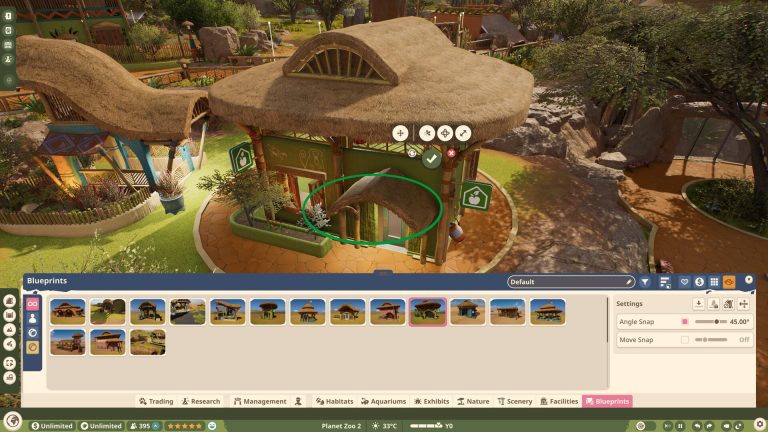
Planet Zoo 2 Nature Brush is part of the October 2026 update. Use the Nature Brush to distribute foliage and rocks across a chosen area. It is especially useful for filling larger habitat edges, wooded sections and landscaped spaces, while individual placement remains better for precise features..
Choose a foliage or rock selection, paint a small test patch, then adjust the brush size and density before filling the rest of the habitat. Save a combination you like as a custom brush so you can use it elsewhere in the zoo.
Planet Zoo 2 Nature Brush: what Nature Brush does
The Nature Brush helps fill habitats and landscaped zoo areas with foliage and rocks more quickly than placing everything by hand. Brush-based placement can cover larger patches of environment, making it useful for natural-looking enclosures and surroundings that would otherwise take many individual edits.
Planet Zoo 2 Nature Brush: choose foliage or rocks
Select the type of natural scenery you want to distribute before painting. A foliage arrangement may suit wooded habitats, while a rock-heavy patch can change the look of a hillside or viewing area. Use the animal’s Zoopedia requirements to guide habitat choices rather than adding objects purely for appearance.
Planet Zoo 2 Nature Brush: adjust brush strength and area
Nature Brush tools include controls for how densely and widely items are distributed. Start on a small area to judge the result, then increase the brush strength or size for larger sections. Too much scenery in a confined habitat can make the layout harder to manage or interfere with useful movement space.
Planet Zoo 2 Nature Brush: save and reuse custom brushes
Custom brushes can help reproduce the same style in several related habitats or visitor areas. After assembling an arrangement you like, use the game’s save-brush function where available. That gives you a repeatable palette instead of recreating individual combinations every time you decorate.
How to create and reuse a Nature Brush
- Open the landscaping or scenery tools and select Nature Brush.
- Choose the foliage or rock items that suit the habitat you’re decorating.
- Begin with a small brush size and a low placement density so you can see how the objects spread.
- Paint a short section of ground, then inspect the result from ground level.
- Adjust the size or density to cover larger areas once the mix looks right.
- Save a custom brush combination when the game offers that option, then reuse it in another part of the zoo.
In a planted enclosure, keep clear spaces around entrances, feeding equipment, water and the routes staff use. The brush can cover a large area quickly, which is helpful for scenery but can also hide small objects you still need to reach. Work around the important parts of the habitat instead of painting straight across them.
For a rocky landscape, make a short pass at low density before building up the result. It gives you more control over where larger objects appear. The same method works around visitor paths: lay out the path first, then paint the surrounding ground rather than letting scenery dictate where guests can walk.
Planet Zoo 2 Nature Brush: work around paths and habitat boundaries
Review the result where foliage meets guest paths, keeper access or animal barriers. Dense vegetation is decorative but shouldn’t block important construction or access. Place paths and basic enclosure gates first, then use the brush to finish surrounding scenery without accidentally obscuring their layout.
Planet Zoo 2 Nature Brush: nature Brush versus ecosystem restoration
Nature Brush is a creative placement tool. Wildlife Reserve ecosystem restoration also depends on removing pollution and invasive plants, suitable terrain and ecological roles. Painting extra trees cannot by itself repair a degraded ecosystem. Use the separate conservation tools when you need to improve reserve Biodiversity rather than simply the look of a habitat.
Related Guides
Official source: Frontier Developments official announcement.