Diablo 4 Secret Coin Quest Full Walkthrough covers one of Sanctuary’s most elaborate hidden mysteries, bringing together three unusual coins, three pieces of cursed jewellery and a secret boss encounter. What began with the original Lucky Coin eventually developed into a much larger puzzle, with new discoveries connecting activities across Scosglen, Nahantu and Skovos. Completing the entire chain requires more than defeating enemies, as several stages depend on special shrine effects, coordinated players and precisely timed interactions.
The mystery received its long-awaited breakthrough in September 2026, when Diablo IV’s secret-hunting community uncovered the missing Luckiest Coin steps and their connection to the Unlucky Council. Each coin has a separate acquisition method, so players who already own one or two pieces can continue from the relevant section. The instructions below follow the community-documented solution, including the most important conditions that can prevent progress.
What you need to complete the secret coin quest
The complete secret requires three distinct coins, each exchanged for a unique piece of jewellery. The Lucky Coin provides the Ring of Misfortune, the Luckier Coin leads to the Ring of the Jinx, and the Luckiest Coin rewards the Amulet of Dark Omens.
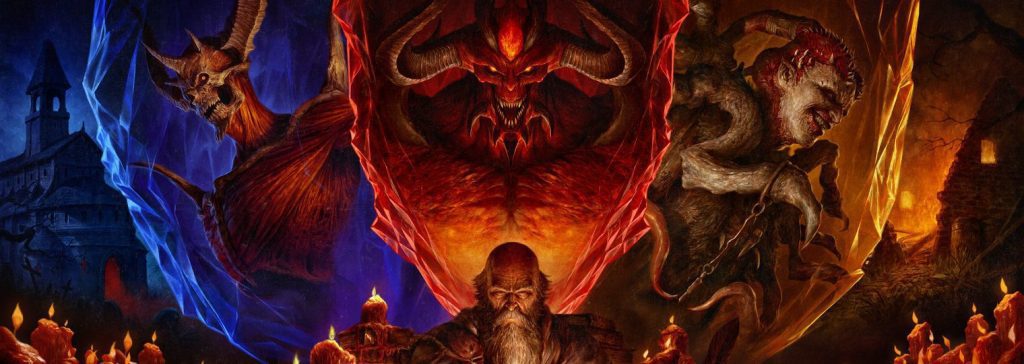
Diablo 4 Secret Coin Quest Full Walkthrough Image Blizzard Entertainment.
These three items are the keys to the final encounter. They can be obtained in any order, although completing the earlier discoveries first provides a convenient route through the full mystery.
The important distinction is that Wirt’s Lucky Coins belong to a separate Echo of Tristram secret. Despite the similar name, those coins cannot replace any of the items required for the Unlucky Council. Players can consult our Lucky Coin comparison guide and Lucky Coin versus Wirt’s Lucky Coin explanation if their inventory contains items from both secrets.
Step 1: How to get the original Lucky Coin
The first coin is tied to a Greed Shrine and a particular open-world corpse encounter. According to the community solution, the character needs at least 33.3% Lucky Hit Chance for the drop to become possible, although substantially higher Lucky Hit Chance can improve your attempts.
Begin by searching for a small open-world event where an enemy is attacking a corpse. These encounters can appear in several regions, but eastern Hawezar is a useful hunting area because of its Drowned and Nangari enemies.
Rather than interacting immediately, locate a nearby Greed Shrine. Mark the corpse encounter on your map so you can return quickly, because the shrine effect has a limited duration.
Activate the Greed Shrine, return to the corpse and interact while the shrine buff is active. If the conditions are met, the Lucky Coin can drop, although success is not guaranteed on every attempt.
If nothing appears, check your Lucky Hit Chance, confirm that the Greed Shrine buff was active and try another suitable encounter. Higher Lucky Hit Chance improves the process, but it does not guarantee success.
Step 2: Exchange Lucky Coins for the Ring of Misfortune
Take the original Lucky Coins to the Wishing Well east of Cerrigar in Scosglen. Unlike a conventional item exchange, the community-discovered solution requires five coin deposits associated with five different character classes.
A straightforward way to coordinate the exchange is to gather five players, each using a different class and carrying a Lucky Coin. Since the standard party accommodates four players, one participant can remain near the well after leaving the party to make room for the fifth character.
Each participating class deposits its coin at the Wishing Well. The interaction triggers unusual environmental effects, including swarms and other hazards. After the required five distinct-class deposits, the Ring of Misfortune drops.
Community guidance also describes alternatives using fewer players and multiple coins, but the five-class arrangement is the clearest documented method. Do not spend a valuable coin without confirming that the other participants are present and the required class combination is ready.
Once the ring appears, collect and keep it. You will need it equipped for the final secret encounter.
Step 3: How to find the Luckier Coin
The second coin uses an entirely different shrine interaction. This time you need a Blast Wave Shrine and a destructible container with a visible object name.
Lower Kurast in Nahantu is a practical location because there are numerous containers close to potential shrine spawns. Search for the appropriate shrine before destroying nearby objects.
When the Blast Wave effect is active, allow its pulse to break a named container. Under the correct conditions, a special rat can appear. The rat is unusual because it cannot be killed through ordinary attacks, so chasing it aggressively or leaving the area can ruin the attempt.
Follow the rat while keeping it visible. Current community observations suggest that the process can take a few minutes, but the exact duration should not be treated as a guaranteed fixed timer.
Eventually the rat explodes and drops the Luckier Coin. The rat does not necessarily announce its appearance with an obvious sound, making careful observation important.
Because the event is not guaranteed for every container, unsuccessful attempts may require finding another Blast Wave Shrine and repeating the interaction.
Step 4: Get the Ring of the Jinx
The Luckier Coin can be exchanged without repeating the elaborate five-class arrangement used for the first ring.
Travel to Samuk in Nahantu and find the moss-covered grave to the west of the settlement. Interact with the grave while carrying the Luckier Coin to receive the Ring of the Jinx.
This ring has an unusual effect that can break nearby environmental objects. Keep it in your inventory rather than disposing of it as unwanted equipment, since its importance becomes clear during the final stage.
The Ring of Misfortune and Ring of the Jinx complete two of the three jewellery requirements. The remaining item is the Amulet of Dark Omens, obtained through the Luckiest Coin discovery.
Step 5: How to obtain the Luckiest Coin
The Luckiest Coin requires four players working together in Skartara, within the Skovos region introduced by Lord of Hatred.
There are four specific elemental golems involved in the discovery: Droplet, Flowing Rage, Raging Fissure and Snagging Vein. Assign one player to each enemy and make sure all four are alive before beginning.
The party should agree on a countdown, then kill the four enemies in rapid succession. There is no documented fixed kill order, but synchronisation is essential.
As the kills register, an on-screen counter should increase towards four. When all four conditions register successfully, the game displays the message “From many Tempers, a single token” and the Luckiest Coin drops.
If the counter fails to reach four, regroup and check whether an enemy was killed early, whether one had already been defeated by another player or whether the group was too slow.
Less populated difficulty instances can make the attempt easier to organise because other players are less likely to interfere with the relevant enemies. Our Luckiest Coin troubleshooting guide covers failed attempts in more detail.
Step 6: Get the Amulet of Dark Omens
With the Luckiest Coin obtained, travel to Temis in Skovos. The next interaction involves a pillow on the southern side of the settlement, making this one of the strangest exchanges in the entire secret.
Find the pillow and interact with it to deposit the Luckiest Coin. A real-world timer then begins, with the reported requirement being exactly 24 hours.
This stage is particularly unforgiving. Community testing indicates that players have approximately two minutes after the 24-hour period ends to return and claim their reward.
Record the precise time of your initial interaction and arrange to return shortly before the following day’s collection window. If the window is missed, the coin may be lost and the process must be repeated.
Interacting successfully at the correct time rewards the Amulet of Dark Omens. Its unusual effect can cause an NPC to throw a tomato at the wearer, potentially knocking the character down.
Our Temis location guide can help if you have not yet explored the Skovos settlement, while the Amulet of Dark Omens troubleshooting article explains the strict collection requirement.
Step 7: Open the Unlucky Council portal
Once all three jewellery pieces have been obtained, equip the Ring of Misfortune, Ring of the Jinx and Amulet of Dark Omens on the character attempting the encounter.
The final step has another important restriction: the community-documented Unlucky Council entrance is available on Torment 12 difficulty. Simply owning the complete set on an easier difficulty is not enough.
Travel to Lorath’s Cabin south of Kyovashad. With the correct difficulty selected and all three items equipped, the Echo of the Damned portal becomes available.
The encounter leads into the Foyer, where the player faces the Unlucky Council, a trio of Echoes associated with Donan, Neyrelle and Lorath.
Players attempting the encounter together should each meet the jewellery requirements. Enter through the intended portal rather than relying on an invitation into somebody else’s active encounter, since bypassing the normal entry conditions may prevent reward eligibility.
Step 8: Defeat the Unlucky Council
The Unlucky Council is an exceptionally demanding encounter because the required jewellery replaces three equipment slots that would otherwise support your normal build.
The Ring of Misfortune can interfere with primary resource management, while the Amulet of Dark Omens introduces an additional risk of being knocked down. A build that relies heavily on resource expenditure or specific jewellery powers may need adjustments before attempting the fight.
During the encounter, Donan acts as a support enemy and can strengthen his allies with shields and buffs. Neyrelle uses close-range attacks and disruptive effects, while Lorath contributes dangerous ranged attacks and ground hazards.
Prioritising Donan can reduce the pressure created by his support abilities. After that, focus on whichever remaining opponent creates the greatest problem for your build.
The trio also uses coordinated attacks involving projectiles, explosions and damaging beams across the arena. Movement abilities and reliable defensive effects are especially useful.
Do not remove the required jewellery during the fight. The community-documented reward conditions require participating players to keep all three pieces equipped throughout the encounter.
Step 9: Claim the Horadric Coin and final rewards
Defeating the Unlucky Council rewards the Horadric Coin alongside encounter-related achievements or titles, depending on the character and mode.
The Horadric Coin can be used as a coin-flipping novelty item, but it also has a connection to a hidden Horadric Cube recipe.
Combining the Horadric Coin with two Engagement Rings and one Lost Amulet produces the Sack of Ill Trinkets. The associated ingredients can be found through activities such as fishing and certain Whisper Caches, according to community investigation.
The sack provides another way to obtain the unusual jewellery needed for the encounter. After the initial craft, community documentation also identifies Squirt the Peddler in Temis as a source for additional sacks.
Players unfamiliar with the crafting station can use our Horadric Cube unlocking guide before attempting the final recipe.
What to check if the coin quest stops progressing
Most failures in the Diablo 4 Secret Coin Quest Full Walkthrough come from missing an interaction condition rather than following the wrong overall route.
For the original Lucky Coin, concentrate on the Greed Shrine buff, the appropriate corpse encounter and your character’s Lucky Hit Chance. For the Luckier Coin, make sure the Blast Wave effect breaks the container and watch carefully for the rat.
The Luckiest Coin depends on four coordinated kills, while the Amulet of Dark Omens depends on a strict real-world collection window. Finally, the Unlucky Council requires the complete jewellery set and Torment 12.
Disable any loot filter that might hide common coins or unique jewellery. The different rarity categories can make a successful drop surprisingly easy to overlook.
For official updates to the game, consult Diablo IV from Blizzard Entertainment. The detailed coin solution itself comes from community investigations rather than an official step-by-step quest announcement.
The secret coin chain rewards patience, coordination and attention to details that ordinary quest markers would normally explain. Once all three pieces of jewellery are secured, the mystery finally becomes a challenging boss encounter, bringing years of community experimentation together in one hidden corner of Sanctuary.
If you enjoyed our Diablo 4 Secret Coin Quest Full Walkthrough, please see our other related articles and guides below.
Diablo 4 Secret Coin Quest Full Walkthrough Related Guides
- Diablo 4 Lucky Coin vs Luckier Coin vs Luckiest Coin
- Diablo 4 Lucky Coin vs Wirt’s Lucky Coin
- Diablo 4 Luckiest Coin Not Dropping
- Diablo 4 Amulet of Dark Omens Not Appearing
- Diablo 4 Unlucky Council No Rewards
- Where Is Temis in Diablo 4
- How to Unlock the Horadric Cube in Diablo 4
- Where to Get Horadric Cube Materials in Diablo 4