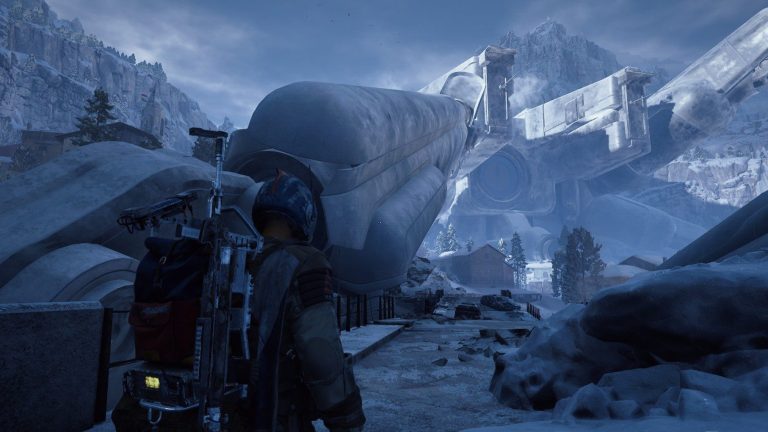
ARC Raiders Map Conditions change how a raid plays by altering weather, loot, ARC activity, extraction options or adding a unique event to the map. Embark currently rotates 19 different conditions, from low-risk Storm Aftermath and Lush Blooms to 5-of-5 threats such as Hurricane, ARC Frigate, Close Scrutiny and Hidden Bunker.
The useful part of ARC Raiders Map Conditions is that they are scheduled. Embark publishes the active condition for each map plus upcoming one-hour windows, so you can deliberately wait for Night Raid, Hurricane, Prospecting Probes or another condition that matches the loot or objective you need.
All ARC Raiders Map Conditions and effects
These are the current ARC Raiders Map Conditions and the main change each one makes to a deployment.
| Condition | Difficulty | Main effect |
|---|---|---|
| ARC Frigate | 5/5 | Frigate over the map, no Raider Hatches, locked doors inactive, lower normal loot value |
| Beachcombing | 3/5 | Buried valuables, lootable Dockmaster’s Detectors and more birds on Riven Tides |
| Bird City | 3/5 | More trinkets, birds and ziplines around Buried City |
| Close Scrutiny | 5/5 | Surveyors and Vaporizers, more ARC loot, locked doors inactive |
| Cold Snap | 3/5 | Damaging cold, Candleberries and increased loot value |
| Electromagnetic Storm | 4/5 | Lightning, better loot, fewer Return Points and no Raider Hatches |
| Harvester | 3/5 | Harvester machine guarded by a Queen |
| Hidden Bunker | 5/5 | Four-button bunker objective, fewer exits and no Raider Hatches |
| Hurricane | 5/5 | Strong wind, shield-damaging debris, higher-threat ARC and better loot |
| Husk Graveyard | 3/5 | More searchable ARC husks, including electrified First Wave wrecks |
| Launch Tower Loot | 4/5 | Locked Launch Tower with extra loot and heavier ARC defence |
| Locked Gate | 4/5 | Collect four security codes, fewer Return Points and no Raider Hatches |
| Lush Blooms | 2/5 | More Nature loot, plants and fruit |
| Matriarch | 4/5 | Matriarch and her defending ARC children appear |
| Night Raid | 4/5 | Better loot, more ARC, fewer Return Points and no Raider Hatches |
| Prospecting Probes | 3/5 | More guarded ARC Probes across the map |
| Redirection | 3/5 | Emperor Relays, falling debris and redirectable payloads |
| Storm Aftermath | 1/5 | Fewer Raiders, lower-threat ARC and new-player matchmaking |
| Uncovered Caches | 2/5 | Extra Raider Caches that can explode after exposure |
How the map condition schedule works
Embark’s official ARC Raiders Map Conditions page shows what is active now and the next scheduled appearance for every condition. The windows normally run for one hour, and different maps can have different conditions at the same time.
Select your server region before planning a run. The condition list is most useful when you need something specific: wait for Prospecting Probes when you want Probes, Hurricane for First Wave Caches or Night Raid when locked rooms and high-value loot are your priority.
Major conditions that change extraction
Several ARC Raiders Map Conditions change how you leave the map, which matters more than the extra loot if your usual extraction plan depends on a Raider Hatch.
- Night Raid: fewer active Return Points and no Raider Hatches.
- Electromagnetic Storm: fewer Return Points, no Raider Hatches and lightning hazards.
- Locked Gate: fewer Return Points and no Raider Hatches while the gate security objective is active.
- Hidden Bunker: fewer Return Points and no Raider Hatches during the bunker event.
- ARC Frigate: Raider Hatches are inactive while the Frigate condition is running.
If you enter one of these ARC Raiders Map Conditions, check the active Return Points as soon as the raid begins. A Hatch Key is not an emergency exit when the condition disables the hatches.

Best conditions for better loot
Not all ARC Raiders Map Conditions improve the same kind of loot. Pick the condition that matches the item you need instead of assuming every difficult event is automatically the best farming route.
| Goal | Useful condition |
|---|---|
| Locked-room and high-value container loot | Night Raid |
| Blueprints and First Wave Caches | Hurricane |
| Probe loot | Prospecting Probes |
| ARC husk parts | Husk Graveyard |
| Nature items and fruit | Lush Blooms |
| Candleberries | Cold Snap |
| Fossilized Lightning and storm loot | Electromagnetic Storm |
| Buried valuables on Riven Tides | Beachcombing |
| ARC loot from Surveyors and Vaporizers | Close Scrutiny |
Best conditions for blueprints
Hurricane is one of the strongest ARC Raiders Map Conditions for blueprint hunting because it adds First Wave Caches. These special containers can hold weapons, attachments, healing, shields and weapon blueprints.
Night Raid is also strong when you own keys for valuable rooms. Its increased loot value makes secured areas much more attractive than they are in a normal deployment.
Conditions with unique objectives
Some ARC Raiders Map Conditions are built around a specific activity rather than a broad loot modifier.
- Harvester: reach and complete the Harvester while dealing with the Queen and its defences.
- Hidden Bunker: activate four controls to unlock the bunker and retrieve its data and loot.
- Locked Gate: collect the four security codes needed to override the gate shutdown.
- Redirection: use Emperor Beacons and Relays to redirect payloads.
- Beachcombing: use the Dockmaster’s Detector to uncover buried valuables on Riven Tides.
- Launch Tower Loot: push through heavier ARC protection to reach the locked loot at the top.
The Click already has dedicated guides for several of these objectives, including the ARC Raiders Harvester puzzle, ARC Raiders Redirection and ARC Raiders Beachcombing.
What is the easiest map condition?
Storm Aftermath is the lowest-difficulty entry among the current ARC Raiders Map Conditions. It reduces Raider pressure and lowers the threat from ARC, with matchmaking limited towards newer players.
Lush Blooms is another low-pressure condition at 2-of-5 difficulty. It mainly increases Nature loot, making it a good farming window when you need fruit or plant resources without deliberately chasing a high-risk encounter.
What are the hardest conditions?
The 5-of-5 ARC Raiders Map Conditions include Hurricane, ARC Frigate, Close Scrutiny and Hidden Bunker. They are difficult for different reasons rather than simply spawning more enemies.
- Hurricane: poor visibility, wind, shield damage and higher-threat ARC.
- ARC Frigate: the Frigate dominates the map and changes normal loot and extraction rules.
- Close Scrutiny: Surveyors and Vaporizers create heavy ARC pressure.
- Hidden Bunker: a multi-step objective with restricted extraction and valuable bunker loot.
How to choose the right condition
The best ARC Raiders Map Conditions are the ones that overlap with something you already need. If you need a blueprint, wait for Hurricane or a useful Night Raid. If you need ARC parts, Husk Graveyard or Prospecting Probes can save time. If you only need one quest interaction, a calmer condition may be better than forcing it during a 5-of-5 storm.
- Check Embark’s live schedule for your region.
- Pick the map that contains your quest, key room or material.
- Check what the active condition changes before choosing a loadout.
- Plan your extraction around any disabled Hatches or reduced Return Points.
- Use the condition’s unique loot rather than running the map exactly like a normal raid.
Map condition not showing
ARC Raiders Map Conditions rotate. If the condition you want is not visible on your preferred map, use Embark’s schedule to see the next one-hour window instead of repeatedly queueing and hoping it appears.
Different regions and maps can show different active slots, so make sure the schedule is set to the server region you actually use.
Which condition should you farm first?
For general profit, Night Raid and Hurricane are two of the strongest ARC Raiders Map Conditions because they directly improve high-value loot. For targeted materials, Prospecting Probes, Husk Graveyard, Lush Blooms and Cold Snap are easier to match to a specific farming goal.
Once you know the map, build condition-specific routes rather than one universal farming loop. The whole point of the system is that the best path changes with the weather, loot rules and event running that hour.
Related Guides
Official source: ARC Raiders Map Conditions.