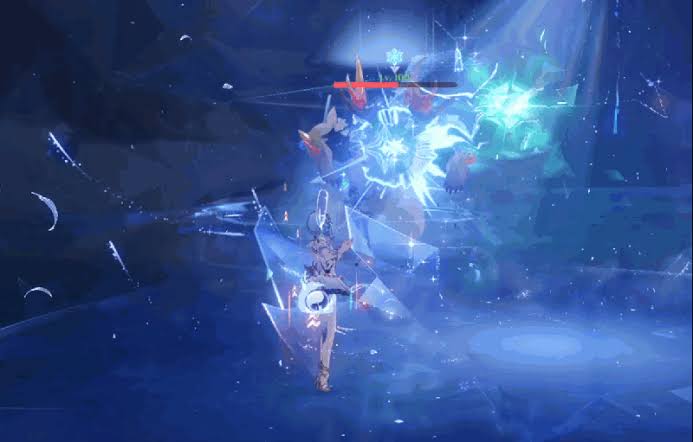
Stellar Glimmer is the name for Genshin Impact’s enhanced Cryo reactions, Stellar-Conduct and Stellar Swirl. They don’t trigger just because your party contains Electro, Anemo and Cryo characters. You need a character whose passive enables the new reactions, then apply the correct elements to an enemy.
The two reactions have different effects. Conduct creates a Polestar Field that buffs your party, while Swirl produces a vortex that explodes for Cryo damage. Here is how to trigger each one, which characters enable them and how to fix a team that only produces ordinary reactions.
How to unlock Stellar Glimmer reactions
An enabling passive is required. Sandrone, Odette and Cryo Traveler can enable both reactions, while Vesna enables Stellar Swirl specifically. That means a team with Vesna alone will not gain Stellar-Conduct. Check the relevant passive in your character’s Talent screen before building around either reaction. Check your own character’s Talents screen before building the team; having any ordinary Cryo unit does not automatically unlock the enhanced reactions.
To trigger Conduct, apply Cryo and Electro to the same enemy while the enabling passive is present. Either element can supply the initial aura. For Swirl, apply Cryo first and follow up with Anemo. The character who performs that last hit need not be the passive’s owner if the enabling effect applies to the team.
| Reaction | Trigger | What happens |
|---|---|---|
| Stellar-Conduct | Cryo + Electro with enabling passive | Starlight Prism and Polestar Field |
| Stellar Swirl | Swirl a Cryo aura with enabling passive | Stellar Vortex followed by Cryo explosion |
| Normal Superconduct or Swirl | Same elements without enabling passive | Original reaction only |
Stellar Glimmer: how Stellar-Conduct works
Stellar-Conduct turns Superconduct into a reaction centred on sustained buffs rather than a single reaction-damage number. The initial Cryo and Electro interaction creates a Starlight Prism and its surrounding Polestar Field. The field can enhance participating characters’ Talents, boost Cryo and Electro damage and reduce enemy Physical Resistance.
The field appearing isn’t itself a large reaction-damage hit. Subsequent qualifying Cryo and Electro elemental applications accumulate within the field. The field checks qualifying Cryo and Electro applications in repeating four-second windows. The reaction that creates the field is separate from the later elemental applications used to strengthen it, so keep attacking after the field appears.
KeqingMains’ tested Stellar Glimmer calculations give the Polestar Field a 40% Physical Resistance reduction. Its Cryo and Electro damage bonus begins at 20% and can reach 40% with twelve qualifying elemental hits in the accumulation window. This is a maximum under specific conditions, not something every ordinary team will produce consistently.
Multiple enemies hit by the same attack do not automatically award a separate stack for every enemy struck. Apply Cryo and Electro regularly instead of chasing artificial multi-target stacks. The player benefit is straightforward: once the field is established, characters whose Talents use Conduct can deal stronger damage as the party keeps up elemental pressure.
Stellar Glimmer: how Stellar Swirl works
Stellar Swirl is the modified Cryo-and-Anemo reaction. Apply Cryo to a target and then swirl that aura with an Anemo ability while the enabling passive is active. That produces an initial Anemo reaction hit and creates a Stellar Vortex. The vortex explodes about three seconds later and deals area Cryo damage.
Further Cryo Swirls while the vortex is active can increase its strength. At higher levels its eventual Cryo explosion covers more ground, and further triggers can detonate it early. This makes clustering enemies helpful, but only if they stay near the vortex long enough to be caught by its explosion.
When a Stellar Vortex explodes, it also briefly enables a high jump. Treat that as an extra movement tool, not a guaranteed substitute for dodging the next attack. The effect can be useful for movement as well as damage, although you still need to trigger the reaction and stay within the available window.
Stellar Glimmer does not turn all Anemo Swirls into Stellar Swirl. Hydro, Pyro and Electro auras produce their usual reactions. The specific Stellar version needs Cryo to be the aura that your Anemo hit swirls.
Why Stellar Glimmer is not triggering
First check the enabler. Cryo Traveler must actually have Cryo selected, and a party made entirely of ordinary Cryo, Electro and Anemo units will not gain the Stellar variants by default. Next check the aura on your target. Anemo must strike Cryo for Stellar Swirl, and Conduct needs Cryo and Electro together.
If you see ordinary Superconduct, look at the enabling passive and the party composition. If you see an ordinary Swirl, make sure it is specifically Cryo being swirled. Some enemies naturally carry other elements that make it difficult to control the desired reaction, so test the setup against a neutral enemy if you are unsure.
Another common misunderstanding is that Stellar-Conduct should display a large damage number when the field forms. It usually does not. Look for the Polestar Field and active Radiance state, then keep applying Cryo and Electro so the character Talents that use Stellar Glimmer can benefit.
Which stats improve Stellar Glimmer damage?
Stellar Glimmer uses its own reaction scaling. Reaction damage can draw on the levels and Elemental Mastery of contributing characters, plus bonuses specifically labelled for Stellar reactions. Direct Stellar damage through a character Talent may also depend on their normal damage scaling and CRIT. This is why a single ‘stack Elemental Mastery on everybody’ rule is misleading.
Elemental Damage Bonus and enemy Defence reduction do not automatically raise the Stellar reaction damage component. Follow the specific character Talent’s damage formula, and remember that reducing Defence is different from reducing Elemental Resistance. Check the character’s Talent wording before buying weapons or replacing artifacts just for the reaction.
For playable teams, see our Vesna teams guide, Vodyanitsa teams and Vesna build. The Genshin Impact 7.1 overview covers the wider combat additions.
Start with an enabler whose passive covers the reaction you want. Apply Cryo and Electro for Conduct, or swirl Cryo with Anemo for Swirl. Once you can trigger it consistently, optimise the characters whose Talents benefit. With Conduct, maintain the field’s Cryo and Electro applications. With Swirl, plan for the delayed vortex explosion and any useful follow-up jump.
Official source: HoYoverse Version 7.1 update information. Mechanics research: KeqingMains Stellar Glimmer Reaction Guide.