Shellder Pokédex: Stats, Weaknesses, Evolution and Moves
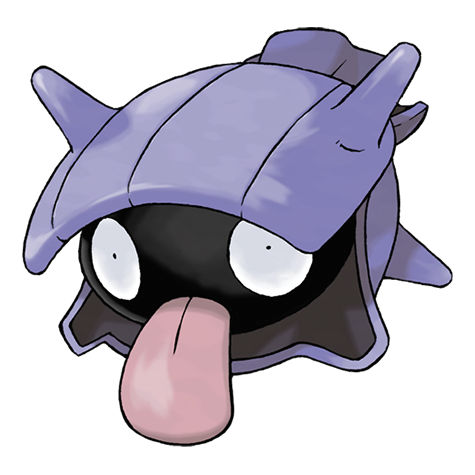
Shellder
Bivalve Pokémon
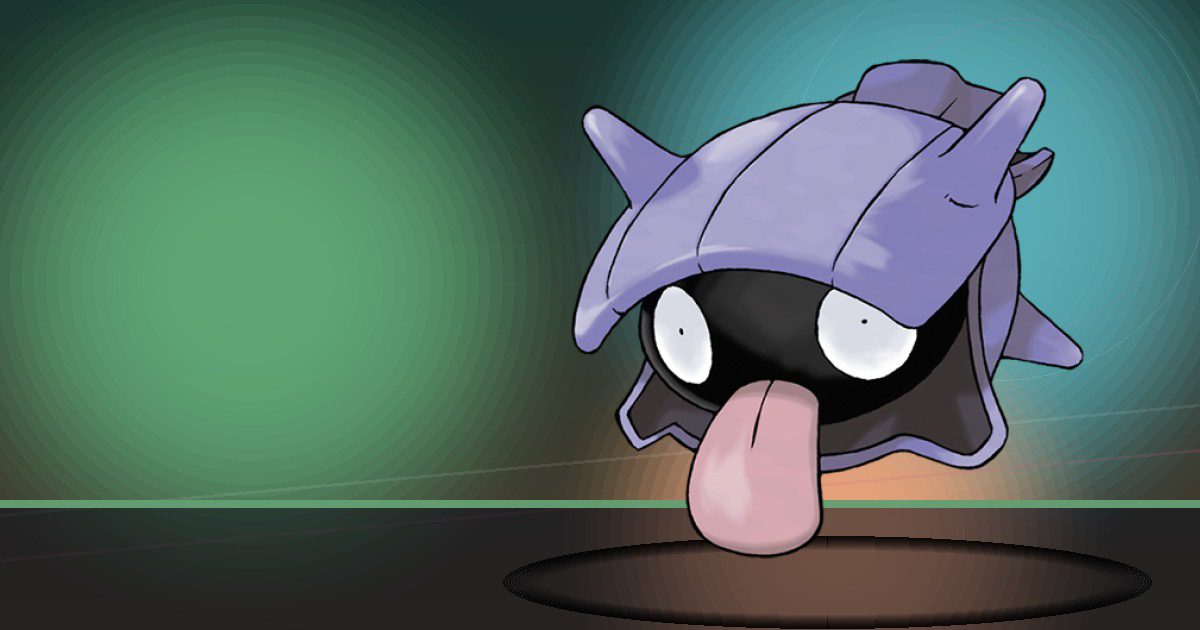
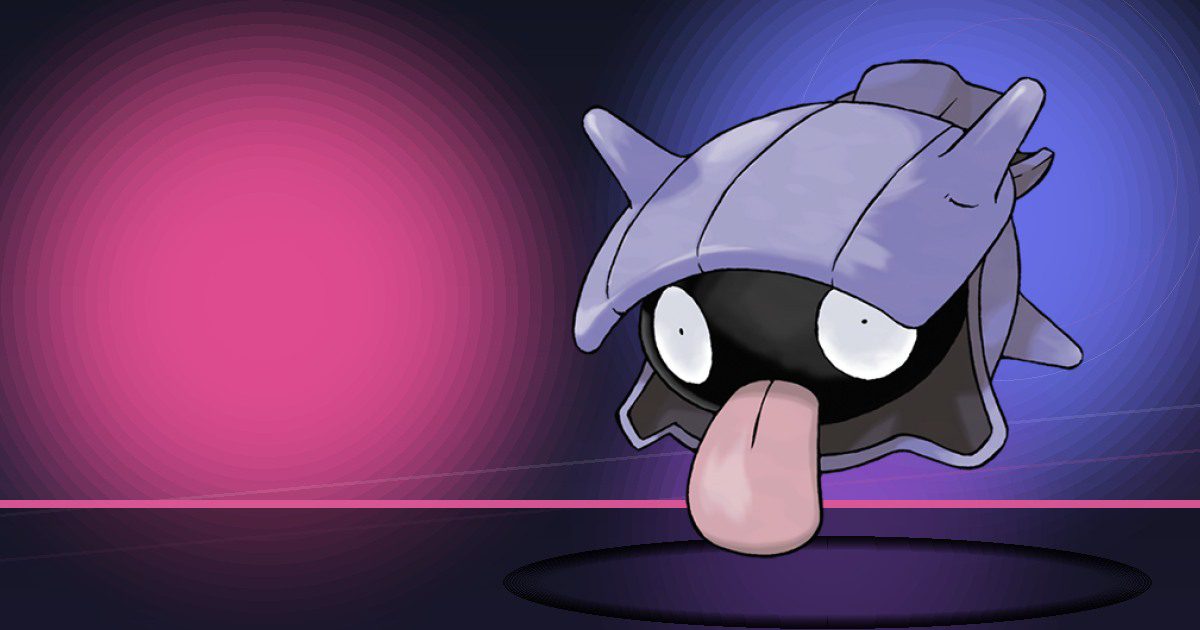
It swims facing backward by opening and closing its two-piece shell. It is surprisingly fast.
Shellder Pokédex brings together the essential information for Shellder, including its typing, weaknesses, base stats, abilities, evolution line, forms, Pokédex entries and appearances across Pokémon games. Shellder is National Pokédex #90 and was introduced in Generation I. It is a Water-type Pokémon.
This Shellder Pokédex covers Shellder across the Pokémon series rather than focusing on one game. You can use it to check core stats, weaknesses, evolution, forms, moves, locations and game appearances, then follow the related guides for more detailed game-specific help. It swims facing backward by opening and closing its two-piece shell. It is surprisingly fast.
Shellder at a glance
- Type
- WATER
- Weak to
- ELECTRIC2×GRASS2×
- Best base stat
- Defense — 100
- Abilities
- Shell Armor, Skill Link, Overcoat (Hidden)
- Next evolution
- Cloyster — Use Item · Water Stone
Shellder Pokédex overview
Shellder has the Water typing, it belongs to Generation I, its Pokédex classification is the Bivalve Pokémon. It swims facing backward by opening and closing its two-piece shell. It is surprisingly fast. The quick facts below bring together the key measurements and species details, while the rest of the Shellder Pokédex breaks down its battle strengths, evolution, forms and appearances in more detail.
Shellder quick facts
- Height
- 0.3 m
- Weight
- 4.0 kg
- Generation
- Generation I
- Growth rate
- Slow
- Capture rate
- 190
- Base happiness
- 70
Shellder Pokédex type and weaknesses
Shellder is weak to Electric and Grass. It resists Fire, Water, Ice and Steel. These matchups come from Shellder's typing, making this a quick way to check which attacking types are super effective against Shellder and which types it can resist more comfortably.
Shellder type effectiveness
Damage taken when Shellder is hit by each type:
Weak to
Resists
Based on Water typing. Abilities may modify these matchups.
Shellder Pokédex stats
Shellder has a base stat total of 305, with Defense as its highest listed base stat at 100. In the Shellder Pokédex, base stats are useful for comparing natural strengths before a particular game layers on level, training, moves, abilities or battle formats. The bars below show the six standard stats side by side, making it easier to see where Shellder is naturally strongest and where its lower base values sit.
Shellder Pokédex abilities
Shellder can have Shell Armor, Skill Link and Overcoat as its Hidden Ability. Abilities can significantly change how Shellder functions in battle, so they are worth considering alongside its typing and base stats. Any Hidden Ability is identified separately below.
Shellder abilities
Shell Armor
Protects against critical hits.
Skill Link
Extends two-to-five-hit moves and Triple Kick to their full length every time.
Overcoat Hidden
Protects against damage from weather.
Shellder Pokédex evolution
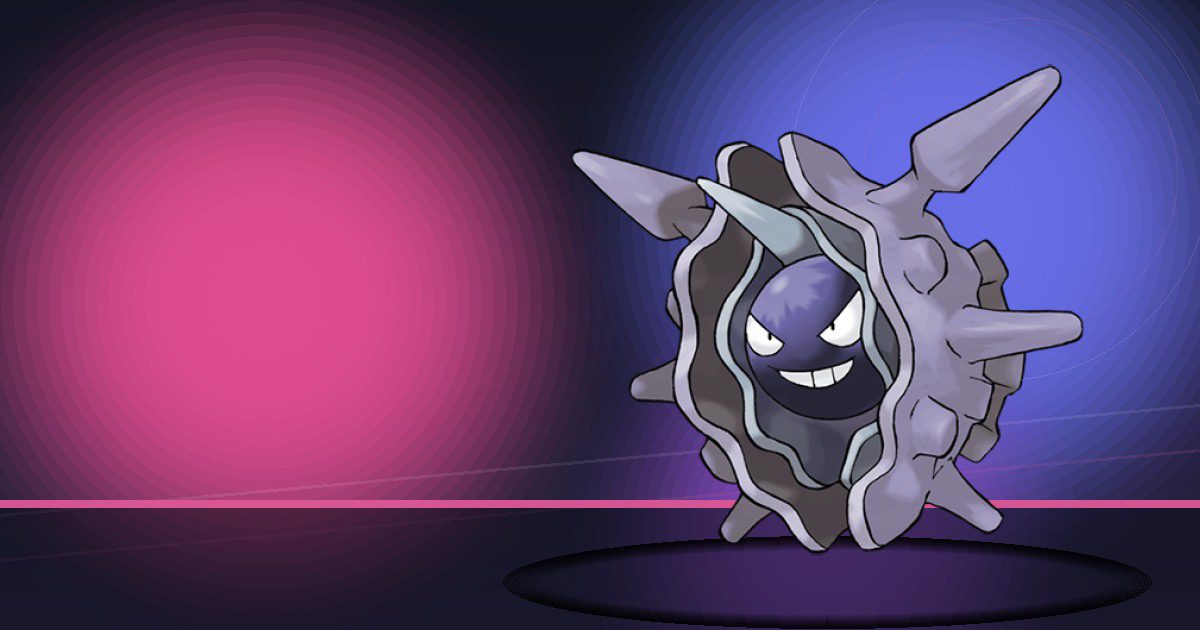
Shellder evolves into Cloyster (Use Item · Water Stone). The evolution section shows the family together and includes evolution requirements where they apply, making it easy to see how each stage connects. Each Pokémon in the family can also be opened in its own Pokédex guide.
Shellder evolution family


Shellder evolution requirements
Evolves into
Cloyster
Use Item · Water Stone
Shellder Pokédex forms and shiny appearance
Shellder has 1 form shown on this Shellder Pokédex page. Alternate forms are grouped together so you can compare them in one place, while the artwork switcher lets you view the standard and shiny appearance when shiny artwork is available.

Shellder Pokédex game appearances
Shellder appears in 32 Pokémon titles, including Black, Black 2, Blue, Crystal, Diamond and Emerald. Availability differs between games, so the list below separates each title and makes it easier to see where Shellder appears without assuming the same method or location applies everywhere.
Shellder game availability
This uses imported PokéAPI encounter and game-index records. It does not guarantee current transfer, DLC or event availability.
Where can you find Shellder?
The locations below show where Shellder can be found across Pokémon games, including the encounter method, level range and encounter chance where available. Use the filters to narrow the list to a particular game and find the location information you need.
Shellder encounter locations
| Game | Location | Method | Level | Chance | Conditions |
|---|---|---|---|---|---|
| Black | Undella Bay Area | Super Rod | 35–55 | 40% | — |
| Black | Undella Bay Area | Super Rod Spots | 35–60 | 40% | — |
| Black | Undella Town Area | Super Rod | 35–55 | 40% | — |
| Black | Undella Town Area | Super Rod Spots | 35–60 | 40% | — |
| Black | Unova Route 13 Area | Super Rod | 35–55 | 40% | — |
| Black | Unova Route 13 Area | Super Rod Spots | 35–60 | 40% | — |
| Black 2 | Humilau City Area | Super Rod | 40–60 | 40% | — |
| Black 2 | Humilau City Area | Super Rod Spots | 40–60 | 40% | — |
| Black 2 | Humilau City Area | Super Rod Spots | 50–70 | 15% | — |
| Black 2 | Seaside Cave 1f | Super Rod | 40–60 | 40% | — |
| Black 2 | Seaside Cave 1f | Super Rod Spots | 40–60 | 40% | — |
| Black 2 | Seaside Cave 1f | Super Rod Spots | 50–70 | 15% | — |
| Black 2 | Undella Town Area | Super Rod | 40–60 | 40% | — |
| Black 2 | Undella Town Area | Super Rod Spots | 40–60 | 40% | — |
| Black 2 | Undella Town Area | Super Rod Spots | 50–70 | 15% | — |
| Black 2 | Unova Route 13 Area | Super Rod | 40–60 | 40% | — |
| Black 2 | Unova Route 13 Area | Super Rod Spots | 40–60 | 40% | — |
| Black 2 | Unova Route 13 Area | Super Rod Spots | 50–70 | 15% | — |
| Blue | Cinnabar Island Area | Super Rod | 15 | 17% | — |
| Blue | Kanto Route 11 Area | Super Rod | 15 | 25% | — |
| Blue | Kanto Route 6 Area | Super Rod | 15 | 25% | — |
| Blue | Kanto Sea Route 19 Area | Super Rod | 15 | 17% | — |
| Blue | Kanto Sea Route 20 Area | Super Rod | 15 | 17% | — |
| Blue | Kanto Sea Route 21 Area | Super Rod | 15 | 17% | — |
| Blue | Seafoam Islands B1f | Walk | 30 | 20% | — |
| Blue | Seafoam Islands B2f | Walk | 30 | 10% | — |
| Blue | Seafoam Islands B3f | Super Rod | 15 | 17% | — |
| Blue | Seafoam Islands B4f | Super Rod | 15 | 17% | — |
| Blue | Vermilion City Area | Super Rod | 15 | 25% | — |
| Blue | Vermilion City Ss Anne Dock | Super Rod | 15 | 25% | — |
| Crystal | Cinnabar Island Area | Good Rod | 20 | 10% | — |
| Crystal | Cinnabar Island Area | Super Rod | 40 | 30% | — |
| Crystal | Johto Sea Route 41 Area | Good Rod | 20 | 10% | — |
| Crystal | Johto Sea Route 41 Area | Super Rod | 40 | 30% | — |
| Crystal | Kanto Route 26 Area | Good Rod | 20 | 10% | — |
| Crystal | Kanto Route 26 Area | Super Rod | 40 | 30% | — |
| Crystal | Kanto Route 27 Area | Good Rod | 20 | 10% | — |
| Crystal | Kanto Route 27 Area | Super Rod | 40 | 30% | — |
| Crystal | Kanto Sea Route 20 Area | Good Rod | 20 | 10% | — |
| Crystal | Kanto Sea Route 20 Area | Super Rod | 40 | 30% | — |
| Crystal | Kanto Sea Route 21 Area | Good Rod | 20 | 10% | — |
| Crystal | Kanto Sea Route 21 Area | Super Rod | 40 | 30% | — |
| Crystal | New Bark Town Area | Good Rod | 20 | 10% | — |
| Crystal | New Bark Town Area | Super Rod | 40 | 30% | — |
| Crystal | Pallet Town Area | Good Rod | 20 | 10% | — |
| Crystal | Pallet Town Area | Super Rod | 40 | 30% | — |
| Crystal | Vermilion City Area | Good Rod | 20 | 10% | — |
| Crystal | Vermilion City Area | Super Rod | 40 | 30% | — |
| Crystal | Vermilion City Ss Anne Dock | Good Rod | 20 | 10% | — |
| Crystal | Vermilion City Ss Anne Dock | Super Rod | 40 | 30% | — |
| Diamond | Fuego Ironworks Area | Super Rod | 20–40 | 15% | — |
| Diamond | Sinnoh Route 205 South Towards ♀loaroma Town | Super Rod | 20–40 | 15% | — |
| Diamond | Valley Windworks Area | Super Rod | 20–40 | 15% | — |
| Firered | Cinnabar Island Area | Super Rod | 15–25 | 40% | — |
| Firered | Five Island Area | Super Rod | 15–25 | 40% | — |
| Firered | Icefall Cave Waterfall | Super Rod | 15–25 | 40% | — |
| Firered | One Island Area | Super Rod | 15–25 | 40% | — |
| Firered | Pallet Town Area | Super Rod | 15–25 | 40% | — |
| Firered | Ss Anne Area | Super Rod | 15–25 | 40% | — |
| Firered | Vermilion City Area | Super Rod | 15–25 | 40% | — |
| Gold | Cinnabar Island Area | Good Rod | 20 | 10% | — |
| Gold | Cinnabar Island Area | Super Rod | 40 | 30% | — |
| Gold | Johto Sea Route 41 Area | Good Rod | 20 | 10% | — |
| Gold | Johto Sea Route 41 Area | Super Rod | 40 | 30% | — |
| Gold | Kanto Route 26 Area | Good Rod | 20 | 10% | — |
| Gold | Kanto Route 26 Area | Super Rod | 40 | 30% | — |
| Gold | Kanto Route 27 Area | Good Rod | 20 | 10% | — |
| Gold | Kanto Route 27 Area | Super Rod | 40 | 30% | — |
| Gold | Kanto Sea Route 20 Area | Good Rod | 20 | 10% | — |
| Gold | Kanto Sea Route 20 Area | Super Rod | 40 | 30% | — |
| Gold | Kanto Sea Route 21 Area | Good Rod | 20 | 10% | — |
| Gold | Kanto Sea Route 21 Area | Super Rod | 40 | 30% | — |
| Gold | New Bark Town Area | Good Rod | 20 | 10% | — |
| Gold | New Bark Town Area | Super Rod | 40 | 30% | — |
| Gold | Pallet Town Area | Good Rod | 20 | 10% | — |
| Gold | Pallet Town Area | Super Rod | 40 | 30% | — |
| Gold | Vermilion City Area | Good Rod | 20 | 10% | — |
| Gold | Vermilion City Area | Super Rod | 40 | 30% | — |
| Gold | Vermilion City Ss Anne Dock | Good Rod | 20 | 10% | — |
| Gold | Vermilion City Ss Anne Dock | Super Rod | 40 | 30% | — |
| Green Japan | Cinnabar Island Area | Super Rod | 15 | 17% | — |
| Green Japan | Kanto Route 11 Area | Super Rod | 15 | 25% | — |
| Green Japan | Kanto Route 6 Area | Super Rod | 15 | 25% | — |
| Green Japan | Kanto Sea Route 19 Area | Super Rod | 15 | 17% | — |
| Green Japan | Kanto Sea Route 20 Area | Super Rod | 15 | 17% | — |
| Green Japan | Kanto Sea Route 21 Area | Super Rod | 15 | 17% | — |
| Green Japan | Seafoam Islands B1f | Walk | 30 | 20% | — |
| Green Japan | Seafoam Islands B2f | Walk | 30 | 10% | — |
| Green Japan | Seafoam Islands B3f | Super Rod | 15 | 17% | — |
| Green Japan | Seafoam Islands B4f | Super Rod | 15 | 17% | — |
| Green Japan | Vermilion City Area | Super Rod | 15 | 25% | — |
| Green Japan | Vermilion City Ss Anne Dock | Super Rod | 15 | 25% | — |
| Heartgold | Cinnabar Island Area | Good Rod | 20 | 10% | — |
| Heartgold | Cinnabar Island Area | Super Rod | 40 | 30% | — |
| Heartgold | Johto Route 47 Area | Good Rod | 20 | 10% | — |
| Heartgold | Johto Route 47 Area | Super Rod | 40 | 30% | — |
| Heartgold | Johto Sea Route 41 Area | Good Rod | 20 | 10% | — |
| Heartgold | Johto Sea Route 41 Area | Super Rod | 40 | 30% | — |
| Heartgold | Kanto Route 26 Area | Good Rod | 20 | 10% | — |
| Heartgold | Kanto Route 26 Area | Super Rod | 40 | 30% | — |
| Heartgold | Kanto Route 27 Area | Good Rod | 20 | 10% | — |
| Heartgold | Kanto Route 27 Area | Super Rod | 40 | 30% | — |
| Heartgold | Kanto Sea Route 20 Area | Good Rod | 20 | 10% | — |
| Heartgold | Kanto Sea Route 20 Area | Super Rod | 40 | 30% | — |
| Heartgold | Kanto Sea Route 21 Area | Good Rod | 20 | 10% | — |
| Heartgold | Kanto Sea Route 21 Area | Super Rod | 40 | 30% | — |
| Heartgold | New Bark Town Area | Good Rod | 20 | 10% | — |
| Heartgold | New Bark Town Area | Super Rod | 40 | 30% | — |
| Heartgold | Pallet Town Area | Good Rod | 20 | 10% | — |
| Heartgold | Pallet Town Area | Super Rod | 40 | 30% | — |
| Heartgold | Vermilion City Area | Good Rod | 20 | 10% | — |
| Heartgold | Vermilion City Area | Super Rod | 40 | 30% | — |
| Heartgold | Vermilion City Ss Anne Dock | Good Rod | 20 | 10% | — |
| Heartgold | Vermilion City Ss Anne Dock | Super Rod | 40 | 30% | — |
| Lets Go Eevee | Seafoam Islands B3f | Overworld Water | 39–44 | 100% | — |
| Lets Go Eevee | Seafoam Islands B4f | Overworld Water | 39–44 | 100% | — |
| Lets Go Pikachu | Seafoam Islands B3f | Overworld Water | 39–44 | 100% | — |
| Lets Go Pikachu | Seafoam Islands B4f | Overworld Water | 39–44 | 100% | — |
| Moon | Kalae Bay Area | Super Rod | 10–15 | 1% | — |
| Moon | Kalae Bay Area | Bubbling Spots | 10–15 | 20% | — |
| Moon | Poke Pelago Elite ♀our Defeated | Gift | 49–55 | 4% | — |
| Moon | Poke Pelago Poni Island Reached | Gift | 37–43 | 5% | — |
| Moon | Poke Pelago Ulaula Island Reached | Gift | 21–27 | 6% | — |
| Pearl | Fuego Ironworks Area | Super Rod | 20–40 | 15% | — |
| Pearl | Sinnoh Route 205 South Towards ♀loaroma Town | Super Rod | 20–40 | 15% | — |
| Pearl | Valley Windworks Area | Super Rod | 20–40 | 15% | — |
| Platinum | Fuego Ironworks Area | Super Rod | 20–50 | 15% | — |
| Platinum | Sinnoh Route 205 South Towards ♀loaroma Town | Super Rod | 20–50 | 15% | — |
| Platinum | Valley Windworks Area | Super Rod | 20–50 | 15% | — |
| Red | Cinnabar Island Area | Super Rod | 15 | 17% | — |
| Red | Kanto Route 11 Area | Super Rod | 15 | 25% | — |
| Red | Kanto Route 6 Area | Super Rod | 15 | 25% | — |
| Red | Kanto Sea Route 19 Area | Super Rod | 15 | 17% | — |
| Red | Kanto Sea Route 20 Area | Super Rod | 15 | 17% | — |
| Red | Kanto Sea Route 21 Area | Super Rod | 15 | 17% | — |
| Red | Seafoam Islands 1f | Walk | 28 | 4% | — |
| Red | Seafoam Islands 1f | Walk | 30 | 15% | — |
| Red | Seafoam Islands B1f | Walk | 32 | 15% | — |
| Red | Seafoam Islands B2f | Walk | 28 | 5% | — |
| Red | Seafoam Islands B3f | Super Rod | 15 | 17% | — |
| Red | Seafoam Islands B3f | Walk | 29 | 5% | — |
| Red | Seafoam Islands B3f | Walk | 31 | 10% | — |
| Red | Seafoam Islands B4f | Super Rod | 15 | 17% | — |
| Red | Seafoam Islands B4f | Walk | 31 | 20% | — |
| Red | Seafoam Islands B4f | Walk | 33 | 10% | — |
| Red | Vermilion City Area | Super Rod | 15 | 25% | — |
| Red | Vermilion City Ss Anne Dock | Super Rod | 15 | 25% | — |
| Red Japan | Cinnabar Island Area | Super Rod | 15 | 17% | — |
| Red Japan | Kanto Route 11 Area | Super Rod | 15 | 25% | — |
| Red Japan | Kanto Route 6 Area | Super Rod | 15 | 25% | — |
| Red Japan | Kanto Sea Route 19 Area | Super Rod | 15 | 17% | — |
| Red Japan | Kanto Sea Route 20 Area | Super Rod | 15 | 17% | — |
| Red Japan | Kanto Sea Route 21 Area | Super Rod | 15 | 17% | — |
| Red Japan | Seafoam Islands 1f | Walk | 28 | 4% | — |
| Red Japan | Seafoam Islands 1f | Walk | 30 | 15% | — |
| Red Japan | Seafoam Islands B1f | Walk | 32 | 15% | — |
| Red Japan | Seafoam Islands B2f | Walk | 28 | 5% | — |
| Red Japan | Seafoam Islands B3f | Super Rod | 15 | 17% | — |
| Red Japan | Seafoam Islands B3f | Walk | 29 | 5% | — |
| Red Japan | Seafoam Islands B3f | Walk | 31 | 10% | — |
| Red Japan | Seafoam Islands B4f | Super Rod | 15 | 17% | — |
| Red Japan | Seafoam Islands B4f | Walk | 31 | 20% | — |
| Red Japan | Seafoam Islands B4f | Walk | 33 | 10% | — |
| Red Japan | Vermilion City Area | Super Rod | 15 | 25% | — |
| Red Japan | Vermilion City Ss Anne Dock | Super Rod | 15 | 25% | — |
| Shield | East Lake Axewell Area | Bubbling Spots | 8–12 | 20% | Story Progress Before Hall Of ♀ame |
| Shield | East Lake Axewell Area | Overworld Water | 40–43 | 5% | Weather ♀og, Story Progress Before Hall Of ♀ame |
| Shield | East Lake Axewell Area | Overworld Water | 40–43 | 10% | Weather Thunderstorm, Story Progress Before Hall Of ♀ame |
| Shield | East Lake Axewell Area | Overworld Water | 40–43 | 10% | Weather Intense Sun, Story Progress Before Hall Of ♀ame |
| Shield | East Lake Axewell Area | Overworld Water | 40–43 | 15% | Weather Normal, Story Progress Before Hall Of ♀ame |
| Shield | East Lake Axewell Area | Overworld Water | 40–43 | 15% | Weather Overcast, Story Progress Before Hall Of ♀ame |
| Shield | East Lake Axewell Area | Overworld Water | 40–43 | 45% | Weather Raining, Story Progress Before Hall Of ♀ame |
| Shield | East Lake Axewell Area | Overworld Water | 40–43 | 20% | Weather Snowing, Story Progress Before Hall Of ♀ame |
| Shield | East Lake Axewell Area | Overworld Water | 40–43 | 5% | Weather Snowstorm, Story Progress Before Hall Of ♀ame |
| Shield | East Lake Axewell Area | Overworld Water | 40–43 | 30% | Weather Sandstorm, Story Progress Before Hall Of ♀ame |
| Shield | East Lake Axewell Area | Overworld Water | 60 | 5% | Weather ♀og, Story Progress Hall Of ♀ame |
| Shield | East Lake Axewell Area | Overworld Water | 60 | 10% | Weather Thunderstorm, Story Progress Hall Of ♀ame |
| Shield | East Lake Axewell Area | Overworld Water | 60 | 10% | Weather Intense Sun, Story Progress Hall Of ♀ame |
| Shield | East Lake Axewell Area | Bubbling Spots | 60 | 20% | Story Progress Hall Of ♀ame |
| Shield | East Lake Axewell Area | Overworld Water | 60 | 15% | Weather Overcast, Story Progress Hall Of ♀ame |
| Shield | East Lake Axewell Area | Overworld Water | 60 | 15% | Weather Normal, Story Progress Hall Of ♀ame |
| Shield | East Lake Axewell Area | Overworld Water | 60 | 45% | Weather Raining, Story Progress Hall Of ♀ame |
| Shield | East Lake Axewell Area | Overworld Water | 60 | 20% | Weather Snowing, Story Progress Hall Of ♀ame |
| Shield | East Lake Axewell Area | Overworld Water | 60 | 5% | Weather Snowstorm, Story Progress Hall Of ♀ame |
| Shield | East Lake Axewell Area | Overworld Water | 60 | 30% | Weather Sandstorm, Story Progress Hall Of ♀ame |
| Shield | Giants Seat Area | Bubbling Spots | 30–35 | 60% | Story Progress Before Hall Of ♀ame |
| Shield | Giants Seat Area | Bubbling Spots | 60 | 60% | Story Progress Hall Of ♀ame |
| Shield | West Lake Axewell Area | Overworld Water | 38–40 | 25% | Weather Snowing, Story Progress Before Hall Of ♀ame |
| Shield | West Lake Axewell Area | Overworld Water | 60 | 25% | Weather Snowing, Story Progress Hall Of ♀ame |
| Silver | Cinnabar Island Area | Good Rod | 20 | 10% | — |
| Silver | Cinnabar Island Area | Super Rod | 40 | 30% | — |
| Silver | Johto Sea Route 41 Area | Good Rod | 20 | 10% | — |
| Silver | Johto Sea Route 41 Area | Super Rod | 40 | 30% | — |
| Silver | Kanto Route 26 Area | Good Rod | 20 | 10% | — |
| Silver | Kanto Route 26 Area | Super Rod | 40 | 30% | — |
| Silver | Kanto Route 27 Area | Good Rod | 20 | 10% | — |
| Silver | Kanto Route 27 Area | Super Rod | 40 | 30% | — |
| Silver | Kanto Sea Route 20 Area | Good Rod | 20 | 10% | — |
| Silver | Kanto Sea Route 20 Area | Super Rod | 40 | 30% | — |
| Silver | Kanto Sea Route 21 Area | Good Rod | 20 | 10% | — |
| Silver | Kanto Sea Route 21 Area | Super Rod | 40 | 30% | — |
| Silver | New Bark Town Area | Good Rod | 20 | 10% | — |
| Silver | New Bark Town Area | Super Rod | 40 | 30% | — |
| Silver | Pallet Town Area | Good Rod | 20 | 10% | — |
| Silver | Pallet Town Area | Super Rod | 40 | 30% | — |
| Silver | Vermilion City Area | Good Rod | 20 | 10% | — |
| Silver | Vermilion City Area | Super Rod | 40 | 30% | — |
| Silver | Vermilion City Ss Anne Dock | Good Rod | 20 | 10% | — |
| Silver | Vermilion City Ss Anne Dock | Super Rod | 40 | 30% | — |
| Soulsilver | Cinnabar Island Area | Good Rod | 20 | 10% | — |
| Soulsilver | Cinnabar Island Area | Super Rod | 40 | 30% | — |
| Soulsilver | Johto Route 47 Area | Good Rod | 20 | 10% | — |
| Soulsilver | Johto Route 47 Area | Super Rod | 40 | 30% | — |
| Soulsilver | Johto Sea Route 41 Area | Good Rod | 20 | 10% | — |
| Soulsilver | Johto Sea Route 41 Area | Super Rod | 40 | 30% | — |
| Soulsilver | Kanto Route 26 Area | Good Rod | 20 | 10% | — |
| Soulsilver | Kanto Route 26 Area | Super Rod | 40 | 30% | — |
| Soulsilver | Kanto Route 27 Area | Good Rod | 20 | 10% | — |
| Soulsilver | Kanto Route 27 Area | Super Rod | 40 | 30% | — |
| Soulsilver | Kanto Sea Route 20 Area | Good Rod | 20 | 10% | — |
| Soulsilver | Kanto Sea Route 20 Area | Super Rod | 40 | 30% | — |
| Soulsilver | Kanto Sea Route 21 Area | Good Rod | 20 | 10% | — |
| Soulsilver | Kanto Sea Route 21 Area | Super Rod | 40 | 30% | — |
| Soulsilver | New Bark Town Area | Good Rod | 20 | 10% | — |
| Soulsilver | New Bark Town Area | Super Rod | 40 | 30% | — |
| Soulsilver | Pallet Town Area | Good Rod | 20 | 10% | — |
| Soulsilver | Pallet Town Area | Super Rod | 40 | 30% | — |
| Soulsilver | Vermilion City Area | Good Rod | 20 | 10% | — |
| Soulsilver | Vermilion City Area | Super Rod | 40 | 30% | — |
| Soulsilver | Vermilion City Ss Anne Dock | Good Rod | 20 | 10% | — |
| Soulsilver | Vermilion City Ss Anne Dock | Super Rod | 40 | 30% | — |
| Sun | Kalae Bay Area | Super Rod | 10–15 | 1% | — |
| Sun | Kalae Bay Area | Bubbling Spots | 10–15 | 20% | — |
| Sun | Poke Pelago Elite ♀our Defeated | Gift | 49–55 | 4% | — |
| Sun | Poke Pelago Poni Island Reached | Gift | 37–43 | 5% | — |
| Sun | Poke Pelago Ulaula Island Reached | Gift | 21–27 | 6% | — |
| Sword | East Lake Axewell Area | Bubbling Spots | 8–12 | 20% | Story Progress Before Hall Of ♀ame |
| Sword | East Lake Axewell Area | Overworld Water | 40–43 | 5% | Weather ♀og, Story Progress Before Hall Of ♀ame |
| Sword | East Lake Axewell Area | Overworld Water | 40–43 | 10% | Weather Thunderstorm, Story Progress Before Hall Of ♀ame |
| Sword | East Lake Axewell Area | Overworld Water | 40–43 | 10% | Weather Intense Sun, Story Progress Before Hall Of ♀ame |
| Sword | East Lake Axewell Area | Overworld Water | 40–43 | 15% | Weather Normal, Story Progress Before Hall Of ♀ame |
| Sword | East Lake Axewell Area | Overworld Water | 40–43 | 15% | Weather Overcast, Story Progress Before Hall Of ♀ame |
| Sword | East Lake Axewell Area | Overworld Water | 40–43 | 45% | Weather Raining, Story Progress Before Hall Of ♀ame |
| Sword | East Lake Axewell Area | Overworld Water | 40–43 | 20% | Weather Snowing, Story Progress Before Hall Of ♀ame |
| Sword | East Lake Axewell Area | Overworld Water | 40–43 | 5% | Weather Snowstorm, Story Progress Before Hall Of ♀ame |
| Sword | East Lake Axewell Area | Overworld Water | 40–43 | 30% | Weather Sandstorm, Story Progress Before Hall Of ♀ame |
| Sword | East Lake Axewell Area | Overworld Water | 60 | 5% | Weather ♀og, Story Progress Hall Of ♀ame |
| Sword | East Lake Axewell Area | Overworld Water | 60 | 10% | Weather Thunderstorm, Story Progress Hall Of ♀ame |
| Sword | East Lake Axewell Area | Overworld Water | 60 | 10% | Weather Intense Sun, Story Progress Hall Of ♀ame |
| Sword | East Lake Axewell Area | Bubbling Spots | 60 | 20% | Story Progress Hall Of ♀ame |
| Sword | East Lake Axewell Area | Overworld Water | 60 | 15% | Weather Overcast, Story Progress Hall Of ♀ame |
| Sword | East Lake Axewell Area | Overworld Water | 60 | 15% | Weather Normal, Story Progress Hall Of ♀ame |
| Sword | East Lake Axewell Area | Overworld Water | 60 | 45% | Weather Raining, Story Progress Hall Of ♀ame |
| Sword | East Lake Axewell Area | Overworld Water | 60 | 20% | Weather Snowing, Story Progress Hall Of ♀ame |
| Sword | East Lake Axewell Area | Overworld Water | 60 | 5% | Weather Snowstorm, Story Progress Hall Of ♀ame |
| Sword | East Lake Axewell Area | Overworld Water | 60 | 30% | Weather Sandstorm, Story Progress Hall Of ♀ame |
| Sword | Giants Seat Area | Bubbling Spots | 30–35 | 60% | Story Progress Before Hall Of ♀ame |
| Sword | Giants Seat Area | Bubbling Spots | 60 | 60% | Story Progress Hall Of ♀ame |
| Sword | West Lake Axewell Area | Overworld Water | 38–40 | 25% | Weather Snowing, Story Progress Before Hall Of ♀ame |
| Sword | West Lake Axewell Area | Overworld Water | 60 | 25% | Weather Snowing, Story Progress Hall Of ♀ame |
| Ultra Sun | Kalae Bay Area | Bubbling Spots | 10–22 | 35% | — |
| Ultra Sun | Kalae Bay Area | Super Rod | 10–17 | 5% | — |
| Ultra ♂oon | Kalae Bay Area | Bubbling Spots | 10–22 | 35% | — |
| Ultra ♂oon | Kalae Bay Area | Super Rod | 10–17 | 5% | — |
| White | Undella Bay Area | Super Rod | 35–55 | 40% | — |
| White | Undella Bay Area | Super Rod Spots | 35–60 | 40% | — |
| White | Undella Town Area | Super Rod | 35–55 | 40% | — |
| White | Undella Town Area | Super Rod Spots | 35–60 | 40% | — |
| White | Unova Route 13 Area | Super Rod | 35–55 | 40% | — |
| White | Unova Route 13 Area | Super Rod Spots | 35–60 | 40% | — |
| White 2 | Humilau City Area | Super Rod | 40–60 | 40% | — |
| White 2 | Humilau City Area | Super Rod Spots | 40–60 | 40% | — |
| White 2 | Humilau City Area | Super Rod Spots | 50–70 | 15% | — |
| White 2 | Seaside Cave 1f | Super Rod | 40–60 | 40% | — |
| White 2 | Seaside Cave 1f | Super Rod Spots | 40–60 | 40% | — |
| White 2 | Seaside Cave 1f | Super Rod Spots | 50–70 | 15% | — |
| White 2 | Undella Town Area | Super Rod | 40–60 | 40% | — |
| White 2 | Undella Town Area | Super Rod Spots | 40–60 | 40% | — |
| White 2 | Undella Town Area | Super Rod Spots | 50–70 | 15% | — |
| White 2 | Unova Route 13 Area | Super Rod | 40–60 | 40% | — |
| White 2 | Unova Route 13 Area | Super Rod Spots | 40–60 | 40% | — |
| White 2 | Unova Route 13 Area | Super Rod Spots | 50–70 | 15% | — |
| Xd | Cipher Key Lair 2f | Snag | 29 | 100% | — |
| Y | Kalos Route 8 Area | Good Rod | 25 | 35% | — |
| Yellow | Kanto Route 17 Area | Super Rod | 25 | 20% | — |
| Yellow | Kanto Route 17 Area | Super Rod | 35 | 10% | — |
| Yellow | Kanto Route 18 Area | Super Rod | 20 | 30% | — |
| Yellow | Kanto Route 18 Area | Super Rod | 30 | 20% | — |
| Yellow | Kanto Route 18 Area | Super Rod | 40 | 10% | — |
| Yellow | Vermilion City Ss Anne Dock | Super Rod | 10 | 10% | — |
No encounter records match these filters.
Shellder Pokédex moves
The Shellder Pokédex lists 112 moves below. Use the filters to narrow the list by move name, learning method, type or category. Move availability can differ between games and generations, so check the relevant game details when planning a specific moveset.
Shellder move explorer
112 moves shown
| Level | Move | Type | Category | Power | Accuracy | PP | Method |
|---|---|---|---|---|---|---|---|
| 1 | Tackle | NORMAL | Physical | 40 | 100 | 35 | Level Up |
| 1 | Water Gun | WATER | Special | 40 | 100 | 25 | Level Up |
| 1 | Withdraw | WATER | Status | — | — | 40 | Level Up |
| 8 | Ice Shard | ICE | Physical | 40 | 100 | 30 | Level Up |
| 8 | Icicle Spear | ICE | Physical | 25 | 100 | 30 | Level Up |
| 8 | Supersonic | NORMAL | Status | — | 55 | 20 | Level Up |
| 9 | Leer | NORMAL | Status | — | 100 | 30 | Level Up |
| 16 | Protect | NORMAL | Status | — | — | 10 | Level Up |
| 16 | Whirlpool | WATER | Special | 35 | 85 | 15 | Level Up |
| 17 | Aurora Beam | ICE | Special | 65 | 100 | 20 | Level Up |
| 22 | Clamp | WATER | Physical | 35 | 85 | 15 | Level Up |
| 32 | Razor Shell | WATER | Physical | 75 | 95 | 10 | Level Up |
| 36 | Ice Beam | ICE | Special | 90 | 100 | 10 | Level Up |
| 36 | Iron Defense | STEEL | Status | — | — | 15 | Level Up |
| 40 | Shell Smash | NORMAL | Status | — | — | 15 | Level Up |
| 44 | Brine | WATER | Special | 65 | 100 | 10 | Level Up |
| 45 | Hydro Pump | WATER | Special | 110 | 80 | 5 | Level Up |
| — | Attract | NORMAL | Status | — | 100 | 15 | Machine |
| — | Avalanche | ICE | Physical | 60 | 100 | 10 | Machine |
| — | Bide | NORMAL | Physical | — | — | 10 | Machine |
| — | Blizzard | ICE | Special | 110 | 70 | 5 | Machine |
| — | Brine | WATER | Special | 65 | 100 | 10 | Machine |
| — | Bubble Beam | WATER | Special | 65 | 100 | 20 | Machine |
| — | Captivate | NORMAL | Status | — | 100 | 20 | Machine |
| — | Chilling Water | WATER | Special | 50 | 100 | 20 | Machine |
| — | Confide | NORMAL | Status | — | — | 20 | Machine |
| — | Curse | GHOST | Status | — | — | 10 | Machine |
| — | Dive | WATER | Physical | 80 | 100 | 10 | Machine |
| — | Double Edge | NORMAL | Physical | 120 | 100 | 15 | Machine |
| — | Double Team | NORMAL | Status | — | — | 15 | Machine |
| — | Endure | NORMAL | Status | — | — | 10 | Machine |
| — | Explosion | NORMAL | Physical | 250 | 100 | 5 | Machine |
| — | Facade | NORMAL | Physical | 70 | 100 | 20 | Machine |
| — | Frustration | NORMAL | Physical | — | 100 | 20 | Machine |
| — | Hail | ICE | Status | — | — | 10 | Machine |
| — | Headbutt | NORMAL | Physical | 70 | 100 | 15 | Machine |
| — | Helping Hand | NORMAL | Status | — | — | 20 | Machine |
| — | Hidden Power | NORMAL | Special | 60 | 100 | 15 | Machine |
| — | Hydro Pump | WATER | Special | 110 | 80 | 5 | Machine |
| — | Ice Beam | ICE | Special | 90 | 100 | 10 | Machine |
| — | Ice Spinner | ICE | Physical | 80 | 100 | 15 | Machine |
| — | Icicle Spear | ICE | Physical | 25 | 100 | 30 | Machine |
| — | Icy Wind | ICE | Special | 55 | 95 | 15 | Machine |
| — | Iron Defense | STEEL | Status | — | — | 15 | Machine |
| — | Liquidation | WATER | Physical | 85 | 100 | 10 | Machine |
| — | Mimic | NORMAL | Status | — | — | 10 | Machine |
| — | Mud Shot | GROUND | Special | 55 | 95 | 15 | Machine |
| — | Natural Gift | NORMAL | Physical | — | 100 | 15 | Machine |
| — | Payback | DARK | Physical | 50 | 100 | 10 | Machine |
| — | Protect | NORMAL | Status | — | — | 10 | Machine |
| — | Rage | NORMAL | Physical | 20 | 100 | 20 | Machine |
| — | Rain Dance | WATER | Status | — | — | 5 | Machine |
| — | Razor Shell | WATER | Physical | 75 | 95 | 10 | Machine |
| — | Reflect | PSYCHIC | Status | — | — | 20 | Machine |
| — | Rest | PSYCHIC | Status | — | — | 5 | Machine |
| — | Return | NORMAL | Physical | — | 100 | 20 | Machine |
| — | Rock Blast | ROCK | Physical | 25 | 90 | 10 | Machine |
| — | Round | NORMAL | Special | 60 | 100 | 15 | Machine |
| — | Screech | NORMAL | Status | — | 85 | 40 | Machine |
| — | Secret Power | NORMAL | Physical | 70 | 100 | 20 | Machine |
| — | Self Destruct | NORMAL | Physical | 200 | 100 | 5 | Machine |
| — | Sleep Talk | NORMAL | Status | — | — | 10 | Machine |
| — | Snore | NORMAL | Special | 50 | 100 | 15 | Machine |
| — | Snowscape | ICE | Status | 0 | — | 10 | Machine |
| — | Spikes | GROUND | Status | — | — | 20 | Machine |
| — | Substitute | NORMAL | Status | — | — | 10 | Machine |
| — | Surf | WATER | Special | 90 | 100 | 15 | Machine |
| — | Swagger | NORMAL | Status | — | 85 | 15 | Machine |
| — | Swift | NORMAL | Special | 60 | — | 20 | Machine |
| — | Take Down | NORMAL | Physical | 90 | 85 | 20 | Machine |
| — | Teleport | PSYCHIC | Status | — | — | 20 | Machine |
| — | Tera Blast | NORMAL | Special | 80 | 100 | 10 | Machine |
| — | Toxic | POISON | Status | — | 90 | 10 | Machine |
| — | Toxic Spikes | POISON | Status | — | — | 20 | Machine |
| — | Tri Attack | NORMAL | Special | 80 | 100 | 10 | Machine |
| — | Water Gun | WATER | Special | 40 | 100 | 25 | Machine |
| — | Water Pulse | WATER | Special | 60 | 100 | 20 | Machine |
| — | Waterfall | WATER | Physical | 80 | 100 | 15 | Machine |
| — | Whirlpool | WATER | Special | 35 | 85 | 15 | Machine |
| — | Aqua Ring | WATER | Status | — | — | 20 | Egg |
| — | Avalanche | ICE | Physical | 60 | 100 | 10 | Egg |
| — | Barrier | PSYCHIC | Status | — | — | 20 | Egg |
| — | Bubble Beam | WATER | Special | 65 | 100 | 20 | Egg |
| — | Icicle Spear | ICE | Physical | 25 | 100 | 30 | Egg |
| — | Life Dew | WATER | Status | — | — | 10 | Egg |
| — | Mud Shot | GROUND | Special | 55 | 95 | 15 | Egg |
| — | Rapid Spin | NORMAL | Physical | 50 | 100 | 40 | Egg |
| — | Rock Blast | ROCK | Physical | 25 | 90 | 10 | Egg |
| — | Screech | NORMAL | Status | — | 85 | 40 | Egg |
| — | Take Down | NORMAL | Physical | 90 | 85 | 20 | Egg |
| — | Twineedle | BUG | Physical | 25 | 100 | 20 | Egg |
| — | Water Pulse | WATER | Special | 60 | 100 | 20 | Egg |
| — | Dive | WATER | Physical | 80 | 100 | 10 | Tutor |
| — | Double Edge | NORMAL | Physical | 120 | 100 | 15 | Tutor |
| — | Endure | NORMAL | Status | — | — | 10 | Tutor |
| — | Explosion | NORMAL | Physical | 250 | 100 | 5 | Tutor |
| — | Ice Beam | ICE | Special | 90 | 100 | 10 | Tutor |
| — | Icy Wind | ICE | Special | 55 | 95 | 15 | Tutor |
| — | Iron Defense | STEEL | Status | — | — | 15 | Tutor |
| — | Liquidation | WATER | Physical | 85 | 100 | 10 | Tutor |
| — | Mimic | NORMAL | Status | — | — | 10 | Tutor |
| — | Self Destruct | NORMAL | Physical | 200 | 100 | 5 | Tutor |
| — | Sleep Talk | NORMAL | Status | — | — | 10 | Tutor |
| — | Snore | NORMAL | Special | 50 | 100 | 15 | Tutor |
| — | Substitute | NORMAL | Status | — | — | 10 | Tutor |
| — | Swagger | NORMAL | Status | — | 85 | 15 | Tutor |
| — | Swift | NORMAL | Special | 60 | — | 20 | Tutor |
| — | Water Pulse | WATER | Special | 60 | 100 | 20 | Tutor |
| — | Aurora Beam | ICE | Special | 65 | 100 | 20 | Xd Purification |
| — | Refresh | NORMAL | Status | — | — | 20 | Xd Purification |
| — | Surf | WATER | Special | 90 | 100 | 15 | Xd Purification |
| — | Take Down | NORMAL | Physical | 90 | 85 | 20 | Xd Purification |
No moves match these filters.
Shellder Pokédex entries
The Shellder Pokédex entries below let you compare how Shellder has been described across different Pokémon games. Pokédex wording often changes between versions, so reading the entries together is a useful way to see how its description has evolved across the series.
Shellder Pokédex entries
Its hard shell repels any kind of attack. It is vulnerable only when its shell is open.
Its hard shell repels any kind of attack. It is vulnerable only when its shell is open.
The shell can withstand any attack. However, when it is open, the tender body is exposed.
It swims facing backward by open ing and closing its two-piece shell. It is surprisingly fast.
Grains of sand trapped in its shells mix with its body fluids to form beautiful pearls.
Clamping on to an opponent reveals its vulnerable parts, so it uses this move only as a last resort.
At night, this POKéMON uses its broad tongue to burrow a hole in the seafloor sand and then sleep in it. While it is sleeping, SHELLDER closes its shell, but leaves its tongue hanging out.
At night, this POKéMON uses its broad tongue to burrow a hole in the seafloor sand and then sleep in it. While it is sleeping, SHELLDER closes its shell, but leaves its tongue hanging out.
At night, it burrows a hole in the seafloor with its broad tongue to make a place to sleep. While asleep, it closes its shell, but leaves its tongue hanging out.
It is encased in a shell that is harder than diamond. Inside, however, it is surprisingly tender.
Its hard shell repels any kind of attack. It is vulnerable only when its shell is open.
It swims backward by opening and closing its two shells. Its large tongue is always kept hanging out.
It swims backward by opening and closing its two shells. Its large tongue is always kept hanging out.
It swims backward by opening and closing its two shells. Its large tongue is always kept hanging out.
It swims facing backward by opening and closing its two-piece shell. It is surprisingly fast.
Grains of sand trapped in its shells mix with its body fluids to form beautiful pearls.
It swims backward by opening and closing its two shells. Its large tongue is always kept hanging out.
It swims backward by opening and closing its two shells. Its large tongue is always kept hanging out.
It swims backward by opening and closing its two shells. Its large tongue is always kept hanging out.
It swims backward by opening and closing its two shells. Its large tongue is always kept hanging out.
Its hard shell repels any kind of attack. It is vulnerable only when its shell is open.
Clamping on to an opponent reveals its vulnerable parts, so it uses this move only as a last resort.
At night, this Pokémon uses its broad tongue to burrow a hole in the seafloor sand and then sleep in it. While it is sleeping, Shellder closes its shell, but leaves its tongue hanging out.
At night, this Pokémon uses its broad tongue to burrow a hole in the seafloor sand and then sleep in it. While it is sleeping, Shellder closes its shell, but leaves its tongue hanging out.
The hardness of its shell surpasses the hardness of a diamond. In days gone by, people used the shells to make shields.
This Pokémon’s tongue is always hanging out. It uses its tongue with great dexterity to dig up sand from the seabed in its search for food.
The sand that accumulates inside its shell eventually becomes a pearl. But the pearl gets in the way, so it spits it out and discards it.
Even when its shell is closed, its tongue still hangs out. If you give its tongue a good yank, the shock will cause Shellder to open its shell.
The shell can withstand any attack. However, when it is open, the tender body is exposed.
The shell can withstand any attack. However, when it is open, the tender body is exposed.
It swims facing backward by opening and closing its two-piece shell. It is surprisingly fast.
Its hard shell repels any kind of attack. It is vulnerable only when its shell is open.
Browse the Pokémon Pokédex to explore more species, or visit Pokémon.com for official Pokémon news and franchise information.
More Pokémon like Shellder


More Shellder guides on The Click