Poliwhirl Pokédex: Stats, Weaknesses, Evolution and Moves

Poliwhirl
Tadpole Pokémon
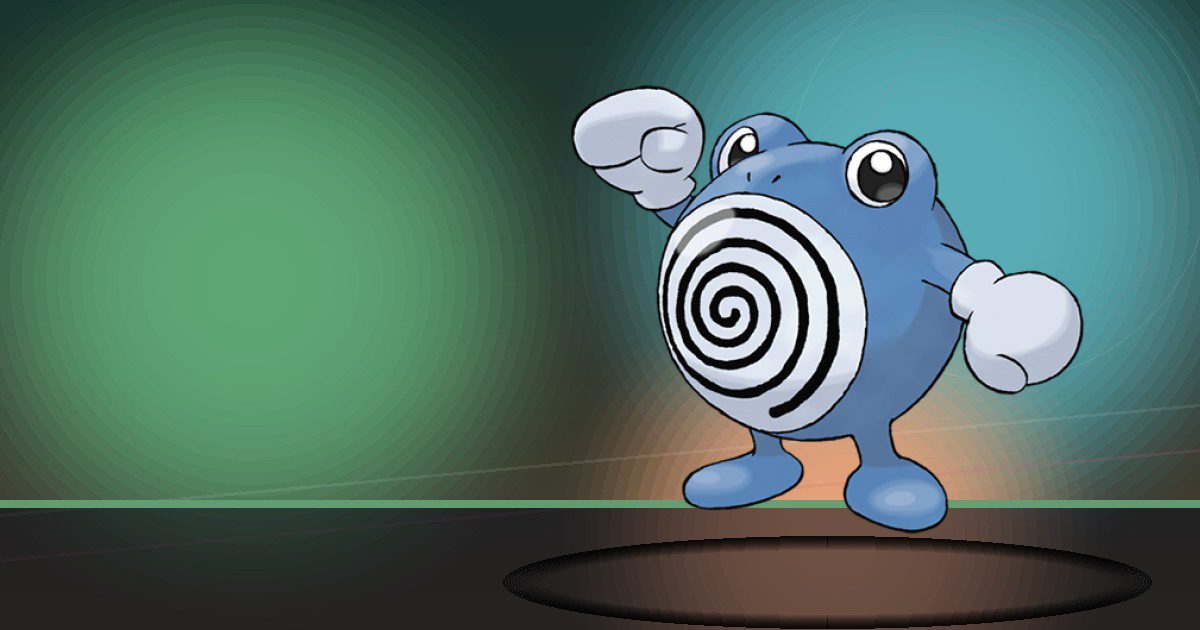
Staring at the swirl on its belly causes drowsiness. This trait of Poliwhirl’s has been used in place of lullabies to get children to go to sleep.
Poliwhirl Pokédex brings together the essential information for Poliwhirl, including its typing, weaknesses, base stats, abilities, evolution line, forms, Pokédex entries and appearances across Pokémon games. Poliwhirl is National Pokédex #61 and was introduced in Generation I. It is a Water-type Pokémon.
This Poliwhirl Pokédex covers Poliwhirl across the Pokémon series rather than focusing on one game. You can use it to check core stats, weaknesses, evolution, forms, moves, locations and game appearances, then follow the related guides for more detailed game-specific help. Staring at the swirl on its belly causes drowsiness. This trait of Poliwhirl’s has been used in place of lullabies to get children to go to sleep.
Poliwhirl at a glance
- Type
- WATER
- Weak to
- ELECTRIC2×GRASS2×
- Best base stat
- Speed — 90
- Abilities
- Water Absorb, Damp, Swift Swim (Hidden)
- Next evolution
- Poliwrath — Use Item · Water Stone
Politoed — Trade · holding Kings Rock
Poliwhirl Pokédex overview
Poliwhirl has the Water typing, it belongs to Generation I, its Pokédex classification is the Tadpole Pokémon. Staring at the swirl on its belly causes drowsiness. This trait of Poliwhirl’s has been used in place of lullabies to get children to go to sleep. The quick facts below bring together the key measurements and species details, while the rest of the Poliwhirl Pokédex breaks down its battle strengths, evolution, forms and appearances in more detail.
Poliwhirl quick facts
- Height
- 1.0 m
- Weight
- 20.0 kg
- Generation
- Generation I
- Growth rate
- Medium Slow
- Capture rate
- 120
- Base happiness
- 70
Poliwhirl Pokédex type and weaknesses
Poliwhirl is weak to Electric and Grass. It resists Fire, Water, Ice and Steel. These matchups come from Poliwhirl's typing, making this a quick way to check which attacking types are super effective against Poliwhirl and which types it can resist more comfortably.
Poliwhirl type effectiveness
Damage taken when Poliwhirl is hit by each type:
Weak to
Resists
Based on Water typing. Abilities may modify these matchups.
Poliwhirl Pokédex stats
Poliwhirl has a base stat total of 385, with Speed as its highest listed base stat at 90. In the Poliwhirl Pokédex, base stats are useful for comparing natural strengths before a particular game layers on level, training, moves, abilities or battle formats. The bars below show the six standard stats side by side, making it easier to see where Poliwhirl is naturally strongest and where its lower base values sit.
Poliwhirl Pokédex abilities
Poliwhirl can have Water Absorb, Damp and Swift Swim as its Hidden Ability. Abilities can significantly change how Poliwhirl functions in battle, so they are worth considering alongside its typing and base stats. Any Hidden Ability is identified separately below.
Poliwhirl abilities
Water Absorb
Absorbs Water moves, healing for 1/4 max HP.
Damp
Prevents Self-Destruct, Explosion, and Aftermath from working while the Pokémon is in battle.
Swift Swim Hidden
Doubles Speed during rain.
Poliwhirl Pokédex evolution
Poliwhirl evolves from Poliwag. Poliwhirl evolves into Poliwrath (Use Item · Water Stone) and Politoed (Trade · holding Kings Rock). The evolution section shows the family together and includes evolution requirements where they apply, making it easy to see how each stage connects. Each Pokémon in the family can also be opened in its own Pokédex guide.
Poliwhirl evolution family


Poliwhirl evolution requirements
Poliwhirl Pokédex forms and shiny appearance
Poliwhirl has 1 form shown on this Poliwhirl Pokédex page. Alternate forms are grouped together so you can compare them in one place, while the artwork switcher lets you view the standard and shiny appearance when shiny artwork is available.

Poliwhirl Pokédex game appearances
Poliwhirl appears in 30 Pokémon titles, including Black, Black 2, Blue, Crystal, Diamond and Emerald. Availability differs between games, so the list below separates each title and makes it easier to see where Poliwhirl appears without assuming the same method or location applies everywhere.
Poliwhirl game availability
This uses imported PokéAPI encounter and game-index records. It does not guarantee current transfer, DLC or event availability.
Where can you find Poliwhirl?
The locations below show where Poliwhirl can be found across Pokémon games, including the encounter method, level range and encounter chance where available. Use the filters to narrow the list to a particular game and find the location information you need.
Poliwhirl encounter locations
| Game | Location | Method | Level | Chance | Conditions |
|---|---|---|---|---|---|
| Black | Challengers Cave B2f | Super Rod | 35–55 | 15% | — |
| Black | Challengers Cave B2f | Super Rod Spots | 35–60 | 40% | — |
| Black | Challengers Cave B2f | Super Rod Spots | 35–70 | 15% | — |
| Black | Giant Chasm Area | Super Rod | 35–55 | 15% | — |
| Black | Giant Chasm Area | Super Rod Spots | 35–60 | 40% | — |
| Black | Giant Chasm Area | Super Rod Spots | 35–70 | 15% | — |
| Black | Giant Chasm ♀orest Cave | Super Rod | 35–55 | 15% | — |
| Black | Giant Chasm ♀orest Cave | Super Rod Spots | 35–60 | 40% | — |
| Black | Giant Chasm ♀orest Cave | Super Rod Spots | 45–70 | 15% | — |
| Black | Unova Route 6 Area | Super Rod | 35–55 | 15% | — |
| Black | Unova Route 6 Area | Super Rod Spots | 35–60 | 40% | — |
| Black | Unova Route 6 Area | Super Rod Spots | 35–70 | 15% | — |
| Black | Unova Victory Road 1f Unknown Room | Super Rod | 35–55 | 15% | — |
| Black | Unova Victory Road 1f Unknown Room | Super Rod Spots | 35–60 | 40% | — |
| Black | Unova Victory Road 1f Unknown Room | Super Rod Spots | 35–70 | 15% | — |
| Black | Unova Victory Road Unknown Area 53 | Super Rod | 35–55 | 15% | — |
| Black | Unova Victory Road Unknown Area 53 | Super Rod Spots | 35–60 | 40% | — |
| Black | Unova Victory Road Unknown Area 53 | Super Rod Spots | 35–70 | 15% | — |
| Black | Wellspring Cave Area | Super Rod | 35–55 | 15% | — |
| Black | Wellspring Cave Area | Super Rod Spots | 35–60 | 40% | — |
| Black 2 | Clay Tunnel Area | Super Rod Spots | 50–60 | 40% | — |
| Black 2 | Clay Tunnel Area | Super Rod Spots | 60 | 15% | — |
| Black 2 | Floccesy Ranch Inner | Super Rod Spots | 40–60 | 40% | — |
| Black 2 | Floccesy Ranch Inner | Super Rod Spots | 50–70 | 15% | — |
| Black 2 | Floccesy Ranch Outer | Super Rod Spots | 40–60 | 40% | — |
| Black 2 | Floccesy Ranch Outer | Super Rod Spots | 50–70 | 15% | — |
| Black 2 | Giant Chasm Area | Super Rod Spots | 40–60 | 40% | — |
| Black 2 | Giant Chasm Area | Super Rod Spots | 50–70 | 15% | — |
| Black 2 | Lostlorn ♀orest Area | Super Rod Spots | 40–60 | 40% | — |
| Black 2 | Lostlorn ♀orest Area | Super Rod Spots | 50–70 | 15% | — |
| Black 2 | Pinwheel ♀orest Hidden Grotto Outer Area | Hidden Grotto | 55–59 | 5% | — |
| Black 2 | Relic Passage Relic Castle Entrance | Super Rod Spots | 40–60 | 40% | — |
| Black 2 | Relic Passage Relic Castle Entrance | Super Rod Spots | 50–70 | 15% | — |
| Black 2 | Unova Route 19 Area | Super Rod Spots | 40–60 | 40% | — |
| Black 2 | Unova Route 19 Area | Super Rod Spots | 50–70 | 15% | — |
| Black 2 | Unova Route 20 Area | Super Rod Spots | 40–60 | 40% | — |
| Black 2 | Unova Route 20 Area | Super Rod Spots | 50–70 | 15% | — |
| Black 2 | Unova Route 23 Area | Super Rod Spots | 40–60 | 40% | — |
| Black 2 | Unova Route 23 Area | Super Rod Spots | 50–70 | 15% | — |
| Black 2 | Unova Route 6 Area | Super Rod Spots | 40–60 | 40% | — |
| Black 2 | Unova Route 6 Area | Super Rod Spots | 50–70 | 15% | — |
| Black 2 | Unova Victory Road 2 Unknown Area 71 | Super Rod Spots | 40–60 | 40% | — |
| Black 2 | Unova Victory Road 2 Unknown Area 71 | Super Rod Spots | 50–60 | 15% | — |
| Black 2 | Unova Victory Road 2 Unknown Area 73 | Super Rod Spots | 40–60 | 40% | — |
| Black 2 | Unova Victory Road 2 Unknown Area 73 | Super Rod Spots | 50–70 | 15% | — |
| Black 2 | Unova Victory Road 2 Unknown Area 75 | Super Rod Spots | 40–60 | 40% | — |
| Black 2 | Unova Victory Road 2 Unknown Area 75 | Super Rod Spots | 50–70 | 15% | — |
| Black 2 | Unova Victory Road 2 Unknown Area 78 | Super Rod Spots | 40–60 | 40% | — |
| Black 2 | Unova Victory Road 2 Unknown Area 78 | Super Rod Spots | 50–70 | 15% | — |
| Black 2 | Unova Victory Road 2 Unknown Area 79 | Super Rod Spots | 40–60 | 40% | — |
| Black 2 | Unova Victory Road 2 Unknown Area 79 | Super Rod Spots | 50–70 | 15% | — |
| Black 2 | Wellspring Cave Area | Super Rod Spots | 50–60 | 40% | — |
| Black 2 | Wellspring Cave Area | Super Rod Spots | 60 | 15% | — |
| Blue | Celadon City Area | Super Rod | 23 | 25% | — |
| Blue | Kanto Route 10 Area | Super Rod | 23 | 25% | — |
| Crystal | Ecruteak City Area | Surf | 20–24 | 10% | — |
| Crystal | Johto Route 30 Area | Surf | 20–24 | 10% | — |
| Crystal | Johto Route 31 Area | Surf | 20–24 | 10% | — |
| Crystal | Johto Route 44 Area | Walk | 24 | 5% | Time Night |
| Crystal | Johto Route 44 Area | Surf | 25–29 | 10% | — |
| Crystal | Johto Route 44 Area | Walk | 26 | 4% | Time Night |
| Crystal | Kanto Route 22 Area | Surf | 10–14 | 10% | — |
| Crystal | Kanto Route 28 Area | Walk | 40 | 30% | Time Night |
| Crystal | Kanto Route 28 Area | Surf | 40–44 | 10% | — |
| Crystal | Mt Silver Outside | Surf | 35–39 | 60% | — |
| Crystal | Mt Silver Outside | Surf | 40–44 | 30% | — |
| Crystal | Mt Silver Outside | Walk | 42 | 30% | Time Night |
| Crystal | Mt Silver Outside | Walk | 44 | 10% | Time Night |
| Crystal | Violet City Area | Surf | 20–24 | 10% | — |
| Crystal | Viridian City Area | Surf | 10–14 | 10% | — |
| Diamond | Sinnoh Route 225 Area | Super Rod | 30–40 | 40% | — |
| Diamond | Sinnoh Route 225 Area | Super Rod | 35–55 | 4% | — |
| Diamond | Sinnoh Route 225 Area | Surf | 40–50 | 30% | — |
| Diamond | Sinnoh Route 227 Area | Surf | 40–50 | 60% | — |
| Diamond | Sinnoh Route 227 Area | Surf | 45–55 | 5% | — |
| Diamond | Sinnoh Route 228 Area | Surf | 40–50 | 60% | — |
| Diamond | Sinnoh Route 228 Area | Surf | 45–55 | 5% | — |
| Firered | Cape Brink Area | Super Rod | 20–30 | 40% | — |
| Firered | Cerulean Cave 1f | Super Rod | 20–30 | 40% | — |
| Firered | Cerulean Cave B1f | Super Rod | 20–30 | 40% | — |
| Firered | Four Island Area | Super Rod | 20–30 | 40% | — |
| Firered | Icefall Cave Entrance | Super Rod | 20–30 | 40% | — |
| Firered | Kanto Route 22 Area | Super Rod | 20–30 | 40% | — |
| Firered | Kanto Route 23 Area | Super Rod | 20–30 | 40% | — |
| Firered | Kanto Route 25 Area | Super Rod | 20–30 | 40% | — |
| Firered | Kanto Route 6 Area | Super Rod | 20–30 | 40% | — |
| Firered | Ruin Valley Area | Super Rod | 20–30 | 40% | — |
| Firered | Viridian City Area | Super Rod | 20–30 | 40% | — |
| Gold | Ecruteak City Area | Surf | 20–24 | 10% | — |
| Gold | Johto Route 30 Area | Surf | 20–24 | 10% | — |
| Gold | Johto Route 31 Area | Surf | 20–24 | 10% | — |
| Gold | Johto Route 44 Area | Surf | 25–29 | 10% | — |
| Gold | Kanto Route 22 Area | Surf | 10–14 | 10% | — |
| Gold | Kanto Route 28 Area | Surf | 40–44 | 10% | — |
| Gold | Mt Silver Outside | Surf | 35–39 | 60% | — |
| Gold | Mt Silver Outside | Surf | 40–44 | 30% | — |
| Gold | Violet City Area | Surf | 20–24 | 10% | — |
| Gold | Viridian City Area | Surf | 10–14 | 10% | — |
| Green Japan | Celadon City Area | Super Rod | 23 | 25% | — |
| Green Japan | Kanto Route 10 Area | Super Rod | 23 | 25% | — |
| Heartgold | Cerulean Cave 1f | Super Rod | 40 | 30% | Time ♂orning |
| Heartgold | Cerulean Cave 1f | Super Rod | 40 | 30% | Time Day |
| Heartgold | Cerulean Cave 2f | Super Rod | 40 | 30% | Time ♂orning |
| Heartgold | Cerulean Cave 2f | Super Rod | 40 | 30% | Time Day |
| Heartgold | Cerulean Cave B1f | Super Rod | 40 | 30% | Time ♂orning |
| Heartgold | Cerulean Cave B1f | Super Rod | 40 | 30% | Time Day |
| Heartgold | Ecruteak City Area | Surf | 15–25 | 5% | — |
| Heartgold | Johto Route 30 Area | Surf | 15–25 | 5% | — |
| Heartgold | Johto Route 30 Area | Surf | 32 | 1% | — |
| Heartgold | Johto Route 31 Area | Surf | 15–25 | 5% | — |
| Heartgold | Johto Route 31 Area | Surf | 32 | 1% | — |
| Heartgold | Johto Route 44 Area | Surf | 20–30 | 5% | — |
| Heartgold | Johto Safari Zone Rocky Beach | Surf | 16 | 10% | Johto Safari Blocks Inactive |
| Heartgold | Johto Safari Zone Rocky Beach | Surf | 17 | 10% | Johto Safari Blocks Inactive |
| Heartgold | Johto Safari Zone Wetland | Old Rod | 17 | 10% | Johto Safari Blocks Water ♂in 2 |
| Heartgold | Johto Safari Zone Wetland | Old Rod | 18 | 10% | Johto Safari Blocks Water ♂in 3 |
| Heartgold | Johto Safari Zone Wetland | Good Rod | 23 | 10% | Johto Safari Blocks Inactive |
| Heartgold | Johto Safari Zone Wetland | Good Rod | 24 | 10% | Johto Safari Blocks Inactive |
| Heartgold | Johto Safari Zone Wetland | Good Rod | 25 | 10% | Johto Safari Blocks Inactive |
| Heartgold | Johto Safari Zone Wetland | Super Rod | 35 | 10% | Johto Safari Blocks Inactive |
| Heartgold | Johto Safari Zone Wetland | Super Rod | 36 | 10% | Johto Safari Blocks Inactive |
| Heartgold | Johto Safari Zone Wetland | Super Rod | 37 | 10% | Johto Safari Blocks Inactive |
| Heartgold | Johto Safari Zone ♂arshland | Super Rod | 7 | 10% | Johto Safari Blocks Inactive |
| Heartgold | Johto Safari Zone ♂arshland | Super Rod | 8 | 10% | Johto Safari Blocks Inactive |
| Heartgold | Johto Safari Zone ♂arshland | Good Rod | 24 | 10% | Johto Safari Blocks Inactive |
| Heartgold | Johto Safari Zone ♂arshland | Good Rod | 25 | 10% | Johto Safari Blocks Inactive |
| Heartgold | Johto Safari Zone ♂arshland | Super Rod | 35 | 10% | Johto Safari Blocks Inactive |
| Heartgold | Johto Safari Zone ♂arshland | Super Rod | 36 | 10% | Johto Safari Blocks Inactive |
| Heartgold | Johto Safari Zone ♂arshland | Super Rod | 37 | 10% | Johto Safari Blocks Inactive |
| Heartgold | Johto Safari Zone ♂eadow | Old Rod | 15 | 10% | Johto Safari Blocks Water ♂in 2 |
| Heartgold | Johto Safari Zone ♂eadow | Old Rod | 16 | 10% | Johto Safari Blocks Water ♂in 3 |
| Heartgold | Johto Safari Zone ♂eadow | Good Rod | 24 | 10% | Johto Safari Blocks Inactive |
| Heartgold | Johto Safari Zone ♂eadow | Good Rod | 25 | 10% | Johto Safari Blocks Inactive |
| Heartgold | Johto Safari Zone ♂eadow | Good Rod | 27 | 10% | Johto Safari Blocks Water ♂in 5 |
| Heartgold | Johto Safari Zone ♂eadow | Super Rod | 35 | 10% | Johto Safari Blocks Inactive |
| Heartgold | Johto Safari Zone ♂eadow | Super Rod | 36 | 10% | Johto Safari Blocks Inactive |
| Heartgold | Johto Safari Zone ♂eadow | Super Rod | 37 | 10% | Johto Safari Blocks Inactive |
| Heartgold | Johto Safari Zone ♂eadow | Super Rod | 38 | 10% | Johto Safari Blocks Inactive |
| Heartgold | Kanto Route 22 Area | Surf | 10 | 5% | — |
| Heartgold | Kanto Route 28 Area | Surf | 40 | 5% | — |
| Heartgold | Mt Silver Outside | Surf | 30–40 | 60% | — |
| Heartgold | Mt Silver Outside | Surf | 35–45 | 30% | — |
| Heartgold | Mt Silver Outside | Surf | 48 | 1% | — |
| Heartgold | Violet City Area | Surf | 15–25 | 5% | — |
| Heartgold | Viridian City Area | Surf | 10 | 5% | — |
| Leafgreen | Cape Brink Area | Super Rod | 20–30 | 40% | — |
| Leafgreen | Cerulean Cave 1f | Super Rod | 20–30 | 40% | — |
| Leafgreen | Cerulean Cave B1f | Super Rod | 20–30 | 40% | — |
| Leafgreen | Four Island Area | Super Rod | 20–30 | 40% | — |
| Leafgreen | Icefall Cave Entrance | Super Rod | 20–30 | 40% | — |
| Leafgreen | Kanto Route 22 Area | Super Rod | 20–30 | 40% | — |
| Leafgreen | Kanto Route 23 Area | Super Rod | 20–30 | 40% | — |
| Leafgreen | Kanto Route 25 Area | Super Rod | 20–30 | 40% | — |
| Leafgreen | Kanto Route 6 Area | Super Rod | 20–30 | 40% | — |
| Leafgreen | Ruin Valley Area | Super Rod | 20–30 | 40% | — |
| Leafgreen | Viridian City Area | Super Rod | 20–30 | 40% | — |
| Lets Go Eevee | Cerulean Cave 1f | Overworld Water | 51–56 | 100% | — |
| Lets Go Eevee | Cerulean Cave B1f | Overworld Water | 51–56 | 100% | — |
| Lets Go Eevee | Kanto Route 22 Area | Overworld Water | 3–4 | 100% | — |
| Lets Go Eevee | Kanto Route 23 Area | Overworld Water | 41–46 | 100% | — |
| Lets Go Eevee | Kanto Route 25 Area | Overworld Water | 9–14 | 100% | — |
| Lets Go Pikachu | Cerulean Cave 1f | Overworld Water | 51–56 | 100% | — |
| Lets Go Pikachu | Cerulean Cave B1f | Overworld Water | 51–56 | 100% | — |
| Lets Go Pikachu | Kanto Route 22 Area | Overworld Water | 3–4 | 100% | — |
| Lets Go Pikachu | Kanto Route 23 Area | Overworld Water | 41–46 | 100% | — |
| Lets Go Pikachu | Kanto Route 25 Area | Overworld Water | 9–14 | 100% | — |
| Moon | Konikoni City Area | Npc Trade | 22 | 100% | — |
| Moon | Malie Garden Area | Sos Encounter | 24–27 | 10% | — |
| Pearl | Sinnoh Route 225 Area | Super Rod | 30–40 | 40% | — |
| Pearl | Sinnoh Route 225 Area | Super Rod | 35–55 | 4% | — |
| Pearl | Sinnoh Route 225 Area | Surf | 40–50 | 30% | — |
| Pearl | Sinnoh Route 227 Area | Surf | 40–50 | 60% | — |
| Pearl | Sinnoh Route 227 Area | Surf | 45–55 | 5% | — |
| Pearl | Sinnoh Route 228 Area | Surf | 40–50 | 60% | — |
| Pearl | Sinnoh Route 228 Area | Surf | 45–55 | 5% | — |
| Platinum | Sinnoh Route 227 Area | Surf | 35–55 | 60% | — |
| Platinum | Sinnoh Route 228 Area | Surf | 35–55 | 60% | — |
| Red | Celadon City Area | Super Rod | 23 | 25% | — |
| Red | Kanto Route 10 Area | Super Rod | 23 | 25% | — |
| Red Japan | Celadon City Area | Super Rod | 23 | 25% | — |
| Red Japan | Kanto Route 10 Area | Super Rod | 23 | 25% | — |
| Silver | Ecruteak City Area | Surf | 20–24 | 10% | — |
| Silver | Johto Route 30 Area | Surf | 20–24 | 10% | — |
| Silver | Johto Route 31 Area | Surf | 20–24 | 10% | — |
| Silver | Johto Route 44 Area | Surf | 25–29 | 10% | — |
| Silver | Kanto Route 22 Area | Surf | 10–14 | 10% | — |
| Silver | Kanto Route 28 Area | Surf | 40–44 | 10% | — |
| Silver | Mt Silver Outside | Surf | 35–39 | 60% | — |
| Silver | Mt Silver Outside | Surf | 40–44 | 30% | — |
| Silver | Violet City Area | Surf | 20–24 | 10% | — |
| Silver | Viridian City Area | Surf | 10–14 | 10% | — |
| Soulsilver | Cerulean Cave 1f | Super Rod | 40 | 30% | Time ♂orning |
| Soulsilver | Cerulean Cave 1f | Super Rod | 40 | 30% | Time Day |
| Soulsilver | Cerulean Cave 2f | Super Rod | 40 | 30% | Time ♂orning |
| Soulsilver | Cerulean Cave 2f | Super Rod | 40 | 30% | Time Day |
| Soulsilver | Cerulean Cave B1f | Super Rod | 40 | 30% | Time ♂orning |
| Soulsilver | Cerulean Cave B1f | Super Rod | 40 | 30% | Time Day |
| Soulsilver | Ecruteak City Area | Surf | 15–25 | 5% | — |
| Soulsilver | Johto Route 30 Area | Surf | 15–25 | 5% | — |
| Soulsilver | Johto Route 30 Area | Surf | 32 | 1% | — |
| Soulsilver | Johto Route 31 Area | Surf | 15–25 | 5% | — |
| Soulsilver | Johto Route 31 Area | Surf | 32 | 1% | — |
| Soulsilver | Johto Route 44 Area | Surf | 20–30 | 5% | — |
| Soulsilver | Johto Safari Zone Rocky Beach | Surf | 16 | 10% | Johto Safari Blocks Inactive |
| Soulsilver | Johto Safari Zone Rocky Beach | Surf | 17 | 10% | Johto Safari Blocks Inactive |
| Soulsilver | Johto Safari Zone Wetland | Old Rod | 17 | 10% | Johto Safari Blocks Water ♂in 2 |
| Soulsilver | Johto Safari Zone Wetland | Old Rod | 18 | 10% | Johto Safari Blocks Water ♂in 3 |
| Soulsilver | Johto Safari Zone Wetland | Good Rod | 23 | 10% | Johto Safari Blocks Inactive |
| Soulsilver | Johto Safari Zone Wetland | Good Rod | 24 | 10% | Johto Safari Blocks Inactive |
| Soulsilver | Johto Safari Zone Wetland | Good Rod | 25 | 10% | Johto Safari Blocks Inactive |
| Soulsilver | Johto Safari Zone Wetland | Super Rod | 35 | 10% | Johto Safari Blocks Inactive |
| Soulsilver | Johto Safari Zone Wetland | Super Rod | 36 | 10% | Johto Safari Blocks Inactive |
| Soulsilver | Johto Safari Zone Wetland | Super Rod | 37 | 10% | Johto Safari Blocks Inactive |
| Soulsilver | Johto Safari Zone ♂arshland | Super Rod | 7 | 10% | Johto Safari Blocks Inactive |
| Soulsilver | Johto Safari Zone ♂arshland | Super Rod | 8 | 10% | Johto Safari Blocks Inactive |
| Soulsilver | Johto Safari Zone ♂arshland | Good Rod | 24 | 10% | Johto Safari Blocks Inactive |
| Soulsilver | Johto Safari Zone ♂arshland | Good Rod | 25 | 10% | Johto Safari Blocks Inactive |
| Soulsilver | Johto Safari Zone ♂arshland | Super Rod | 35 | 10% | Johto Safari Blocks Inactive |
| Soulsilver | Johto Safari Zone ♂arshland | Super Rod | 36 | 10% | Johto Safari Blocks Inactive |
| Soulsilver | Johto Safari Zone ♂arshland | Super Rod | 37 | 10% | Johto Safari Blocks Inactive |
| Soulsilver | Johto Safari Zone ♂eadow | Old Rod | 15 | 10% | Johto Safari Blocks Water ♂in 2 |
| Soulsilver | Johto Safari Zone ♂eadow | Old Rod | 16 | 10% | Johto Safari Blocks Water ♂in 3 |
| Soulsilver | Johto Safari Zone ♂eadow | Good Rod | 24 | 10% | Johto Safari Blocks Inactive |
| Soulsilver | Johto Safari Zone ♂eadow | Good Rod | 25 | 10% | Johto Safari Blocks Inactive |
| Soulsilver | Johto Safari Zone ♂eadow | Good Rod | 27 | 10% | Johto Safari Blocks Water ♂in 5 |
| Soulsilver | Johto Safari Zone ♂eadow | Super Rod | 35 | 10% | Johto Safari Blocks Inactive |
| Soulsilver | Johto Safari Zone ♂eadow | Super Rod | 36 | 10% | Johto Safari Blocks Inactive |
| Soulsilver | Johto Safari Zone ♂eadow | Super Rod | 37 | 10% | Johto Safari Blocks Inactive |
| Soulsilver | Johto Safari Zone ♂eadow | Super Rod | 38 | 10% | Johto Safari Blocks Inactive |
| Soulsilver | Kanto Route 22 Area | Surf | 10 | 5% | — |
| Soulsilver | Kanto Route 28 Area | Surf | 40 | 5% | — |
| Soulsilver | Mt Silver Outside | Surf | 30–40 | 60% | — |
| Soulsilver | Mt Silver Outside | Surf | 35–45 | 30% | — |
| Soulsilver | Mt Silver Outside | Surf | 48 | 1% | — |
| Soulsilver | Violet City Area | Surf | 15–25 | 5% | — |
| Soulsilver | Viridian City Area | Surf | 10 | 5% | — |
| Sun | Konikoni City Area | Npc Trade | 22 | 100% | — |
| Sun | Malie Garden Area | Sos Encounter | 24–27 | 10% | — |
| Ultra Sun | Malie Garden Area | Walk | 25–28 | 20% | — |
| Ultra Sun | Malie Garden Area | Sos Encounter | 25–28 | 10% | — |
| Ultra ♂oon | Malie Garden Area | Walk | 25–28 | 20% | — |
| Ultra ♂oon | Malie Garden Area | Sos Encounter | 25–28 | 10% | — |
| White | Challengers Cave B2f | Super Rod | 35–55 | 15% | — |
| White | Challengers Cave B2f | Super Rod Spots | 35–60 | 40% | — |
| White | Challengers Cave B2f | Super Rod Spots | 35–70 | 15% | — |
| White | Giant Chasm Area | Super Rod | 35–55 | 15% | — |
| White | Giant Chasm Area | Super Rod Spots | 35–60 | 40% | — |
| White | Giant Chasm Area | Super Rod Spots | 35–70 | 15% | — |
| White | Giant Chasm ♀orest Cave | Super Rod | 35–55 | 15% | — |
| White | Giant Chasm ♀orest Cave | Super Rod Spots | 35–60 | 40% | — |
| White | Giant Chasm ♀orest Cave | Super Rod Spots | 45–70 | 15% | — |
| White | Unova Route 6 Area | Super Rod | 35–55 | 15% | — |
| White | Unova Route 6 Area | Super Rod Spots | 35–60 | 40% | — |
| White | Unova Route 6 Area | Super Rod Spots | 35–70 | 15% | — |
| White | Unova Victory Road 1f Unknown Room | Super Rod | 35–55 | 15% | — |
| White | Unova Victory Road 1f Unknown Room | Super Rod Spots | 35–60 | 40% | — |
| White | Unova Victory Road 1f Unknown Room | Super Rod Spots | 35–70 | 15% | — |
| White | Unova Victory Road Unknown Area 53 | Super Rod | 35–55 | 15% | — |
| White | Unova Victory Road Unknown Area 53 | Super Rod Spots | 35–60 | 40% | — |
| White | Unova Victory Road Unknown Area 53 | Super Rod Spots | 35–70 | 15% | — |
| White | Wellspring Cave Area | Super Rod | 35–55 | 15% | — |
| White | Wellspring Cave Area | Super Rod Spots | 35–60 | 40% | — |
| White 2 | Clay Tunnel Area | Super Rod Spots | 50–60 | 40% | — |
| White 2 | Clay Tunnel Area | Super Rod Spots | 60 | 15% | — |
| White 2 | Floccesy Ranch Inner | Super Rod Spots | 40–60 | 40% | — |
| White 2 | Floccesy Ranch Inner | Super Rod Spots | 50–70 | 15% | — |
| White 2 | Floccesy Ranch Outer | Super Rod Spots | 40–60 | 40% | — |
| White 2 | Floccesy Ranch Outer | Super Rod Spots | 50–70 | 15% | — |
| White 2 | Giant Chasm Area | Super Rod Spots | 40–60 | 40% | — |
| White 2 | Giant Chasm Area | Super Rod Spots | 50–70 | 15% | — |
| White 2 | Lostlorn ♀orest Area | Super Rod Spots | 40–60 | 40% | — |
| White 2 | Lostlorn ♀orest Area | Super Rod Spots | 50–70 | 15% | — |
| White 2 | Pinwheel ♀orest Hidden Grotto Outer Area | Hidden Grotto | 55–59 | 5% | — |
| White 2 | Relic Passage Relic Castle Entrance | Super Rod Spots | 40–60 | 40% | — |
| White 2 | Relic Passage Relic Castle Entrance | Super Rod Spots | 50–70 | 15% | — |
| White 2 | Unova Route 19 Area | Super Rod Spots | 40–60 | 40% | — |
| White 2 | Unova Route 19 Area | Super Rod Spots | 50–70 | 15% | — |
| White 2 | Unova Route 20 Area | Super Rod Spots | 40–60 | 40% | — |
| White 2 | Unova Route 20 Area | Super Rod Spots | 50–70 | 15% | — |
| White 2 | Unova Route 23 Area | Super Rod Spots | 40–60 | 40% | — |
| White 2 | Unova Route 23 Area | Super Rod Spots | 50–70 | 15% | — |
| White 2 | Unova Route 6 Area | Super Rod Spots | 40–60 | 40% | — |
| White 2 | Unova Route 6 Area | Super Rod Spots | 50–70 | 15% | — |
| White 2 | Unova Victory Road 2 Unknown Area 71 | Super Rod Spots | 40–60 | 40% | — |
| White 2 | Unova Victory Road 2 Unknown Area 71 | Super Rod Spots | 50–60 | 15% | — |
| White 2 | Unova Victory Road 2 Unknown Area 73 | Super Rod Spots | 40–60 | 40% | — |
| White 2 | Unova Victory Road 2 Unknown Area 73 | Super Rod Spots | 50–70 | 15% | — |
| White 2 | Unova Victory Road 2 Unknown Area 75 | Super Rod Spots | 40–60 | 40% | — |
| White 2 | Unova Victory Road 2 Unknown Area 75 | Super Rod Spots | 50–70 | 15% | — |
| White 2 | Unova Victory Road 2 Unknown Area 78 | Super Rod Spots | 40–60 | 40% | — |
| White 2 | Unova Victory Road 2 Unknown Area 78 | Super Rod Spots | 50–70 | 15% | — |
| White 2 | Unova Victory Road 2 Unknown Area 79 | Super Rod Spots | 40–60 | 40% | — |
| White 2 | Unova Victory Road 2 Unknown Area 79 | Super Rod Spots | 50–70 | 15% | — |
| White 2 | Wellspring Cave Area | Super Rod Spots | 50–60 | 40% | — |
| White 2 | Wellspring Cave Area | Super Rod Spots | 60 | 15% | — |
| X | Couriway Town Area | Good Rod | 35 | 35% | — |
| X | Couriway Town Area | Super Rod | 45 | 60% | — |
| X | Friend Safari Water | Walk | 30 | 33% | Friend Safari Slot 3 |
| X | Frost Cavern Unknown Area 313 | Good Rod | 30 | 35% | — |
| X | Frost Cavern Unknown Area 313 | Surf | 38 | 50% | — |
| X | Frost Cavern Unknown Area 313 | Surf | 39 | 15% | — |
| X | Frost Cavern Unknown Area 313 | Surf | 40 | 1% | — |
| X | Frost Cavern Unknown Area 313 | Super Rod | 40 | 60% | — |
| X | Frost Cavern Unknown Area 315 | Good Rod | 30 | 35% | — |
| X | Frost Cavern Unknown Area 315 | Surf | 38 | 50% | — |
| X | Frost Cavern Unknown Area 315 | Surf | 39 | 15% | — |
| X | Frost Cavern Unknown Area 315 | Surf | 40 | 1% | — |
| X | Frost Cavern Unknown Area 315 | Super Rod | 40 | 60% | — |
| X | Kalos Route 14 Area | Good Rod | 35 | 35% | — |
| X | Kalos Route 14 Area | Super Rod | 35 | 60% | — |
| X | Kalos Route 15 Area | Good Rod | 25 | 35% | — |
| X | Kalos Route 15 Area | Super Rod | 35 | 60% | — |
| X | Kalos Route 16 Area | Good Rod | 25 | 35% | — |
| X | Kalos Route 16 Area | Super Rod | 35 | 60% | — |
| X | Kalos Route 19 Area | Good Rod | 35 | 35% | — |
| X | Kalos Route 19 Area | Super Rod | 45 | 60% | — |
| X | Kalos Route 21 Area | Good Rod | 40 | 35% | — |
| X | Kalos Route 21 Area | Super Rod | 50 | 60% | — |
| X | Kalos Victory Road Outside | Good Rod | 45 | 35% | — |
| X | Kalos Victory Road Outside | Super Rod | 55 | 60% | — |
| X | Kalos Victory Road Unknown Area 322 | Good Rod | 45 | 35% | — |
| X | Kalos Victory Road Unknown Area 322 | Super Rod | 55 | 60% | — |
| X | Kalos Victory Road Unknown Area 322 | Surf | 57 | 50% | — |
| X | Kalos Victory Road Unknown Area 322 | Surf | 58 | 15% | — |
| X | Kalos Victory Road Unknown Area 322 | Surf | 59 | 1% | — |
| X | Kalos Victory Road Unknown Area 328 | Good Rod | 45 | 35% | — |
| X | Kalos Victory Road Unknown Area 328 | Super Rod | 55 | 60% | — |
| X | Kalos Victory Road Unknown Area 328 | Surf | 57 | 50% | — |
| X | Kalos Victory Road Unknown Area 328 | Surf | 58 | 15% | — |
| X | Kalos Victory Road Unknown Area 328 | Surf | 59 | 1% | — |
| X | Laverre City Area | Good Rod | 25 | 35% | — |
| X | Laverre City Area | Super Rod | 35 | 60% | — |
| X | Pokemon Village Area | Good Rod | 40 | 35% | — |
| X | Pokemon Village Area | Surf | 48 | 30% | — |
| X | Pokemon Village Area | Surf | 50 | 4% | — |
| X | Pokemon Village Area | Super Rod | 50 | 60% | — |
| Y | Couriway Town Area | Good Rod | 35 | 35% | — |
| Y | Couriway Town Area | Super Rod | 45 | 60% | — |
| Y | Friend Safari Water | Walk | 30 | 33% | Friend Safari Slot 3 |
| Y | Frost Cavern Unknown Area 313 | Good Rod | 30 | 35% | — |
| Y | Frost Cavern Unknown Area 313 | Surf | 38 | 50% | — |
| Y | Frost Cavern Unknown Area 313 | Surf | 39 | 15% | — |
| Y | Frost Cavern Unknown Area 313 | Surf | 40 | 1% | — |
| Y | Frost Cavern Unknown Area 313 | Super Rod | 40 | 60% | — |
| Y | Frost Cavern Unknown Area 315 | Good Rod | 30 | 35% | — |
| Y | Frost Cavern Unknown Area 315 | Surf | 38 | 50% | — |
| Y | Frost Cavern Unknown Area 315 | Surf | 39 | 15% | — |
| Y | Frost Cavern Unknown Area 315 | Surf | 40 | 1% | — |
| Y | Frost Cavern Unknown Area 315 | Super Rod | 40 | 60% | — |
| Y | Kalos Route 14 Area | Good Rod | 35 | 35% | — |
| Y | Kalos Route 14 Area | Super Rod | 35 | 60% | — |
| Y | Kalos Route 15 Area | Good Rod | 25 | 35% | — |
| Y | Kalos Route 15 Area | Super Rod | 35 | 60% | — |
| Y | Kalos Route 16 Area | Good Rod | 25 | 35% | — |
| Y | Kalos Route 16 Area | Super Rod | 35 | 60% | — |
| Y | Kalos Route 19 Area | Good Rod | 35 | 35% | — |
| Y | Kalos Route 19 Area | Super Rod | 45 | 60% | — |
| Y | Kalos Route 21 Area | Good Rod | 40 | 35% | — |
| Y | Kalos Route 21 Area | Super Rod | 50 | 60% | — |
| Y | Kalos Victory Road Outside | Good Rod | 45 | 35% | — |
| Y | Kalos Victory Road Outside | Super Rod | 55 | 60% | — |
| Y | Kalos Victory Road Unknown Area 322 | Good Rod | 45 | 35% | — |
| Y | Kalos Victory Road Unknown Area 322 | Super Rod | 55 | 60% | — |
| Y | Kalos Victory Road Unknown Area 322 | Surf | 57 | 50% | — |
| Y | Kalos Victory Road Unknown Area 322 | Surf | 58 | 15% | — |
| Y | Kalos Victory Road Unknown Area 322 | Surf | 59 | 1% | — |
| Y | Kalos Victory Road Unknown Area 328 | Good Rod | 45 | 35% | — |
| Y | Kalos Victory Road Unknown Area 328 | Super Rod | 55 | 60% | — |
| Y | Kalos Victory Road Unknown Area 328 | Surf | 57 | 50% | — |
| Y | Kalos Victory Road Unknown Area 328 | Surf | 58 | 15% | — |
| Y | Kalos Victory Road Unknown Area 328 | Surf | 59 | 1% | — |
| Y | Laverre City Area | Good Rod | 25 | 35% | — |
| Y | Laverre City Area | Super Rod | 35 | 60% | — |
| Y | Pokemon Village Area | Good Rod | 40 | 35% | — |
| Y | Pokemon Village Area | Surf | 48 | 30% | — |
| Y | Pokemon Village Area | Surf | 50 | 4% | — |
| Y | Pokemon Village Area | Super Rod | 50 | 60% | — |
| Yellow | Kanto Route 22 Area | Super Rod | 15 | 10% | — |
| Yellow | Kanto Route 23 Area | Super Rod | 30 | 20% | — |
| Yellow | Kanto Route 23 Area | Super Rod | 40 | 10% | — |
No encounter records match these filters.
Poliwhirl Pokédex moves
The Poliwhirl Pokédex lists 128 moves below. Use the filters to narrow the list by move name, learning method, type or category. Move availability can differ between games and generations, so check the relevant game details when planning a specific moveset.
Poliwhirl move explorer
128 moves shown
| Level | Move | Type | Category | Power | Accuracy | PP | Method |
|---|---|---|---|---|---|---|---|
| 1 | Bubble | WATER | Special | 40 | 100 | 30 | Level Up |
| 1 | Hypnosis | PSYCHIC | Status | — | 60 | 20 | Level Up |
| 1 | Mud Shot | GROUND | Special | 55 | 95 | 15 | Level Up |
| 1 | Pound | NORMAL | Physical | 40 | 100 | 35 | Level Up |
| 1 | Water Gun | WATER | Special | 40 | 100 | 25 | Level Up |
| 1 | Water Sport | WATER | Status | — | — | 15 | Level Up |
| 15 | Double Slap | NORMAL | Physical | 15 | 85 | 10 | Level Up |
| 18 | Bubble Beam | WATER | Special | 65 | 100 | 20 | Level Up |
| 18 | Rain Dance | WATER | Status | — | — | 5 | Level Up |
| 21 | Body Slam | NORMAL | Physical | 85 | 100 | 15 | Level Up |
| 30 | Low Kick | FIGHTING | Physical | — | 100 | 20 | Level Up |
| 37 | Belly Drum | NORMAL | Status | — | — | 10 | Level Up |
| 40 | Earth Power | GROUND | Special | 90 | 100 | 10 | Level Up |
| 41 | Amnesia | PSYCHIC | Status | — | — | 20 | Level Up |
| 43 | Wake Up Slap | FIGHTING | Physical | 70 | 100 | 10 | Level Up |
| 48 | Hydro Pump | WATER | Special | 110 | 80 | 5 | Level Up |
| 53 | Mud Bomb | GROUND | Special | 65 | 85 | 10 | Level Up |
| 66 | Double Edge | NORMAL | Physical | 120 | 100 | 15 | Level Up |
| — | Amnesia | PSYCHIC | Status | — | — | 20 | Machine |
| — | Attract | NORMAL | Status | — | 100 | 15 | Machine |
| — | Bide | NORMAL | Physical | — | — | 10 | Machine |
| — | Blizzard | ICE | Special | 110 | 70 | 5 | Machine |
| — | Body Slam | NORMAL | Physical | 85 | 100 | 15 | Machine |
| — | Brick Break | FIGHTING | Physical | 75 | 100 | 15 | Machine |
| — | Bubble Beam | WATER | Special | 65 | 100 | 20 | Machine |
| — | Bulldoze | GROUND | Physical | 60 | 100 | 20 | Machine |
| — | Captivate | NORMAL | Status | — | 100 | 20 | Machine |
| — | Chilling Water | WATER | Special | 50 | 100 | 20 | Machine |
| — | Confide | NORMAL | Status | — | — | 20 | Machine |
| — | Counter | FIGHTING | Physical | — | 100 | 20 | Machine |
| — | Curse | GHOST | Status | — | — | 10 | Machine |
| — | Defense Curl | NORMAL | Status | — | — | 40 | Machine |
| — | Detect | FIGHTING | Status | — | — | 5 | Machine |
| — | Dig | GROUND | Physical | 80 | 100 | 10 | Machine |
| — | Dive | WATER | Physical | 80 | 100 | 10 | Machine |
| — | Double Edge | NORMAL | Physical | 120 | 100 | 15 | Machine |
| — | Double Team | NORMAL | Status | — | — | 15 | Machine |
| — | Earth Power | GROUND | Special | 90 | 100 | 10 | Machine |
| — | Earthquake | GROUND | Physical | 100 | 100 | 10 | Machine |
| — | Encore | NORMAL | Status | — | 100 | 5 | Machine |
| — | Endeavor | NORMAL | Physical | — | 100 | 5 | Machine |
| — | Endure | NORMAL | Status | — | — | 10 | Machine |
| — | Facade | NORMAL | Physical | 70 | 100 | 20 | Machine |
| — | Fissure | GROUND | Physical | — | 30 | 5 | Machine |
| — | Fling | DARK | Physical | — | 100 | 10 | Machine |
| — | Focus Punch | FIGHTING | Physical | 150 | 100 | 20 | Machine |
| — | Frustration | NORMAL | Physical | — | 100 | 20 | Machine |
| — | Hail | ICE | Status | — | — | 10 | Machine |
| — | Haze | ICE | Status | — | — | 30 | Machine |
| — | Headbutt | NORMAL | Physical | 70 | 100 | 15 | Machine |
| — | Helping Hand | NORMAL | Status | — | — | 20 | Machine |
| — | Hidden Power | NORMAL | Special | 60 | 100 | 15 | Machine |
| — | Hydro Pump | WATER | Special | 110 | 80 | 5 | Machine |
| — | Ice Beam | ICE | Special | 90 | 100 | 10 | Machine |
| — | Ice Punch | ICE | Physical | 75 | 100 | 15 | Machine |
| — | Icy Wind | ICE | Special | 55 | 95 | 15 | Machine |
| — | Liquidation | WATER | Physical | 85 | 100 | 10 | Machine |
| — | Low Kick | FIGHTING | Physical | — | 100 | 20 | Machine |
| — | Low Sweep | FIGHTING | Physical | 65 | 100 | 20 | Machine |
| — | Mega Kick | NORMAL | Physical | 120 | 75 | 5 | Machine |
| — | Mega Punch | NORMAL | Physical | 80 | 85 | 20 | Machine |
| — | Metronome | NORMAL | Status | — | — | 10 | Machine |
| — | Mimic | NORMAL | Status | — | — | 10 | Machine |
| — | Mud Shot | GROUND | Special | 55 | 95 | 15 | Machine |
| — | Mud Slap | GROUND | Special | 20 | 100 | 10 | Machine |
| — | Muddy Water | WATER | Special | 90 | 85 | 10 | Machine |
| — | Natural Gift | NORMAL | Physical | — | 100 | 15 | Machine |
| — | Power Up Punch | FIGHTING | Physical | 40 | 100 | 20 | Machine |
| — | Protect | NORMAL | Status | — | — | 10 | Machine |
| — | Psych Up | NORMAL | Status | — | — | 10 | Machine |
| — | Psychic | PSYCHIC | Special | 90 | 100 | 10 | Machine |
| — | Psywave | PSYCHIC | Special | — | 100 | 15 | Machine |
| — | Rage | NORMAL | Physical | 20 | 100 | 20 | Machine |
| — | Rain Dance | WATER | Status | — | — | 5 | Machine |
| — | Rest | PSYCHIC | Status | — | — | 5 | Machine |
| — | Return | NORMAL | Physical | — | 100 | 20 | Machine |
| — | Rock Smash | FIGHTING | Physical | 40 | 100 | 15 | Machine |
| — | Round | NORMAL | Special | 60 | 100 | 15 | Machine |
| — | Scald | WATER | Special | 80 | 100 | 15 | Machine |
| — | Secret Power | NORMAL | Physical | 70 | 100 | 20 | Machine |
| — | Seismic Toss | FIGHTING | Physical | — | 100 | 20 | Machine |
| — | Skull Bash | NORMAL | Physical | 130 | 100 | 10 | Machine |
| — | Sleep Talk | NORMAL | Status | — | — | 10 | Machine |
| — | Snore | NORMAL | Special | 50 | 100 | 15 | Machine |
| — | Strength | NORMAL | Physical | 80 | 100 | 15 | Machine |
| — | Submission | FIGHTING | Physical | 80 | 80 | 20 | Machine |
| — | Substitute | NORMAL | Status | — | — | 10 | Machine |
| — | Surf | WATER | Special | 90 | 100 | 15 | Machine |
| — | Swagger | NORMAL | Status | — | 85 | 15 | Machine |
| — | Swift | NORMAL | Special | 60 | — | 20 | Machine |
| — | Take Down | NORMAL | Physical | 90 | 85 | 20 | Machine |
| — | Tera Blast | NORMAL | Special | 80 | 100 | 10 | Machine |
| — | Thief | DARK | Physical | 60 | 100 | 25 | Machine |
| — | Toxic | POISON | Status | — | 90 | 10 | Machine |
| — | Water Gun | WATER | Special | 40 | 100 | 25 | Machine |
| — | Water Pulse | WATER | Special | 60 | 100 | 20 | Machine |
| — | Waterfall | WATER | Physical | 80 | 100 | 15 | Machine |
| — | Weather Ball | NORMAL | Special | 50 | 100 | 10 | Machine |
| — | Whirlpool | WATER | Special | 35 | 85 | 15 | Machine |
| — | Endeavor | NORMAL | Physical | — | 100 | 5 | Egg |
| — | Mist | ICE | Status | — | — | 30 | Egg |
| — | Muddy Water | WATER | Special | 90 | 85 | 10 | Egg |
| — | Splash | NORMAL | Status | — | — | 40 | Egg |
| — | Water Pulse | WATER | Special | 60 | 100 | 20 | Egg |
| — | Body Slam | NORMAL | Physical | 85 | 100 | 15 | Tutor |
| — | Counter | FIGHTING | Physical | — | 100 | 20 | Tutor |
| — | Defense Curl | NORMAL | Status | — | — | 40 | Tutor |
| — | Dive | WATER | Physical | 80 | 100 | 10 | Tutor |
| — | Double Edge | NORMAL | Physical | 120 | 100 | 15 | Tutor |
| — | Endeavor | NORMAL | Physical | — | 100 | 5 | Tutor |
| — | Endure | NORMAL | Status | — | — | 10 | Tutor |
| — | Focus Punch | FIGHTING | Physical | 150 | 100 | 20 | Tutor |
| — | Headbutt | NORMAL | Physical | 70 | 100 | 15 | Tutor |
| — | Helping Hand | NORMAL | Status | — | — | 20 | Tutor |
| — | Ice Beam | ICE | Special | 90 | 100 | 10 | Tutor |
| — | Ice Punch | ICE | Physical | 75 | 100 | 15 | Tutor |
| — | Icy Wind | ICE | Special | 55 | 95 | 15 | Tutor |
| — | Mega Kick | NORMAL | Physical | 120 | 75 | 5 | Tutor |
| — | Mega Punch | NORMAL | Physical | 80 | 85 | 20 | Tutor |
| — | Metronome | NORMAL | Status | — | — | 10 | Tutor |
| — | Mimic | NORMAL | Status | — | — | 10 | Tutor |
| — | Mud Slap | GROUND | Special | 20 | 100 | 10 | Tutor |
| — | Seismic Toss | FIGHTING | Physical | — | 100 | 20 | Tutor |
| — | Sleep Talk | NORMAL | Status | — | — | 10 | Tutor |
| — | Snore | NORMAL | Special | 50 | 100 | 15 | Tutor |
| — | Substitute | NORMAL | Status | — | — | 10 | Tutor |
| — | Swagger | NORMAL | Status | — | 85 | 15 | Tutor |
| — | Water Pulse | WATER | Special | 60 | 100 | 20 | Tutor |
No moves match these filters.
Poliwhirl Pokédex entries
The Poliwhirl Pokédex entries below let you compare how Poliwhirl has been described across different Pokémon games. Pokédex wording often changes between versions, so reading the entries together is a useful way to see how its description has evolved across the series.
Poliwhirl Pokédex entries
Capable of living in or out of water. When out of water, it sweats to keep its body slimy.
Capable of living in or out of water. When out of water, it sweats to keep its body slimy.
Under attack, it uses its belly spiral to put the foe to sleep. It then makes its escape.
The swirl on its belly subtly un dulates. Staring at it may gradual ly cause drowsi ness.
The skin on most of its body is moist. However, the skin on its belly spiral feels smooth.
Though it is skilled at walk ing, it prefers to live underwater where there is less danger.
The surface of POLIWHIRL’s body is always wet and slick with an oily fluid. Because of this greasy covering, it can easily slip and slide out of the clutches of any enemy in battle.
The surface of POLIWHIRL’s body is always wet and slick with an oily fluid. Because of this greasy covering, it can easily slip and slide out of the clutches of any enemy in battle.
Its body surface is always wet and slick with an oily fluid. Because of this greasy covering, it can easily slip and slide out of the clutches of any enemy in battle.
Its two legs are well developed. Even though it can live on the ground, it prefers living in water.
It can live in or out of water. When out of water, it constantly sweats to keep its body slimy.
The spiral pattern on its belly subtly undulates. Staring at it gradually causes drowsiness.
The spiral pattern on its belly subtly undulates. Staring at it gradually causes drowsiness.
The spiral pattern on its belly subtly undulates. Staring at it gradually causes drowsiness.
The swirl on its belly subtly undulates. Staring at it may gradually cause drowsiness.
The skin on most of its body is moist. However, the skin on its belly spiral feels smooth.
The spiral pattern on its belly subtly undulates. Staring at it gradually causes drowsiness.
The spiral pattern on its belly subtly undulates. Staring at it gradually causes drowsiness.
The spiral pattern on its belly subtly undulates. Staring at it gradually causes drowsiness.
The spiral pattern on its belly subtly undulates. Staring at it gradually causes drowsiness.
It can live in or out of water. When out of water, it constantly sweats to keep its body slimy.
Its two legs are well developed. Even though it can live on the ground, it prefers living in water.
The surface of Poliwhirl’s body is always wet and slick with a slimy fluid. Because of this slippery covering, it can easily slip and slide out of the clutches of any enemy in battle.
The surface of Poliwhirl’s body is always wet and slick with a slimy fluid. Because of this slippery covering, it can easily slip and slide out of the clutches of any enemy in battle.
Although it can live on land, it prefers to stay in the water, where it has fewer natural enemies.
It marches over the land in search of bug Pokémon to eat. Then it takes them underwater so it can dine on them where it’s safe.
Although it has become capable of living on land, it spends its time in the water, where its prey, fish Pokémon, are plentiful.
Its health suffers when its skin dries out, so be sure to moisturize it diligently.
Under attack, it uses its belly spiral to put the foe to sleep. It then makes its escape.
Under attack, it uses its belly spiral to put the foe to sleep. It then makes its escape.
Staring at the swirl on its belly causes drowsiness. This trait of Poliwhirl’s has been used in place of lullabies to get children to go to sleep.
This Pokémon’s sweat is a slimy mucus. When captured, Poliwhirl can slither from its enemies’ grasp and escape.
Browse the Pokémon Pokédex to explore more species, or visit Pokémon.com for official Pokémon news and franchise information.
More Pokémon like Poliwhirl


More Poliwhirl guides on The Click