A Terraria pre-Hardmode checklist is useful because beating Wall of Flesh changes your world for good. There’s nothing wrong with heading straight into the fight, but it’s a lot nicer to start Hardmode with useful equipment, a safe home and a way to get around when the enemies become stronger.
You don’t need to finish every boss, collect every weapon or completely rebuild the map. Think of this as the preparation that saves you a headache afterwards, alongside a few optional detours that are worth considering if you enjoy exploring before the world gets tougher.
Terraria pre-Hardmode checklist: what should be ready?
The essentials are fairly simple: a decent weapon for Wall of Flesh, movement accessories, a long bridge across the Underworld, healing supplies and a functioning base. If you already have those, you’re probably closer to ready than you think. Everything else below is about making the change less frustrating, not satisfying a hidden requirement.
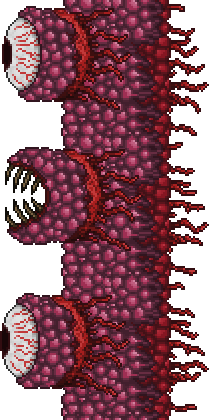
The big world change happens the first time Wall of Flesh dies. New Hallow and Corruption or Crimson stripes appear, more difficult enemies arrive and the spread of those biomes becomes a bigger concern. You don’t have to stop that initial change from happening; the practical goal is to avoid leaving all your important belongings and NPCs in a mess.
Terraria pre-Hardmode checklist: get a Molten Pickaxe
One of the most useful things on a Terraria pre-Hardmode checklist is a Molten Pickaxe. It lets you mine the first Hardmode ore tier, Cobalt or Palladium, as soon as you’ve generated it. You craft the Molten Pickaxe from 20 Hellstone Bars at an Iron or Lead Anvil. Hellstone Bars are made at a Hellforge with Hellstone and Obsidian.
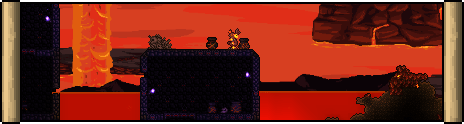
You can collect Hellstone in the Underworld before Wall of Flesh. An Obsidian Skin Potion makes mining near lava much less stressful, and you may want a safe route through the ash and ruined houses. Don’t feel you have to make every piece of Molten gear, but having the pickaxe ready means you won’t spend your first Hardmode day trying to fix an avoidable mining bottleneck.
Make sure your NPC housing and important routes work
It’s worth checking your base before you summon the Wall. Have enough suitable houses for the NPCs you already use and any new ones you may unlock. Make sure you’ve got a reliable way to reach the Underworld, the Jungle and your evil biome, whether that’s a long shaft, a Minecart track, Teleporters or a Pylon network.
The Terraria pre-Hardmode checklist doesn’t require a complete network of underground barriers. The initial diagonal Hardmode stripes can pass through places you previously cleared, so no early trench can guarantee that every town will stay untouched. Protecting an important house or making room to move it later is sensible; trying to cleanse an entire world before Hardmode usually isn’t.
Do you need to defeat Skeletron and Queen Bee first?
No, and that matters. Wall of Flesh is the boss that triggers Hardmode. You don’t have to kill King Slime, Queen Bee, Deerclops or even Skeletron to make that happen. But beating Skeletron opens the Dungeon for exploration, while Queen Bee can provide Beenades and other equipment that’s helpful against Wall of Flesh.
If you enjoy taking your time, exploring the Dungeon and the Underground Jungle before moving on gives you more options. If you’re already comfortable with your weapons and want the challenge, skip those optional fights for now. You can return to earlier bosses after Hardmode begins, although the surrounding enemies may be considerably nastier.
Terraria pre-Hardmode checklist: accessories and supplies
Before you descend, use your Terraria pre-Hardmode checklist to see whether you can upgrade your running boots, hook or jump accessory. The Goblin Tinkerer is useful if you’ve rescued him after a Goblin Army, since his reforging and Tinkerer’s Workshop can improve accessories. None of that is an automatic requirement, but mobility makes the Wall of Flesh fight much easier to manage.
Stock your potion chest with healing potions and useful buffs. Food, Ironskin, Regeneration and Swiftness are all straightforward options if you can make them. Keep some coins safely stored at home before exploring dangerous Hardmode caves. There’s no point risking your entire savings while you learn how strong the new enemies are.
Build the Wall of Flesh bridge before the summon
The Wall of Flesh battle takes place across the Underworld. Clear a long horizontal path, place wooden platforms over lava where necessary, and remove ash hills or buildings that will stop you running. The exact bridge length depends on how much damage you can deal while moving, so making it longer than you expect to need is a safe choice.
Bring enough ammunition or mana supplies to keep attacking while you retreat. Keep a Guide Voodoo Doll ready, but don’t let it fall into lava early. Killing a Voodoo Demon above an open lava pool can accidentally summon the boss, and the last thing you want is an unexpected fight while you’re still building.
What can you skip from the Terraria pre-Hardmode checklist?
You can leave optional bosses unfinished, skip collection achievements, save big building projects for later and come back for items you missed. A full set of every pre-Hardmode armour type isn’t necessary. You also don’t have to purify the entire world before Wall of Flesh, since Hardmode creates its own new biome stripes when it begins.
The most useful Terraria pre-Hardmode checklist is one that leaves you ready for the immediate change. Good movement, a working base, the Molten Pickaxe and a reliable Wall of Flesh arena make a much bigger difference than dozens of unfinished side projects.
What happens after you beat Wall of Flesh?
Once you’re ready, summon and defeat Wall of Flesh. You’ll get the Pwnhammer and your world will move into Hardmode permanently. From there you can smash Demon or Crimson Altars to generate new ore, upgrade your pickaxe and armour, and start preparing for the mechanical bosses.
You don’t need to rush. Finish whatever matters to you before the fight, but don’t let a Terraria pre-Hardmode checklist make the entire game feel like a compulsory set of chores. If your bridge is built and you’ve got a fighting chance, you’re ready to find out what Hardmode has in store.
Official developer: Re-Logic’s Terraria development updates.