Psyduck Pokédex: Stats, Weaknesses, Evolution and Moves
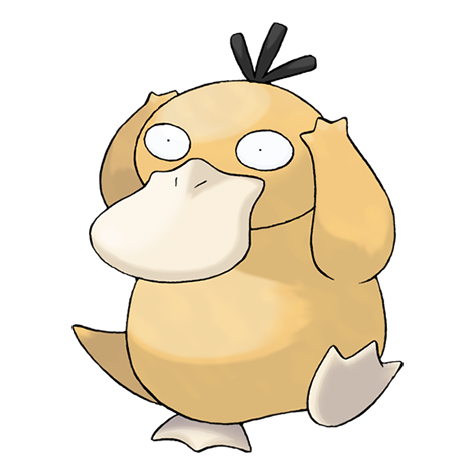
Psyduck
Duck Pokémon
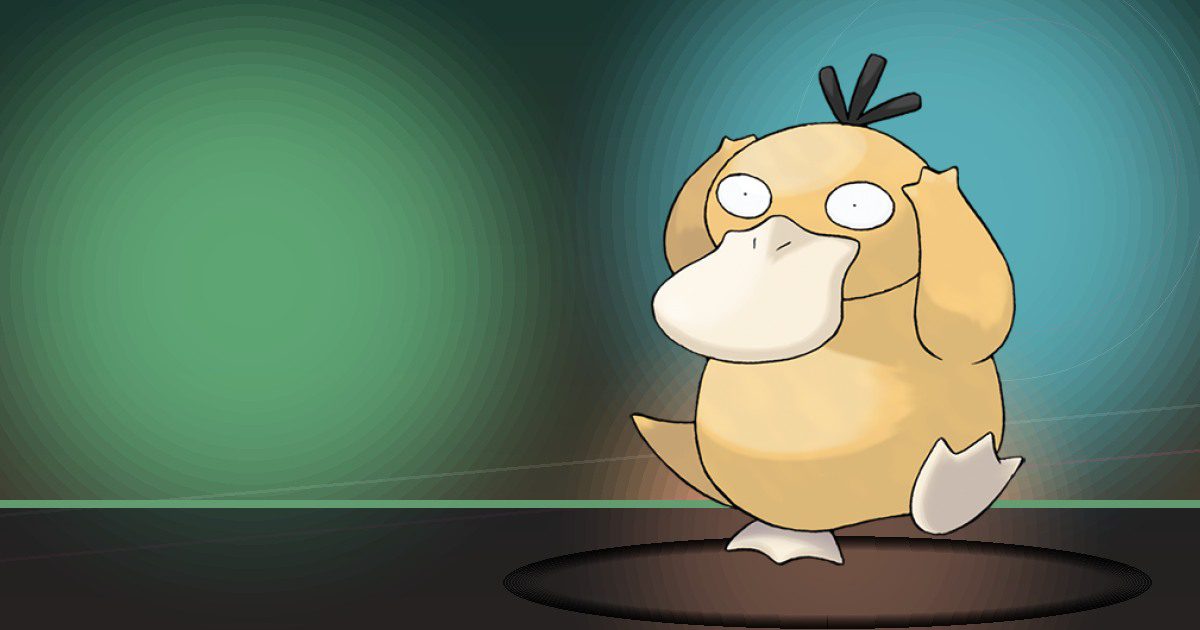
Psyduck is constantly beset by headaches. If the Pokémon lets its strange power erupt, apparently the pain subsides for a while.
Psyduck Pokédex brings together the essential information for Psyduck, including its typing, weaknesses, base stats, abilities, evolution line, forms, Pokédex entries and appearances across Pokémon games. Psyduck is National Pokédex #54 and was introduced in Generation I. It is a Water-type Pokémon.
This Psyduck Pokédex covers Psyduck across the Pokémon series rather than focusing on one game. You can use it to check core stats, weaknesses, evolution, forms, moves, locations and game appearances, then follow the related guides for more detailed game-specific help. Psyduck is constantly beset by headaches. If the Pokémon lets its strange power erupt, apparently the pain subsides for a while.
Psyduck at a glance
- Type
- WATER
- Weak to
- ELECTRIC2×GRASS2×
- Best base stat
- Special Attack — 65
- Abilities
- Damp, Cloud Nine, Swift Swim (Hidden)
- Next evolution
- Golduck — Level 33
Psyduck Pokédex overview
Psyduck has the Water typing, it belongs to Generation I, its Pokédex classification is the Duck Pokémon. Psyduck is constantly beset by headaches. If the Pokémon lets its strange power erupt, apparently the pain subsides for a while. The quick facts below bring together the key measurements and species details, while the rest of the Psyduck Pokédex breaks down its battle strengths, evolution, forms and appearances in more detail.
Psyduck quick facts
- Height
- 0.8 m
- Weight
- 19.6 kg
- Generation
- Generation I
- Growth rate
- Medium
- Capture rate
- 190
- Base happiness
- 70
Psyduck Pokédex type and weaknesses
Psyduck is weak to Electric and Grass. It resists Fire, Water, Ice and Steel. These matchups come from Psyduck's typing, making this a quick way to check which attacking types are super effective against Psyduck and which types it can resist more comfortably.
Psyduck type effectiveness
Damage taken when Psyduck is hit by each type:
Weak to
Resists
Based on Water typing. Abilities may modify these matchups.
Psyduck Pokédex stats
Psyduck has a base stat total of 320, with Special Attack as its highest listed base stat at 65. In the Psyduck Pokédex, base stats are useful for comparing natural strengths before a particular game layers on level, training, moves, abilities or battle formats. The bars below show the six standard stats side by side, making it easier to see where Psyduck is naturally strongest and where its lower base values sit.
Psyduck Pokédex abilities
Psyduck can have Damp, Cloud Nine and Swift Swim as its Hidden Ability. Abilities can significantly change how Psyduck functions in battle, so they are worth considering alongside its typing and base stats. Any Hidden Ability is identified separately below.
Psyduck abilities
Damp
Prevents Self-Destruct, Explosion, and Aftermath from working while the Pokémon is in battle.
Cloud Nine
Negates all effects of weather, but does not prevent the weather itself.
Swift Swim Hidden
Doubles Speed during rain.
Psyduck Pokédex evolution
Psyduck evolves into Golduck (Level 33). The evolution section shows the family together and includes evolution requirements where they apply, making it easy to see how each stage connects. Each Pokémon in the family can also be opened in its own Pokédex guide.
Psyduck evolution family


Psyduck evolution requirements
Evolves into
Golduck
Level 33
Psyduck Pokédex forms and shiny appearance
Psyduck has 1 form shown on this Psyduck Pokédex page. Alternate forms are grouped together so you can compare them in one place, while the artwork switcher lets you view the standard and shiny appearance when shiny artwork is available.

Psyduck Pokédex game appearances
Psyduck appears in 32 Pokémon titles, including Alpha Sapphire, Black, Black 2, Blue, Crystal and Diamond. Availability differs between games, so the list below separates each title and makes it easier to see where Psyduck appears without assuming the same method or location applies everywhere.
Psyduck game availability
This uses imported PokéAPI encounter and game-index records. It does not guarantee current transfer, DLC or event availability.
Where can you find Psyduck?
The locations below show where Psyduck can be found across Pokémon games, including the encounter method, level range and encounter chance where available. Use the filters to narrow the list to a particular game and find the location information you need.
Psyduck encounter locations
| Game | Location | Method | Level | Chance | Conditions |
|---|---|---|---|---|---|
| Alpha Sapphire | Hoenn Safari Zone Neacro Bike Area | Horde | 15 | 5% | — |
| Alpha Sapphire | Hoenn Safari Zone Nwmach Bike Area | Horde | 15 | 5% | — |
| Alpha Sapphire | Hoenn Safari Zone Se | Horde | 15 | 5% | — |
| Alpha Sapphire | Hoenn Safari Zone Sw | Horde | 15 | 5% | — |
| Black 2 | Floccesy Ranch Inner | Walk | 5 | 10% | — |
| Blue | Cerulean City Area | Super Rod | 15 | 25% | — |
| Blue | Kanto Route 24 Area | Super Rod | 15 | 25% | — |
| Blue | Kanto Route 25 Area | Super Rod | 15 | 25% | — |
| Blue | Kanto Safari Zone Area 1 East | Super Rod | 15 | 17% | — |
| Blue | Kanto Safari Zone Area 2 North | Super Rod | 15 | 17% | — |
| Blue | Kanto Safari Zone Area 3 West | Super Rod | 15 | 17% | — |
| Blue | Kanto Safari Zone ♂iddle | Super Rod | 15 | 17% | — |
| Blue | Seafoam Islands 1f | Walk | 30 | 20% | — |
| Blue | Seafoam Islands B1f | Walk | 28 | 10% | — |
| Blue | Seafoam Islands B1f | Walk | 30 | 5% | — |
| Blue | Seafoam Islands B2f | Walk | 30 | 20% | — |
| Blue | Seafoam Islands B2f | Walk | 32 | 10% | — |
| Blue | Seafoam Islands B3f | Walk | 31 | 20% | — |
| Blue | Seafoam Islands B3f | Walk | 33 | 15% | — |
| Blue | Seafoam Islands B4f | Walk | 29 | 10% | — |
| Blue | Seafoam Islands B4f | Walk | 31 | 5% | — |
| Crystal | Ilex ♀orest Area | Walk | 7 | 10% | Time Night |
| Crystal | Ilex ♀orest Area | Surf | 10–14 | 30% | — |
| Crystal | Ilex ♀orest Area | Surf | 15–19 | 60% | — |
| Crystal | Johto Route 35 Area | Surf | 15–19 | 30% | — |
| Crystal | Johto Route 35 Area | Surf | 20–24 | 60% | — |
| Crystal | Kanto Route 6 Area | Surf | 5–9 | 30% | — |
| Crystal | Kanto Route 6 Area | Surf | 10–14 | 60% | — |
| Crystal | Kanto Route 6 Area | Walk | 15 | 10% | Time Night |
| Crystal | National Park Area | Walk | 12 | 30% | Time Night |
| Diamond | Celestic Town Area | Surf | 20–30 | 60% | — |
| Diamond | Celestic Town Area | Surf | 20–40 | 30% | — |
| Diamond | Eterna City Area | Surf | 20–30 | 60% | — |
| Diamond | Eterna City Area | Surf | 20–40 | 30% | — |
| Diamond | Great ♂arsh Area 1 | Surf | 20–40 | 4% | — |
| Diamond | Great ♂arsh Area 1 | Walk | 24 | 4% | Slot2 None |
| Diamond | Great ♂arsh Area 1 | Walk | 24 | 4% | Slot2 Ruby |
| Diamond | Great ♂arsh Area 1 | Walk | 24 | 4% | Slot2 Sapphire |
| Diamond | Great ♂arsh Area 1 | Walk | 24 | 4% | Slot2 Emerald |
| Diamond | Great ♂arsh Area 1 | Walk | 24 | 4% | Slot2 Leafgreen |
| Diamond | Great ♂arsh Area 1 | Walk | 26 | 4% | Slot2 None |
| Diamond | Great ♂arsh Area 1 | Walk | 26 | 4% | Slot2 Ruby |
| Diamond | Great ♂arsh Area 1 | Walk | 26 | 4% | Slot2 Sapphire |
| Diamond | Great ♂arsh Area 1 | Walk | 26 | 4% | Slot2 Emerald |
| Diamond | Great ♂arsh Area 1 | Walk | 26 | 4% | Slot2 Leafgreen |
| Diamond | Great ♂arsh Area 2 | Surf | 20–40 | 4% | — |
| Diamond | Great ♂arsh Area 2 | Walk | 24 | 4% | Slot2 None |
| Diamond | Great ♂arsh Area 2 | Walk | 24 | 4% | Slot2 Ruby |
| Diamond | Great ♂arsh Area 2 | Walk | 24 | 4% | Slot2 Sapphire |
| Diamond | Great ♂arsh Area 2 | Walk | 24 | 4% | Slot2 Emerald |
| Diamond | Great ♂arsh Area 2 | Walk | 24 | 4% | Slot2 Leafgreen |
| Diamond | Great ♂arsh Area 2 | Walk | 26 | 4% | Slot2 None |
| Diamond | Great ♂arsh Area 2 | Walk | 26 | 4% | Slot2 Ruby |
| Diamond | Great ♂arsh Area 2 | Walk | 26 | 4% | Slot2 Sapphire |
| Diamond | Great ♂arsh Area 2 | Walk | 26 | 4% | Slot2 Emerald |
| Diamond | Great ♂arsh Area 2 | Walk | 26 | 4% | Slot2 Leafgreen |
| Diamond | Great ♂arsh Area 3 | Surf | 20–40 | 4% | — |
| Diamond | Great ♂arsh Area 3 | Walk | 22 | 4% | Slot2 None |
| Diamond | Great ♂arsh Area 3 | Walk | 22 | 4% | Slot2 Ruby |
| Diamond | Great ♂arsh Area 3 | Walk | 22 | 4% | Slot2 Sapphire |
| Diamond | Great ♂arsh Area 3 | Walk | 22 | 4% | Slot2 Emerald |
| Diamond | Great ♂arsh Area 3 | Walk | 22 | 4% | Slot2 Leafgreen |
| Diamond | Great ♂arsh Area 3 | Walk | 24 | 4% | Slot2 None |
| Diamond | Great ♂arsh Area 3 | Walk | 24 | 4% | Slot2 Ruby |
| Diamond | Great ♂arsh Area 3 | Walk | 24 | 4% | Slot2 Sapphire |
| Diamond | Great ♂arsh Area 3 | Walk | 24 | 4% | Slot2 Emerald |
| Diamond | Great ♂arsh Area 3 | Walk | 24 | 4% | Slot2 Leafgreen |
| Diamond | Great ♂arsh Area 4 | Surf | 20–40 | 4% | — |
| Diamond | Great ♂arsh Area 4 | Walk | 22 | 4% | Slot2 None |
| Diamond | Great ♂arsh Area 4 | Walk | 22 | 4% | Slot2 Ruby |
| Diamond | Great ♂arsh Area 4 | Walk | 22 | 4% | Slot2 Sapphire |
| Diamond | Great ♂arsh Area 4 | Walk | 22 | 4% | Slot2 Emerald |
| Diamond | Great ♂arsh Area 4 | Walk | 22 | 4% | Slot2 Leafgreen |
| Diamond | Great ♂arsh Area 4 | Walk | 24 | 4% | Slot2 None |
| Diamond | Great ♂arsh Area 4 | Walk | 24 | 4% | Slot2 Ruby |
| Diamond | Great ♂arsh Area 4 | Walk | 24 | 4% | Slot2 Sapphire |
| Diamond | Great ♂arsh Area 4 | Walk | 24 | 4% | Slot2 Emerald |
| Diamond | Great ♂arsh Area 4 | Walk | 24 | 4% | Slot2 Leafgreen |
| Diamond | Great ♂arsh Area 6 | Walk | 20 | 4% | Slot2 None |
| Diamond | Great ♂arsh Area 6 | Walk | 20 | 4% | Slot2 Ruby |
| Diamond | Great ♂arsh Area 6 | Walk | 20 | 4% | Slot2 Sapphire |
| Diamond | Great ♂arsh Area 6 | Walk | 20 | 4% | Slot2 Emerald |
| Diamond | Great ♂arsh Area 6 | Walk | 20 | 4% | Slot2 Leafgreen |
| Diamond | Great ♂arsh Area 6 | Surf | 20–40 | 4% | — |
| Diamond | Great ♂arsh Area 6 | Walk | 22 | 4% | Slot2 None |
| Diamond | Great ♂arsh Area 6 | Walk | 22 | 4% | Slot2 Ruby |
| Diamond | Great ♂arsh Area 6 | Walk | 22 | 4% | Slot2 Sapphire |
| Diamond | Great ♂arsh Area 6 | Walk | 22 | 4% | Slot2 Emerald |
| Diamond | Great ♂arsh Area 6 | Walk | 22 | 4% | Slot2 Leafgreen |
| Diamond | Lake Acuity Area | Surf | 20–30 | 60% | — |
| Diamond | Lake Acuity Area | Surf | 20–40 | 30% | — |
| Diamond | Lake Acuity Area | Walk | 34 | 10% | Radar Off |
| Diamond | Lake Acuity Area | Walk | 35 | 10% | Radar Off |
| Diamond | Lake Acuity Area | Walk | 36 | 10% | Time ♂orning |
| Diamond | Lake Acuity Area | Walk | 36 | 10% | Time Day |
| Diamond | Lake Valor Area | Surf | 20–30 | 60% | — |
| Diamond | Lake Valor Area | Surf | 20–40 | 30% | — |
| Diamond | Lake Valor Area | Walk | 35 | 10% | Radar Off |
| Diamond | Lake Valor Area | Walk | 36 | 10% | Radar Off |
| Diamond | Lake Verity After Galactic Intervention | Surf | 20–30 | 60% | — |
| Diamond | Lake Verity After Galactic Intervention | Surf | 20–40 | 30% | — |
| Diamond | Lake Verity Before Galactic Intervention | Surf | 20–30 | 60% | — |
| Diamond | Lake Verity Before Galactic Intervention | Surf | 20–40 | 30% | — |
| Diamond | Oreburgh Gate B1f | Walk | 8 | 10% | — |
| Diamond | Oreburgh Gate B1f | Walk | 9 | 10% | — |
| Diamond | Oreburgh Gate B1f | Walk | 10 | 5% | — |
| Diamond | Oreburgh Gate B1f | Surf | 20–30 | 30% | — |
| Diamond | Ravaged Path Area | Walk | 5 | 1% | — |
| Diamond | Ravaged Path Area | Surf | 20–30 | 30% | — |
| Diamond | Sinnoh Route 203 Area | Surf | 20–30 | 60% | — |
| Diamond | Sinnoh Route 203 Area | Surf | 20–40 | 30% | — |
| Diamond | Sinnoh Route 204 North Towards ♀loaroma Town | Surf | 20–30 | 60% | — |
| Diamond | Sinnoh Route 204 North Towards ♀loaroma Town | Surf | 20–40 | 30% | — |
| Diamond | Sinnoh Route 204 South Towards Jubilife City | Surf | 20–30 | 60% | — |
| Diamond | Sinnoh Route 204 South Towards Jubilife City | Surf | 20–40 | 30% | — |
| Diamond | Sinnoh Route 205 East Towards Eterna City | Surf | 20–30 | 60% | — |
| Diamond | Sinnoh Route 205 East Towards Eterna City | Surf | 20–40 | 30% | — |
| Diamond | Sinnoh Route 208 Area | Walk | 16 | 20% | Swarm No |
| Diamond | Sinnoh Route 208 Area | Walk | 17 | 5% | — |
| Diamond | Sinnoh Route 208 Area | Walk | 18 | 4% | Slot2 None |
| Diamond | Sinnoh Route 208 Area | Walk | 18 | 4% | Slot2 Emerald |
| Diamond | Sinnoh Route 208 Area | Walk | 18 | 4% | Slot2 ♀irered |
| Diamond | Sinnoh Route 208 Area | Walk | 18 | 4% | Slot2 Leafgreen |
| Diamond | Sinnoh Route 208 Area | Walk | 18 | 1% | Radar Off |
| Diamond | Sinnoh Route 208 Area | Surf | 20–30 | 60% | — |
| Diamond | Sinnoh Route 208 Area | Surf | 20–40 | 30% | — |
| Diamond | Sinnoh Route 209 Area | Surf | 20–30 | 60% | — |
| Diamond | Sinnoh Route 209 Area | Surf | 20–40 | 30% | — |
| Diamond | Sinnoh Route 210 West Towards Celestic Town | Surf | 20–30 | 60% | — |
| Diamond | Sinnoh Route 210 West Towards Celestic Town | Surf | 20–40 | 30% | — |
| Diamond | Sinnoh Route 210 West Towards Celestic Town | Walk | 25 | 20% | — |
| Diamond | Sinnoh Route 212 North Towards Hearthome City | Surf | 20–30 | 60% | — |
| Diamond | Sinnoh Route 212 North Towards Hearthome City | Surf | 20–40 | 30% | — |
| Diamond | Sinnoh Route 214 Area | Surf | 20–30 | 60% | — |
| Diamond | Sinnoh Route 214 Area | Surf | 20–40 | 30% | — |
| Diamond | Twinleaf Town Area | Surf | 20–30 | 60% | — |
| Diamond | Twinleaf Town Area | Surf | 20–40 | 30% | — |
| Emerald | Hoenn Safari Zone Nwmach Bike Area | Surf | 20–30 | 60% | — |
| Emerald | Hoenn Safari Zone Nwmach Bike Area | Surf | 30–35 | 5% | — |
| Emerald | Hoenn Safari Zone Sw | Surf | 20–30 | 60% | — |
| Emerald | Hoenn Safari Zone Sw | Surf | 30–35 | 5% | — |
| Firered | Berry ♀orest Area | Surf | 5–20 | 60% | — |
| Firered | Berry ♀orest Area | Super Rod | 15–25 | 4% | — |
| Firered | Berry ♀orest Area | Surf | 20–35 | 30% | — |
| Firered | Berry ♀orest Area | Super Rod | 25–35 | 1% | — |
| Firered | Berry ♀orest Area | Walk | 31 | 5% | — |
| Firered | Berry ♀orest Area | Surf | 35–40 | 5% | — |
| Firered | Bond Bridge Area | Super Rod | 25–35 | 1% | — |
| Firered | Bond Bridge Area | Walk | 31 | 5% | — |
| Firered | Canyon Entrance Area | Walk | 41 | 5% | — |
| Firered | Cape Brink Area | Surf | 5–20 | 60% | — |
| Firered | Cape Brink Area | Super Rod | 15–25 | 4% | — |
| Firered | Cape Brink Area | Surf | 20–35 | 30% | — |
| Firered | Cape Brink Area | Super Rod | 25–35 | 1% | — |
| Firered | Cape Brink Area | Walk | 31 | 5% | — |
| Firered | Cape Brink Area | Surf | 35–40 | 5% | — |
| Firered | Celadon City Area | Surf | 5–10 | 60% | — |
| Firered | Celadon City Area | Surf | 10–20 | 30% | — |
| Firered | Celadon City Area | Surf | 20–30 | 5% | — |
| Firered | Celadon City Area | Surf | 30–40 | 4% | — |
| Firered | Cerulean Cave 1f | Super Rod | 15–25 | 4% | — |
| Firered | Cerulean Cave 1f | Super Rod | 25–35 | 1% | — |
| Firered | Cerulean Cave 1f | Surf | 30–40 | 60% | — |
| Firered | Cerulean Cave 1f | Surf | 40–50 | 4% | — |
| Firered | Cerulean Cave B1f | Super Rod | 15–25 | 4% | — |
| Firered | Cerulean Cave B1f | Surf | 40–50 | 60% | — |
| Firered | Cerulean Cave B1f | Surf | 50–60 | 4% | — |
| Firered | Cerulean City Area | Super Rod | 25–35 | 1% | — |
| Firered | Cinnabar Island Area | Super Rod | 25–35 | 1% | — |
| Firered | Five Island Area | Super Rod | 25–35 | 1% | — |
| Firered | Five Isle ♂eadow Area | Super Rod | 25–35 | 1% | — |
| Firered | Five Isle ♂eadow Area | Walk | 41 | 5% | — |
| Firered | Four Island Area | Surf | 5–35 | 30% | — |
| Firered | Four Island Area | Super Rod | 15–25 | 4% | — |
| Firered | Four Island Area | Super Rod | 25–35 | 1% | — |
| Firered | Fuchsia City Area | Super Rod | 15–25 | 4% | — |
| Firered | Fuchsia City Area | Surf | 20–25 | 60% | — |
| Firered | Fuchsia City Area | Super Rod | 25–35 | 1% | — |
| Firered | Fuchsia City Area | Surf | 25–30 | 5% | — |
| Firered | Fuchsia City Area | Surf | 30–35 | 4% | — |
| Firered | Fuchsia City Area | Surf | 35–40 | 1% | — |
| Firered | Green Path Area | Super Rod | 25–35 | 1% | — |
| Firered | Icefall Cave Entrance | Surf | 5–35 | 30% | — |
| Firered | Icefall Cave Entrance | Super Rod | 15–25 | 4% | — |
| Firered | Icefall Cave Entrance | Super Rod | 25–35 | 1% | — |
| Firered | Icefall Cave Entrance | Walk | 41 | 5% | — |
| Firered | Icefall Cave Waterfall | Super Rod | 25–35 | 1% | — |
| Firered | Icefall Cave Waterfall | Walk | 41 | 5% | — |
| Firered | Kanto Route 10 Area | Super Rod | 25–35 | 1% | — |
| Firered | Kanto Route 11 Area | Super Rod | 25–35 | 1% | — |
| Firered | Kanto Route 12 Area | Super Rod | 25–35 | 1% | — |
| Firered | Kanto Route 13 Area | Super Rod | 25–35 | 1% | — |
| Firered | Kanto Route 22 Area | Super Rod | 15–25 | 4% | — |
| Firered | Kanto Route 22 Area | Surf | 20–25 | 60% | — |
| Firered | Kanto Route 22 Area | Super Rod | 25–35 | 1% | — |
| Firered | Kanto Route 22 Area | Surf | 25–30 | 5% | — |
| Firered | Kanto Route 22 Area | Surf | 30–35 | 4% | — |
| Firered | Kanto Route 22 Area | Surf | 35–40 | 1% | — |
| Firered | Kanto Route 23 Area | Super Rod | 15–25 | 4% | — |
| Firered | Kanto Route 23 Area | Surf | 20–25 | 60% | — |
| Firered | Kanto Route 23 Area | Super Rod | 25–35 | 1% | — |
| Firered | Kanto Route 23 Area | Surf | 25–30 | 5% | — |
| Firered | Kanto Route 23 Area | Surf | 30–35 | 4% | — |
| Firered | Kanto Route 23 Area | Surf | 35–40 | 1% | — |
| Firered | Kanto Route 24 Area | Super Rod | 25–35 | 1% | — |
| Firered | Kanto Route 25 Area | Super Rod | 15–25 | 4% | — |
| Firered | Kanto Route 25 Area | Surf | 20–25 | 60% | — |
| Firered | Kanto Route 25 Area | Super Rod | 25–35 | 1% | — |
| Firered | Kanto Route 25 Area | Surf | 25–30 | 5% | — |
| Firered | Kanto Route 25 Area | Surf | 30–35 | 4% | — |
| Firered | Kanto Route 25 Area | Surf | 35–40 | 1% | — |
| Firered | Kanto Route 4 Area | Super Rod | 25–35 | 1% | — |
| Firered | Kanto Route 6 Area | Super Rod | 15–25 | 4% | — |
| Firered | Kanto Route 6 Area | Surf | 20–25 | 60% | — |
| Firered | Kanto Route 6 Area | Super Rod | 25–35 | 1% | — |
| Firered | Kanto Route 6 Area | Surf | 25–30 | 5% | — |
| Firered | Kanto Route 6 Area | Surf | 30–35 | 4% | — |
| Firered | Kanto Route 6 Area | Surf | 35–40 | 1% | — |
| Firered | Kanto Safari Zone Area 1 East | Super Rod | 15–35 | 4% | — |
| Firered | Kanto Safari Zone Area 1 East | Surf | 20–25 | 60% | — |
| Firered | Kanto Safari Zone Area 1 East | Surf | 25–30 | 5% | — |
| Firered | Kanto Safari Zone Area 1 East | Surf | 30–35 | 4% | — |
| Firered | Kanto Safari Zone Area 1 East | Surf | 35–40 | 1% | — |
| Firered | Kanto Safari Zone Area 2 North | Super Rod | 15–35 | 4% | — |
| Firered | Kanto Safari Zone Area 2 North | Surf | 20–25 | 60% | — |
| Firered | Kanto Safari Zone Area 2 North | Surf | 25–30 | 5% | — |
| Firered | Kanto Safari Zone Area 2 North | Surf | 30–35 | 4% | — |
| Firered | Kanto Safari Zone Area 2 North | Surf | 35–40 | 1% | — |
| Firered | Kanto Safari Zone Area 3 West | Super Rod | 15–35 | 4% | — |
| Firered | Kanto Safari Zone Area 3 West | Surf | 20–25 | 60% | — |
| Firered | Kanto Safari Zone Area 3 West | Surf | 25–30 | 5% | — |
| Firered | Kanto Safari Zone Area 3 West | Surf | 30–35 | 4% | — |
| Firered | Kanto Safari Zone Area 3 West | Surf | 35–40 | 1% | — |
| Firered | Kanto Safari Zone ♂iddle | Super Rod | 15–35 | 4% | — |
| Firered | Kanto Safari Zone ♂iddle | Surf | 20–25 | 60% | — |
| Firered | Kanto Safari Zone ♂iddle | Surf | 25–30 | 5% | — |
| Firered | Kanto Safari Zone ♂iddle | Surf | 30–35 | 4% | — |
| Firered | Kanto Safari Zone ♂iddle | Surf | 35–40 | 1% | — |
| Firered | Kanto Sea Route 19 Area | Super Rod | 25–35 | 1% | — |
| Firered | Kanto Sea Route 20 Area | Super Rod | 25–35 | 1% | — |
| Firered | Kanto Sea Route 21 Area | Super Rod | 25–35 | 1% | — |
| Firered | Kindle Road Area | Super Rod | 25–35 | 1% | — |
| Firered | Kindle Road Area | Walk | 34 | 5% | — |
| Firered | Memorial Pillar Area | Super Rod | 25–35 | 1% | — |
| Firered | One Island Area | Super Rod | 25–35 | 1% | — |
| Firered | Outcast Island Area | Super Rod | 25–35 | 1% | — |
| Firered | Pallet Town Area | Super Rod | 25–35 | 1% | — |
| Firered | Resort Gorgeous Area | Super Rod | 25–35 | 1% | — |
| Firered | Ruin Valley Area | Super Rod | 15–25 | 4% | — |
| Firered | Ruin Valley Area | Super Rod | 25–35 | 1% | — |
| Firered | Ruin Valley Area | Walk | 41 | 5% | — |
| Firered | Seafoam Islands 1f | Walk | 26 | 1% | — |
| Firered | Seafoam Islands 1f | Walk | 27 | 20% | — |
| Firered | Seafoam Islands 1f | Walk | 29 | 20% | — |
| Firered | Seafoam Islands 1f | Walk | 31 | 10% | — |
| Firered | Seafoam Islands 1f | Walk | 33 | 4% | — |
| Firered | Seafoam Islands B1f | Walk | 29 | 20% | — |
| Firered | Seafoam Islands B1f | Walk | 31 | 20% | — |
| Firered | Seafoam Islands B2f | Walk | 30 | 20% | — |
| Firered | Seafoam Islands B2f | Walk | 32 | 20% | — |
| Firered | Seafoam Islands B3f | Super Rod | 15–25 | 4% | — |
| Firered | Seafoam Islands B3f | Walk | 30 | 10% | — |
| Firered | Seafoam Islands B3f | Surf | 30–40 | 4% | — |
| Firered | Seafoam Islands B3f | Walk | 32 | 10% | — |
| Firered | Seafoam Islands B4f | Super Rod | 15–25 | 4% | — |
| Firered | Seafoam Islands B4f | Surf | 30–40 | 4% | — |
| Firered | Seafoam Islands B4f | Walk | 32 | 10% | — |
| Firered | Ss Anne Area | Super Rod | 25–35 | 1% | — |
| Firered | Tanoby Ruins Area | Super Rod | 25–35 | 1% | — |
| Firered | Trainer Tower Area | Super Rod | 25–35 | 1% | — |
| Firered | Treasure Beach Area | Super Rod | 25–35 | 1% | — |
| Firered | Treasure Beach Area | Walk | 31 | 5% | — |
| Firered | Vermilion City Area | Super Rod | 25–35 | 1% | — |
| Firered | Viridian City Area | Super Rod | 15–25 | 4% | — |
| Firered | Viridian City Area | Surf | 20–25 | 60% | — |
| Firered | Viridian City Area | Super Rod | 25–35 | 1% | — |
| Firered | Viridian City Area | Surf | 25–30 | 5% | — |
| Firered | Viridian City Area | Surf | 30–35 | 4% | — |
| Firered | Viridian City Area | Surf | 35–40 | 1% | — |
| Firered | Water Labyrinth Area | Super Rod | 25–35 | 1% | — |
| Firered | Water Path Area | Super Rod | 25–35 | 1% | — |
| Firered | Water Path Area | Walk | 41 | 5% | — |
| Gold | Ilex ♀orest Area | Surf | 10–14 | 30% | — |
| Gold | Ilex ♀orest Area | Surf | 15–19 | 60% | — |
| Gold | Johto Route 35 Area | Surf | 15–19 | 30% | — |
| Gold | Johto Route 35 Area | Surf | 20–24 | 60% | — |
| Gold | Kanto Route 6 Area | Surf | 5–9 | 30% | — |
| Gold | Kanto Route 6 Area | Surf | 10–14 | 60% | — |
| Green Japan | Cerulean City Area | Super Rod | 15 | 25% | — |
| Green Japan | Kanto Route 24 Area | Super Rod | 15 | 25% | — |
| Green Japan | Kanto Route 25 Area | Super Rod | 15 | 25% | — |
| Green Japan | Kanto Safari Zone Area 1 East | Super Rod | 15 | 17% | — |
| Green Japan | Kanto Safari Zone Area 2 North | Super Rod | 15 | 17% | — |
| Green Japan | Kanto Safari Zone Area 3 West | Super Rod | 15 | 17% | — |
| Green Japan | Kanto Safari Zone ♂iddle | Super Rod | 15 | 17% | — |
| Green Japan | Seafoam Islands 1f | Walk | 30 | 20% | — |
| Green Japan | Seafoam Islands B1f | Walk | 28 | 10% | — |
| Green Japan | Seafoam Islands B1f | Walk | 30 | 5% | — |
| Green Japan | Seafoam Islands B2f | Walk | 30 | 20% | — |
| Green Japan | Seafoam Islands B2f | Walk | 32 | 10% | — |
| Green Japan | Seafoam Islands B3f | Walk | 31 | 20% | — |
| Green Japan | Seafoam Islands B3f | Walk | 33 | 15% | — |
| Green Japan | Seafoam Islands B4f | Walk | 29 | 10% | — |
| Green Japan | Seafoam Islands B4f | Walk | 31 | 5% | — |
| Heartgold | Cerulean Cave 1f | Surf | 35 | 30% | — |
| Heartgold | Cerulean Cave 1f | Surf | 40 | 60% | — |
| Heartgold | Cerulean Cave 2f | Surf | 35 | 30% | — |
| Heartgold | Cerulean Cave 2f | Surf | 40 | 60% | — |
| Heartgold | Cerulean Cave B1f | Surf | 35 | 30% | — |
| Heartgold | Cerulean Cave B1f | Surf | 40 | 60% | — |
| Heartgold | Ilex ♀orest Area | Surf | 5–15 | 30% | — |
| Heartgold | Ilex ♀orest Area | Surf | 10–20 | 60% | — |
| Heartgold | Johto Route 35 Area | Surf | 10–20 | 30% | — |
| Heartgold | Johto Route 35 Area | Surf | 15–25 | 60% | — |
| Heartgold | Johto Safari Zone Wetland | Walk | 15 | 10% | Time Night, Johto Safari Blocks Inactive |
| Heartgold | Johto Safari Zone Wetland | Walk | 16 | 10% | Time Night, Johto Safari Blocks Inactive |
| Heartgold | Johto Safari Zone Wetland | Surf | 16 | 10% | Johto Safari Blocks Inactive |
| Heartgold | Johto Safari Zone Wetland | Surf | 17 | 10% | Johto Safari Blocks Inactive |
| Heartgold | Kanto Route 6 Area | Surf | 5 | 30% | — |
| Heartgold | Kanto Route 6 Area | Surf | 10 | 60% | — |
| Heartgold | Seafoam Islands 1f | Walk | 26 | 4% | — |
| Heartgold | Seafoam Islands 1f | Walk | 27 | 4% | — |
| Heartgold | Seafoam Islands 1f | Walk | 28 | 10% | Radio Off |
| Heartgold | Seafoam Islands 1f | Walk | 29 | 10% | Radio Off |
| Heartgold | Seafoam Islands B1f | Walk | 26 | 1% | — |
| Heartgold | Seafoam Islands B1f | Walk | 27 | 1% | — |
| Heartgold | Seafoam Islands B1f | Walk | 28 | 10% | Radio Off |
| Heartgold | Seafoam Islands B1f | Walk | 28 | 4% | — |
| Heartgold | Seafoam Islands B2f | Walk | 27 | 1% | — |
| Heartgold | Seafoam Islands B2f | Walk | 28 | 1% | — |
| Heartgold | Seafoam Islands B2f | Walk | 29 | 4% | — |
| Heartgold | Seafoam Islands B2f | Walk | 30 | 10% | Radio Off |
| Heartgold | Seafoam Islands B3f | Walk | 31 | 1% | — |
| Heartgold | Seafoam Islands B3f | Walk | 32 | 10% | Radio Off |
| Heartgold | Seafoam Islands B3f | Walk | 32 | 1% | — |
| Heartgold | Seafoam Islands B4f | Good Rod | 20 | 30% | — |
| Heartgold | Seafoam Islands B4f | Walk | 34 | 10% | Radio Off |
| Lets Go Eevee | Cerulean Cave 1f | Overworld | 51–56 | 100% | — |
| Lets Go Eevee | Cerulean Cave B1f | Overworld | 51–56 | 100% | — |
| Lets Go Eevee | Kanto Route 17 Area | Overworld | 33–38 | 100% | — |
| Lets Go Eevee | Kanto Route 24 Area | Overworld | 7–12 | 100% | — |
| Lets Go Eevee | Kanto Route 25 Area | Overworld | 9–14 | 100% | — |
| Lets Go Eevee | Kanto Route 4 Area | Overworld | 7–12 | 100% | — |
| Lets Go Eevee | Kanto Route 6 Area | Overworld | 11–16 | 100% | — |
| Lets Go Pikachu | Cerulean Cave 1f | Overworld | 51–56 | 100% | — |
| Lets Go Pikachu | Cerulean Cave B1f | Overworld | 51–56 | 100% | — |
| Lets Go Pikachu | Kanto Route 17 Area | Overworld | 33–38 | 100% | — |
| Lets Go Pikachu | Kanto Route 24 Area | Overworld | 7–12 | 100% | — |
| Lets Go Pikachu | Kanto Route 25 Area | Overworld | 9–14 | 100% | — |
| Lets Go Pikachu | Kanto Route 4 Area | Overworld | 7–12 | 100% | — |
| Lets Go Pikachu | Kanto Route 6 Area | Overworld | 11–16 | 100% | — |
| Moon | Brooklet Hill North | Walk | 14–17 | 30% | — |
| Moon | Brooklet Hill North | Surf | 14–17 | 20% | — |
| Moon | Brooklet Hill South | Walk | 14–17 | 30% | — |
| Moon | Brooklet Hill South | Surf | 14–17 | 20% | — |
| Moon | Malie Garden Area | Walk | 24–27 | 10% | — |
| Moon | Seaward Cave Area | Surf | 15–18 | 20% | — |
| Omega Ruby | Hoenn Safari Zone Neacro Bike Area | Horde | 15 | 5% | — |
| Omega Ruby | Hoenn Safari Zone Nwmach Bike Area | Horde | 15 | 5% | — |
| Omega Ruby | Hoenn Safari Zone Se | Horde | 15 | 5% | — |
| Omega Ruby | Hoenn Safari Zone Sw | Horde | 15 | 5% | — |
| Pearl | Celestic Town Area | Surf | 20–30 | 60% | — |
| Pearl | Celestic Town Area | Surf | 20–40 | 30% | — |
| Pearl | Eterna City Area | Surf | 20–30 | 60% | — |
| Pearl | Eterna City Area | Surf | 20–40 | 30% | — |
| Pearl | Great ♂arsh Area 1 | Surf | 20–40 | 4% | — |
| Pearl | Great ♂arsh Area 1 | Walk | 24 | 4% | Slot2 None |
| Pearl | Great ♂arsh Area 1 | Walk | 24 | 4% | Slot2 Ruby |
| Pearl | Great ♂arsh Area 1 | Walk | 24 | 4% | Slot2 Sapphire |
| Pearl | Great ♂arsh Area 1 | Walk | 24 | 4% | Slot2 Emerald |
| Pearl | Great ♂arsh Area 1 | Walk | 24 | 4% | Slot2 Leafgreen |
| Pearl | Great ♂arsh Area 1 | Walk | 26 | 4% | Slot2 None |
| Pearl | Great ♂arsh Area 1 | Walk | 26 | 4% | Slot2 Ruby |
| Pearl | Great ♂arsh Area 1 | Walk | 26 | 4% | Slot2 Sapphire |
| Pearl | Great ♂arsh Area 1 | Walk | 26 | 4% | Slot2 Emerald |
| Pearl | Great ♂arsh Area 1 | Walk | 26 | 4% | Slot2 Leafgreen |
| Pearl | Great ♂arsh Area 2 | Surf | 20–40 | 4% | — |
| Pearl | Great ♂arsh Area 2 | Walk | 24 | 4% | Slot2 None |
| Pearl | Great ♂arsh Area 2 | Walk | 24 | 4% | Slot2 Ruby |
| Pearl | Great ♂arsh Area 2 | Walk | 24 | 4% | Slot2 Sapphire |
| Pearl | Great ♂arsh Area 2 | Walk | 24 | 4% | Slot2 Emerald |
| Pearl | Great ♂arsh Area 2 | Walk | 24 | 4% | Slot2 Leafgreen |
| Pearl | Great ♂arsh Area 2 | Walk | 26 | 4% | Slot2 None |
| Pearl | Great ♂arsh Area 2 | Walk | 26 | 4% | Slot2 Ruby |
| Pearl | Great ♂arsh Area 2 | Walk | 26 | 4% | Slot2 Sapphire |
| Pearl | Great ♂arsh Area 2 | Walk | 26 | 4% | Slot2 Emerald |
| Pearl | Great ♂arsh Area 2 | Walk | 26 | 4% | Slot2 Leafgreen |
| Pearl | Great ♂arsh Area 3 | Surf | 20–40 | 4% | — |
| Pearl | Great ♂arsh Area 3 | Walk | 22 | 4% | Slot2 None |
| Pearl | Great ♂arsh Area 3 | Walk | 22 | 4% | Slot2 Ruby |
| Pearl | Great ♂arsh Area 3 | Walk | 22 | 4% | Slot2 Sapphire |
| Pearl | Great ♂arsh Area 3 | Walk | 22 | 4% | Slot2 Emerald |
| Pearl | Great ♂arsh Area 3 | Walk | 22 | 4% | Slot2 Leafgreen |
| Pearl | Great ♂arsh Area 3 | Walk | 24 | 4% | Slot2 None |
| Pearl | Great ♂arsh Area 3 | Walk | 24 | 4% | Slot2 Ruby |
| Pearl | Great ♂arsh Area 3 | Walk | 24 | 4% | Slot2 Sapphire |
| Pearl | Great ♂arsh Area 3 | Walk | 24 | 4% | Slot2 Emerald |
| Pearl | Great ♂arsh Area 3 | Walk | 24 | 4% | Slot2 Leafgreen |
| Pearl | Great ♂arsh Area 4 | Surf | 20–40 | 4% | — |
| Pearl | Great ♂arsh Area 4 | Walk | 22 | 4% | Slot2 None |
| Pearl | Great ♂arsh Area 4 | Walk | 22 | 4% | Slot2 Ruby |
| Pearl | Great ♂arsh Area 4 | Walk | 22 | 4% | Slot2 Sapphire |
| Pearl | Great ♂arsh Area 4 | Walk | 22 | 4% | Slot2 Emerald |
| Pearl | Great ♂arsh Area 4 | Walk | 22 | 4% | Slot2 Leafgreen |
| Pearl | Great ♂arsh Area 4 | Walk | 24 | 4% | Slot2 None |
| Pearl | Great ♂arsh Area 4 | Walk | 24 | 4% | Slot2 Ruby |
| Pearl | Great ♂arsh Area 4 | Walk | 24 | 4% | Slot2 Sapphire |
| Pearl | Great ♂arsh Area 4 | Walk | 24 | 4% | Slot2 Emerald |
| Pearl | Great ♂arsh Area 4 | Walk | 24 | 4% | Slot2 Leafgreen |
| Pearl | Great ♂arsh Area 6 | Walk | 20 | 4% | Slot2 None |
| Pearl | Great ♂arsh Area 6 | Walk | 20 | 4% | Slot2 Ruby |
| Pearl | Great ♂arsh Area 6 | Walk | 20 | 4% | Slot2 Sapphire |
| Pearl | Great ♂arsh Area 6 | Walk | 20 | 4% | Slot2 Emerald |
| Pearl | Great ♂arsh Area 6 | Walk | 20 | 4% | Slot2 Leafgreen |
| Pearl | Great ♂arsh Area 6 | Surf | 20–40 | 4% | — |
| Pearl | Great ♂arsh Area 6 | Walk | 22 | 4% | Slot2 None |
| Pearl | Great ♂arsh Area 6 | Walk | 22 | 4% | Slot2 Ruby |
| Pearl | Great ♂arsh Area 6 | Walk | 22 | 4% | Slot2 Sapphire |
| Pearl | Great ♂arsh Area 6 | Walk | 22 | 4% | Slot2 Emerald |
| Pearl | Great ♂arsh Area 6 | Walk | 22 | 4% | Slot2 Leafgreen |
| Pearl | Lake Acuity Area | Surf | 20–30 | 60% | — |
| Pearl | Lake Acuity Area | Surf | 20–40 | 30% | — |
| Pearl | Lake Acuity Area | Walk | 34 | 10% | Radar Off |
| Pearl | Lake Acuity Area | Walk | 35 | 10% | Radar Off |
| Pearl | Lake Acuity Area | Walk | 36 | 10% | Time ♂orning |
| Pearl | Lake Acuity Area | Walk | 36 | 10% | Time Day |
| Pearl | Lake Valor Area | Surf | 20–30 | 60% | — |
| Pearl | Lake Valor Area | Surf | 20–40 | 30% | — |
| Pearl | Lake Valor Area | Walk | 35 | 10% | Radar Off |
| Pearl | Lake Valor Area | Walk | 36 | 10% | Radar Off |
| Pearl | Lake Verity After Galactic Intervention | Surf | 20–30 | 60% | — |
| Pearl | Lake Verity After Galactic Intervention | Surf | 20–40 | 30% | — |
| Pearl | Lake Verity Before Galactic Intervention | Surf | 20–30 | 60% | — |
| Pearl | Lake Verity Before Galactic Intervention | Surf | 20–40 | 30% | — |
| Pearl | Oreburgh Gate B1f | Walk | 8 | 10% | — |
| Pearl | Oreburgh Gate B1f | Walk | 9 | 10% | — |
| Pearl | Oreburgh Gate B1f | Walk | 10 | 5% | — |
| Pearl | Oreburgh Gate B1f | Surf | 20–30 | 30% | — |
| Pearl | Ravaged Path Area | Walk | 5 | 1% | — |
| Pearl | Ravaged Path Area | Surf | 20–30 | 30% | — |
| Pearl | Sinnoh Route 203 Area | Surf | 20–30 | 60% | — |
| Pearl | Sinnoh Route 203 Area | Surf | 20–40 | 30% | — |
| Pearl | Sinnoh Route 204 North Towards ♀loaroma Town | Surf | 20–30 | 60% | — |
| Pearl | Sinnoh Route 204 North Towards ♀loaroma Town | Surf | 20–40 | 30% | — |
| Pearl | Sinnoh Route 204 South Towards Jubilife City | Surf | 20–30 | 60% | — |
| Pearl | Sinnoh Route 204 South Towards Jubilife City | Surf | 20–40 | 30% | — |
| Pearl | Sinnoh Route 205 East Towards Eterna City | Surf | 20–30 | 60% | — |
| Pearl | Sinnoh Route 205 East Towards Eterna City | Surf | 20–40 | 30% | — |
| Pearl | Sinnoh Route 208 Area | Walk | 16 | 20% | Swarm No |
| Pearl | Sinnoh Route 208 Area | Walk | 17 | 5% | — |
| Pearl | Sinnoh Route 208 Area | Walk | 18 | 4% | Slot2 None |
| Pearl | Sinnoh Route 208 Area | Walk | 18 | 4% | Slot2 Emerald |
| Pearl | Sinnoh Route 208 Area | Walk | 18 | 4% | Slot2 ♀irered |
| Pearl | Sinnoh Route 208 Area | Walk | 18 | 4% | Slot2 Leafgreen |
| Pearl | Sinnoh Route 208 Area | Walk | 18 | 1% | Radar Off |
| Pearl | Sinnoh Route 208 Area | Surf | 20–30 | 60% | — |
| Pearl | Sinnoh Route 208 Area | Surf | 20–40 | 30% | — |
| Pearl | Sinnoh Route 209 Area | Surf | 20–30 | 60% | — |
| Pearl | Sinnoh Route 209 Area | Surf | 20–40 | 30% | — |
| Pearl | Sinnoh Route 210 West Towards Celestic Town | Surf | 20–30 | 60% | — |
| Pearl | Sinnoh Route 210 West Towards Celestic Town | Surf | 20–40 | 30% | — |
| Pearl | Sinnoh Route 210 West Towards Celestic Town | Walk | 25 | 20% | — |
| Pearl | Sinnoh Route 212 North Towards Hearthome City | Surf | 20–30 | 60% | — |
| Pearl | Sinnoh Route 212 North Towards Hearthome City | Surf | 20–40 | 30% | — |
| Pearl | Sinnoh Route 214 Area | Surf | 20–30 | 60% | — |
| Pearl | Sinnoh Route 214 Area | Surf | 20–40 | 30% | — |
| Pearl | Twinleaf Town Area | Surf | 20–30 | 60% | — |
| Pearl | Twinleaf Town Area | Surf | 20–40 | 30% | — |
| Platinum | Celestic Town Area | Surf | 20–30 | 60% | — |
| Platinum | Eterna City Area | Surf | 20–30 | 60% | — |
| Platinum | Lake Acuity Area | Surf | 20–30 | 60% | — |
| Platinum | Lake Acuity Area | Walk | 38 | 5% | — |
| Platinum | Lake Valor Area | Surf | 20–30 | 60% | — |
| Platinum | Lake Valor Area | Walk | 38 | 10% | Radar Off |
| Platinum | Lake Valor Area | Walk | 39 | 5% | — |
| Platinum | Lake Verity After Galactic Intervention | Surf | 20–30 | 60% | — |
| Platinum | Lake Verity Before Galactic Intervention | Surf | 20–30 | 60% | — |
| Platinum | Oreburgh Gate 1f | Walk | 5 | 20% | — |
| Platinum | Oreburgh Gate 1f | Walk | 6 | 10% | — |
| Platinum | Oreburgh Gate 1f | Walk | 7 | 5% | — |
| Platinum | Oreburgh Gate B1f | Walk | 8 | 20% | — |
| Platinum | Oreburgh Gate B1f | Walk | 9 | 10% | — |
| Platinum | Oreburgh Gate B1f | Walk | 10 | 5% | — |
| Platinum | Oreburgh Gate B1f | Surf | 20–30 | 60% | — |
| Platinum | Ravaged Path Area | Walk | 4 | 20% | — |
| Platinum | Ravaged Path Area | Walk | 5 | 10% | — |
| Platinum | Ravaged Path Area | Walk | 6 | 5% | — |
| Platinum | Ravaged Path Area | Surf | 20–30 | 60% | — |
| Platinum | Resort Area Area | Surf | 35–45 | 5% | — |
| Platinum | Sinnoh Route 203 Area | Surf | 20–30 | 60% | — |
| Platinum | Sinnoh Route 204 North Towards ♀loaroma Town | Surf | 20–30 | 60% | — |
| Platinum | Sinnoh Route 204 South Towards Jubilife City | Surf | 20–30 | 60% | — |
| Platinum | Sinnoh Route 205 East Towards Eterna City | Surf | 20–30 | 60% | — |
| Platinum | Sinnoh Route 208 Area | Surf | 20 | 60% | — |
| Platinum | Sinnoh Route 209 Area | Surf | 20–30 | 60% | — |
| Platinum | Sinnoh Route 210 West Towards Celestic Town | Surf | 20–30 | 60% | — |
| Platinum | Sinnoh Route 212 North Towards Hearthome City | Surf | 20–30 | 60% | — |
| Platinum | Sinnoh Route 214 Area | Surf | 20–30 | 60% | — |
| Platinum | Sinnoh Route 225 Area | Surf | 35–45 | 5% | — |
| Platinum | Twinleaf Town Area | Surf | 20–30 | 60% | — |
No encounter records match these filters.
Psyduck Pokédex moves
The Psyduck Pokédex lists 168 moves below. Use the filters to narrow the list by move name, learning method, type or category. Move availability can differ between games and generations, so check the relevant game details when planning a specific moveset.
Psyduck move explorer
168 moves shown
| Level | Move | Type | Category | Power | Accuracy | PP | Method |
|---|---|---|---|---|---|---|---|
| 1 | Bubble | WATER | Special | 40 | 100 | 30 | Level Up |
| 1 | Scratch | NORMAL | Physical | 40 | 100 | 35 | Level Up |
| 1 | Tail Whip | NORMAL | Status | — | 100 | 30 | Level Up |
| 1 | Water Sport | WATER | Status | — | — | 15 | Level Up |
| 3 | Water Gun | WATER | Special | 40 | 100 | 25 | Level Up |
| 6 | Confusion | PSYCHIC | Special | 50 | 100 | 25 | Level Up |
| 9 | Fury Swipes | NORMAL | Physical | 18 | 80 | 15 | Level Up |
| 10 | Disable | NORMAL | Status | — | 100 | 20 | Level Up |
| 11 | Water Pulse | WATER | Special | 60 | 100 | 20 | Level Up |
| 18 | Hypnosis | PSYCHIC | Status | — | 60 | 20 | Level Up |
| 18 | Zen Headbutt | PSYCHIC | Physical | 80 | 90 | 15 | Level Up |
| 21 | Screech | NORMAL | Status | — | 85 | 40 | Level Up |
| 24 | Aqua Tail | WATER | Physical | 90 | 90 | 10 | Level Up |
| 27 | Psybeam | PSYCHIC | Special | 65 | 100 | 20 | Level Up |
| 27 | Soak | WATER | Status | — | 100 | 20 | Level Up |
| 30 | Psych Up | NORMAL | Status | — | — | 10 | Level Up |
| 34 | Amnesia | PSYCHIC | Status | — | — | 20 | Level Up |
| 36 | Hydro Pump | WATER | Special | 110 | 80 | 5 | Level Up |
| 36 | Surf | WATER | Special | 90 | 100 | 15 | Level Up |
| 39 | Wonder Room | PSYCHIC | Status | — | — | 10 | Level Up |
| — | Aerial Ace | Physical | 60 | — | 20 | Machine | |
| — | Amnesia | PSYCHIC | Status | — | — | 20 | Machine |
| — | Attract | NORMAL | Status | — | 100 | 15 | Machine |
| — | Bide | NORMAL | Physical | — | — | 10 | Machine |
| — | Blizzard | ICE | Special | 110 | 70 | 5 | Machine |
| — | Body Slam | NORMAL | Physical | 85 | 100 | 15 | Machine |
| — | Brick Break | FIGHTING | Physical | 75 | 100 | 15 | Machine |
| — | Brine | WATER | Special | 65 | 100 | 10 | Machine |
| — | Bubble Beam | WATER | Special | 65 | 100 | 20 | Machine |
| — | Calm ♂ind | PSYCHIC | Status | — | — | 20 | Machine |
| — | Captivate | NORMAL | Status | — | 100 | 20 | Machine |
| — | Chilling Water | WATER | Special | 50 | 100 | 20 | Machine |
| — | Confide | NORMAL | Status | — | — | 20 | Machine |
| — | Confuse Ray | GHOST | Status | — | 100 | 10 | Machine |
| — | Counter | FIGHTING | Physical | — | 100 | 20 | Machine |
| — | Curse | GHOST | Status | — | — | 10 | Machine |
| — | Dig | GROUND | Physical | 80 | 100 | 10 | Machine |
| — | Dive | WATER | Physical | 80 | 100 | 10 | Machine |
| — | Double Edge | NORMAL | Physical | 120 | 100 | 15 | Machine |
| — | Double Team | NORMAL | Status | — | — | 15 | Machine |
| — | Dynamic Punch | FIGHTING | Physical | 100 | 50 | 5 | Machine |
| — | Encore | NORMAL | Status | — | 100 | 5 | Machine |
| — | Endeavor | NORMAL | Physical | — | 100 | 5 | Machine |
| — | Endure | NORMAL | Status | — | — | 10 | Machine |
| — | Facade | NORMAL | Physical | 70 | 100 | 20 | Machine |
| — | Flash | NORMAL | Status | — | 100 | 20 | Machine |
| — | Fling | DARK | Physical | — | 100 | 10 | Machine |
| — | Flip Turn | WATER | Physical | 60 | 100 | 20 | Machine |
| — | Focus Punch | FIGHTING | Physical | 150 | 100 | 20 | Machine |
| — | Frustration | NORMAL | Physical | — | 100 | 20 | Machine |
| — | Future Sight | PSYCHIC | Special | 120 | 100 | 10 | Machine |
| — | Hail | ICE | Status | — | — | 10 | Machine |
| — | Haze | ICE | Status | — | — | 30 | Machine |
| — | Headbutt | NORMAL | Physical | 70 | 100 | 15 | Machine |
| — | Helping Hand | NORMAL | Status | — | — | 20 | Machine |
| — | Hidden Power | NORMAL | Special | 60 | 100 | 15 | Machine |
| — | Hone Claws | DARK | Status | — | — | 15 | Machine |
| — | Hydro Pump | WATER | Special | 110 | 80 | 5 | Machine |
| — | Ice Beam | ICE | Special | 90 | 100 | 10 | Machine |
| — | Ice Punch | ICE | Physical | 75 | 100 | 15 | Machine |
| — | Icy Wind | ICE | Special | 55 | 95 | 15 | Machine |
| — | Iron Tail | STEEL | Physical | 100 | 75 | 15 | Machine |
| — | Knock Off | DARK | Physical | 65 | 100 | 20 | Machine |
| — | Light Screen | PSYCHIC | Status | — | — | 30 | Machine |
| — | Liquidation | WATER | Physical | 85 | 100 | 10 | Machine |
| — | Low Kick | FIGHTING | Physical | — | 100 | 20 | Machine |
| — | Low Sweep | FIGHTING | Physical | 65 | 100 | 20 | Machine |
| — | Mega Kick | NORMAL | Physical | 120 | 75 | 5 | Machine |
| — | Mega Punch | NORMAL | Physical | 80 | 85 | 20 | Machine |
| — | Metronome | NORMAL | Status | — | — | 10 | Machine |
| — | Mimic | NORMAL | Status | — | — | 10 | Machine |
| — | Mud Shot | GROUND | Special | 55 | 95 | 15 | Machine |
| — | Mud Slap | GROUND | Special | 20 | 100 | 10 | Machine |
| — | Muddy Water | WATER | Special | 90 | 85 | 10 | Machine |
| — | Nasty Plot | DARK | Status | — | — | 20 | Machine |
| — | Natural Gift | NORMAL | Physical | — | 100 | 15 | Machine |
| — | Pay Day | NORMAL | Physical | 40 | 100 | 20 | Machine |
| — | Power Up Punch | FIGHTING | Physical | 40 | 100 | 20 | Machine |
| — | Protect | NORMAL | Status | — | — | 10 | Machine |
| — | Psybeam | PSYCHIC | Special | 65 | 100 | 20 | Machine |
| — | Psych Up | NORMAL | Status | — | — | 10 | Machine |
| — | Psychic | PSYCHIC | Special | 90 | 100 | 10 | Machine |
| — | Psychic Noise | PSYCHIC | Special | 75 | 100 | 10 | Machine |
| — | Psyshock | PSYCHIC | Special | 80 | 100 | 10 | Machine |
| — | Rage | NORMAL | Physical | 20 | 100 | 20 | Machine |
| — | Rain Dance | WATER | Status | — | — | 5 | Machine |
| — | Rest | PSYCHIC | Status | — | — | 5 | Machine |
| — | Return | NORMAL | Physical | — | 100 | 20 | Machine |
| — | Rock Smash | FIGHTING | Physical | 40 | 100 | 15 | Machine |
| — | Round | NORMAL | Special | 60 | 100 | 15 | Machine |
| — | Scald | WATER | Special | 80 | 100 | 15 | Machine |
| — | Screech | NORMAL | Status | — | 85 | 40 | Machine |
| — | Secret Power | NORMAL | Physical | 70 | 100 | 20 | Machine |
| — | Seismic Toss | FIGHTING | Physical | — | 100 | 20 | Machine |
| — | Shadow Claw | GHOST | Physical | 70 | 100 | 15 | Machine |
| — | Skill Swap | PSYCHIC | Status | — | — | 10 | Machine |
| — | Skull Bash | NORMAL | Physical | 130 | 100 | 10 | Machine |
| — | Sleep Talk | NORMAL | Status | — | — | 10 | Machine |
| — | Snore | NORMAL | Special | 50 | 100 | 15 | Machine |
| — | Strength | NORMAL | Physical | 80 | 100 | 15 | Machine |
| — | Submission | FIGHTING | Physical | 80 | 80 | 20 | Machine |
| — | Substitute | NORMAL | Status | — | — | 10 | Machine |
| — | Surf | WATER | Special | 90 | 100 | 15 | Machine |
| — | Swagger | NORMAL | Status | — | 85 | 15 | Machine |
| — | Swift | NORMAL | Special | 60 | — | 20 | Machine |
| — | Take Down | NORMAL | Physical | 90 | 85 | 20 | Machine |
| — | Taunt | DARK | Status | — | 100 | 20 | Machine |
| — | Telekinesis | PSYCHIC | Status | — | — | 15 | Machine |
| — | Tera Blast | NORMAL | Special | 80 | 100 | 10 | Machine |
| — | Thief | DARK | Physical | 60 | 100 | 25 | Machine |
| — | Toxic | POISON | Status | — | 90 | 10 | Machine |
| — | Trailblaze | GRASS | Physical | 50 | 100 | 20 | Machine |
| — | Vacuum Wave | FIGHTING | Special | 40 | 100 | 30 | Machine |
| — | Water Gun | WATER | Special | 40 | 100 | 25 | Machine |
| — | Water Pulse | WATER | Special | 60 | 100 | 20 | Machine |
| — | Waterfall | WATER | Physical | 80 | 100 | 15 | Machine |
| — | Whirlpool | WATER | Special | 35 | 85 | 15 | Machine |
| — | Wonder Room | PSYCHIC | Status | — | — | 10 | Machine |
| — | Zen Headbutt | PSYCHIC | Physical | 80 | 90 | 15 | Machine |
| — | Clear Smog | POISON | Special | 50 | — | 15 | Egg |
| — | Confuse Ray | GHOST | Status | — | 100 | 10 | Egg |
| — | Cross Chop | FIGHTING | Physical | 100 | 80 | 5 | Egg |
| — | Encore | NORMAL | Status | — | 100 | 5 | Egg |
| — | Foresight | NORMAL | Status | — | — | 40 | Egg |
| — | Future Sight | PSYCHIC | Special | 120 | 100 | 10 | Egg |
| — | Hypnosis | PSYCHIC | Status | — | 60 | 20 | Egg |
| — | Ice Beam | ICE | Special | 90 | 100 | 10 | Egg |
| — | Light Screen | PSYCHIC | Status | — | — | 30 | Egg |
| — | Mud Bomb | GROUND | Special | 65 | 85 | 10 | Egg |
| — | Psybeam | PSYCHIC | Special | 65 | 100 | 20 | Egg |
| — | Psychic | PSYCHIC | Special | 90 | 100 | 10 | Egg |
| — | Refresh | NORMAL | Status | — | — | 20 | Egg |
| — | Secret Power | NORMAL | Physical | 70 | 100 | 20 | Egg |
| — | Simple Beam | NORMAL | Status | — | 100 | 15 | Egg |
| — | Sleep Talk | NORMAL | Status | — | — | 10 | Egg |
| — | Synchronoise | PSYCHIC | Special | 120 | 100 | 10 | Egg |
| — | Yawn | NORMAL | Status | — | — | 10 | Egg |
| — | Aqua Tail | WATER | Physical | 90 | 90 | 10 | Tutor |
| — | Body Slam | NORMAL | Physical | 85 | 100 | 15 | Tutor |
| — | Counter | FIGHTING | Physical | — | 100 | 20 | Tutor |
| — | Dive | WATER | Physical | 80 | 100 | 10 | Tutor |
| — | Double Edge | NORMAL | Physical | 120 | 100 | 15 | Tutor |
| — | Dynamic Punch | FIGHTING | Physical | 100 | 50 | 5 | Tutor |
| — | Endure | NORMAL | Status | — | — | 10 | Tutor |
| — | Focus Punch | FIGHTING | Physical | 150 | 100 | 20 | Tutor |
| — | Headbutt | NORMAL | Physical | 70 | 100 | 15 | Tutor |
| — | Ice Beam | ICE | Special | 90 | 100 | 10 | Tutor |
| — | Ice Punch | ICE | Physical | 75 | 100 | 15 | Tutor |
| — | Icy Wind | ICE | Special | 55 | 95 | 15 | Tutor |
| — | Iron Tail | STEEL | Physical | 100 | 75 | 15 | Tutor |
| — | Mega Kick | NORMAL | Physical | 120 | 75 | 5 | Tutor |
| — | Mega Punch | NORMAL | Physical | 80 | 85 | 20 | Tutor |
| — | Mimic | NORMAL | Status | — | — | 10 | Tutor |
| — | Mud Slap | GROUND | Special | 20 | 100 | 10 | Tutor |
| — | Psych Up | NORMAL | Status | — | — | 10 | Tutor |
| — | Role Play | PSYCHIC | Status | — | — | 10 | Tutor |
| — | Seismic Toss | FIGHTING | Physical | — | 100 | 20 | Tutor |
| — | Signal Beam | BUG | Special | 75 | 100 | 15 | Tutor |
| — | Sleep Talk | NORMAL | Status | — | — | 10 | Tutor |
| — | Snore | NORMAL | Special | 50 | 100 | 15 | Tutor |
| — | Substitute | NORMAL | Status | — | — | 10 | Tutor |
| — | Swagger | NORMAL | Status | — | 85 | 15 | Tutor |
| — | Swift | NORMAL | Special | 60 | — | 20 | Tutor |
| — | Telekinesis | PSYCHIC | Status | — | — | 15 | Tutor |
| — | Water Pulse | WATER | Special | 60 | 100 | 20 | Tutor |
| — | Wonder Room | PSYCHIC | Status | — | — | 10 | Tutor |
| — | Worry Seed | GRASS | Status | — | 100 | 10 | Tutor |
| — | Zen Headbutt | PSYCHIC | Physical | 80 | 90 | 15 | Tutor |
No moves match these filters.
Psyduck Pokédex entries
The Psyduck Pokédex entries below let you compare how Psyduck has been described across different Pokémon games. Pokédex wording often changes between versions, so reading the entries together is a useful way to see how its description has evolved across the series.
Psyduck Pokédex entries
While lulling its enemies with its vacant look, this wily POKéMON will use psychokinetic powers.
While lulling its enemies with its vacant look, this wily POKéMON will use psychokinetic powers.
Always tormented by headaches. It uses psychic powers, but it is not known if it intends to do so.
It has mystical powers but doesn't recall that it has used them. That is why it always looks puzzled.
If its chronic headache peaks, it may exhibit odd powers. It seems unable to recall such an episode.
The only time it can use its psy chic power is when its sleeping brain cells happen to wake.
PSYDUCK uses a mysterious power. When it does so, this POKéMON generates brain waves that are supposedly only seen in sleepers. This discovery spurred controversy among scholars.
If it uses its mysterious power, PSYDUCK can’t remember having done so. It apparently can’t form a memory of such an event because it goes into an altered state that is much like deep sleep.
When its headache intensifies, it starts using strange powers. However, it has no recollection of its powers, so it always looks befuddled and bewildered.
It is constantly wracked by a headache. When the headache turns intense, it begins using mysterious powers.
While lulling its enemies with its vacant look, this wily POKéMON will use psychokinetic powers.
If its usual headache worsens, it starts exhibiting odd powers. It can’t remember doing so, however.
It never remembers using its odd powers, so it always tilts its head in puzzlement.
Overwhelmed by enigmatic abilities, it suffers a constant headache. It sometimes uses mysterious powers.
It has mystical powers but doesn’t recall that it has used them. That is why it always looks puzzled.
If its chronic headache peaks, it may exhibit odd powers. It seems unable to recall such an episode.
Overwhelmed by enigmatic abilities, it suffers a constant headache. It sometimes uses mysterious powers.
Overwhelmed by enigmatic abilities, it suffers a constant headache. It sometimes uses mysterious powers.
When headaches stimulate its brain cells, which are usually inactive, it can use a mysterious power.
When headaches stimulate its brain cells, which are usually inactive, it can use a mysterious power.
It is constantly wracked by a headache. When the headache turns intense, it begins using mysterious powers.
It has mystical powers but doesn’t recall that it has used them. That is why it always looks puzzled.
Psyduck uses a mysterious power. When it does so, this Pokémon generates brain waves that are supposedly only seen in sleepers. This discovery spurred controversy among scholars.
If it uses its mysterious power, Psyduck can’t remember having done so. It apparently can’t form a memory of such an event because it goes into an altered state that is much like deep sleep.
As a result of headaches so fierce they cause it to cry, it sometimes uses psychokinesis without meaning to.
This Pokémon is troubled by constant headaches. The more pain it’s in, the more powerful its psychokinesis becomes.
Using psychokinesis gives it a headache, so it normally passes the time spacing out and doing as little as possible.
It has been found that its brain cells are 10 times more active when Psyduck is experiencing a headache.
Always tormented by headaches. It uses psychic powers, but whether it intends to do so is not known.
Always tormented by headaches. It uses psychic powers, but whether it intends to do so is not known.
Psyduck is constantly beset by headaches. If the Pokémon lets its strange power erupt, apparently the pain subsides for a while.
As Psyduck gets stressed out, its headache gets progressively worse. It uses intense psychic energy to overwhelm those around it.
Suffers perpetual headaches. If the agony grows too great, Psyduck's latent power erupts, contrary to Psyduck's intent. Ergo, I am exploring ways to ease the pain.
Browse the Pokémon Pokédex to explore more species, or visit Pokémon.com for official Pokémon news and franchise information.
More Pokémon like Psyduck


More Psyduck guides on The Click